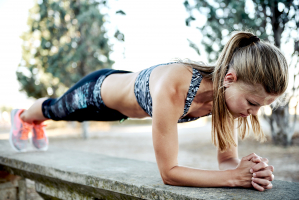
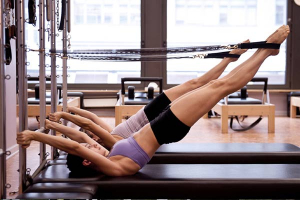
Top 7 Pilates Exercises to Relieve Lower Back Pain

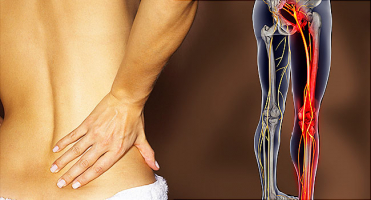
Back pain may be incredibly debilitating, and if you experience it on a regular basis, any alleviation is appreciated. While back pain is complicated, exercise ... read more...is without a doubt one of the most effective preventatives and remedies. Pilates was created as a low-impact, low-intensity rehabilitation program for troops during World War II. It strengthens your core and helps to restore your posture by targeting muscles that support your back. It's no surprise that an increasing number of individuals are turning to pilates to help them manage their symptoms. Here are some pilates exercises to relieve lower back pain.
-
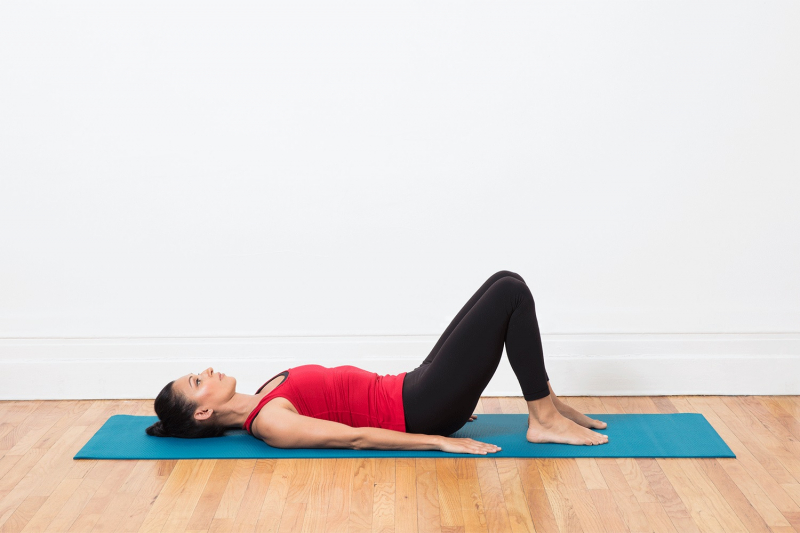
Pelvic tilt exercises engage the intrinsic core stabilizers, which means the core is engaged and the low back isn't overworked. The Basic Pelvic Tilt is an isometric hold that engages the core stabilizers intrinsically. Pelvic tilt exercises in the sagittal plane are commonly used to help people with chronic lower back pain (LBP) align their lumbar spine. One of the primary causes of LBP has been identified as a posture that supports lumbar lordosis. It's critical to limit the usage of the posture that causes lumbar lordosis while treating LBP. The lumbar lordosis is strengthened by anterior pelvic tilting, whereas the lumbar lordosis is weakened by posterior pelvic tilting. Exercises that include posterior pelvic tilting are frequently used in rehabilitation.
Local muscles may be linked to anterior and posterior pelvic tilting, according to research, and these local muscles govern motion in the pelvic sagittal plane. Patients with LBP may benefit from strengthening their local muscles to improve their lumbar alignment in the sagittal plane. In patients with excessive lumbar lordosis, training the transversus abdominis may be beneficial, whereas training the multifidus may be beneficial in those with less lumbar lordosis. Chronic low back pain patients have decreased proprioception in the pelvic area, are less movement-aware, and may have poor postural control. This raises the question of whether excesses of particular motions in postures or activities may predispose persons to LBP.
How to do:
- Lay on your back, knees bent, and feet flat on the floor in Neutral Spine (relaxed back muscles and natural curves, also known as "ladybug tunnel").
- Lift your pelvis and imagine "tilting" your pelvis back to flatten your back or "imprint" your spine as you exhale. Kegeling at this moment activates your transverse abs, the deepest section of your abdominals. These muscles are also referred to as pelvic floor muscles.
- Inhale deeply, then gently exhale, articulating your spine, rolling back down one vertebra at a time, flattening your back, and tilting your pelvis forward once again to return to your neutral spine.
Source: verywellfit -
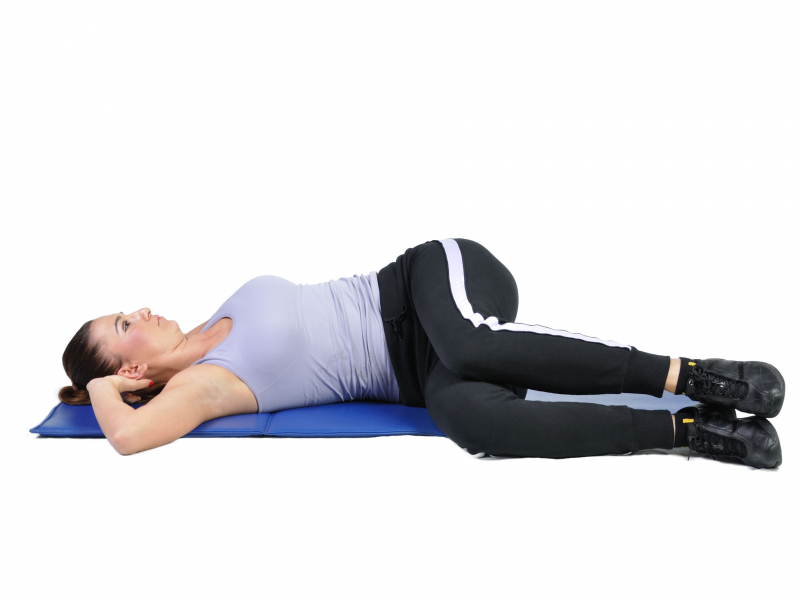
Supine Spinal Twist is a mat pilates exercise that is often practiced. Many YouTube fitness videos and at-home workout DVDs include it as a popular movement. However, while many consumers and some untrained teachers regard this exercise only as a stretch, physical therapists and professional Pilates instructors are aware of the actual purpose of this exercise. The Supine Spinal Twist is meant to develop the oblique muscles in a prolonged position, rather than just stretching them. Although this exercise may be done as a stretch, its primary goal is to stabilize your core and develop your obliques.
Many people try to twist and stretch their lower backs by separating their knees and simply extending from one area to the other. However, because the major purpose of this exercise is to improve stability and strength, the knees should be held together and leveled throughout the action to ensure good alignment. People who are unable to maintain their knees leveled while they rotate frequently have problems with their lumbar spine (lower back). The thoracic spine (upper back) should rotate so that the obliques may be stretched and strengthened. While working out at home with YouTube videos and DVDs might be a cost-effective and handy method to meet your fitness objectives, it's not always possible to tell if you're doing things correctly without the help of a trained teacher. You might be setting yourself up for future aches, pains, and injuries if you exercise on your own or without the supervision of a specialist.
How to do:
- In your appropriate grounding form, lay on your back, knees bent, feet flat on the floor, arms spread out to the sides.
- Maintain a tight grip on your knees (you may want to place a towel under your lower back if you're having trouble keeping your spine neutral), and gently roll your knees to one side, keeping your shoulder blades in contact with the floor.
- Pull your navel into your spine and draw your knees back to the center as you exhale.
- Alternate sides and repeat the exercise 3-5 times on each side. Try to hold the stretch posture for 10-15 seconds to allow your body to fully absorb the stretch.
Source: verywellhealth -
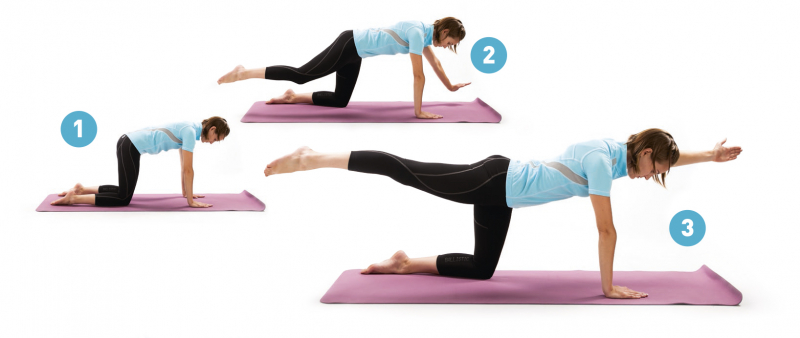
The kneeling arm and leg reach, often known as the bird dog, improves your stability. Kneeling arm and leg reach, often known as a bird dog, is a Pilates motion that challenges stability while building core strength and balance. It is frequently advised as a back-pain-relieving exercise. Though it is not a standard Pilates exercise, a Pilates-style kneeling arm/leg reach will strengthen the core and promote body balance and symmetry. For a full-body workout, this exercise targets the whole stabilizing muscular system for the torso, and every portion of your body should be involved. This is one of the effective pilates exercises to relieve lower back pain.
This is also an oblique workout since these are the sections of your core that keep you from leaning to one side. With each iteration, try to remedy this. Each side should be repeated 3-5 times. If controlling the body and spine while raising the arm and leg is too tough for you, you may either skip the lift until you have the strength in your core or do the complete exercise but with arms and legs separately.
How to work
- Kneel on all fours with your wrists under your shoulders, knees under your hips, and spine in the neutral position.
- Reach one arm forward and the opposing leg back while maintaining your body stable and balanced and your fingers and toes on the ground.
- Lift your extended arm and leg off the ground while pulling your navel into your spine to assist stabilize your body. Be careful not to lean towards your supporting arm. Hold for a few seconds before returning to the starting position with the hand and leg.
Source: rideonmagazine 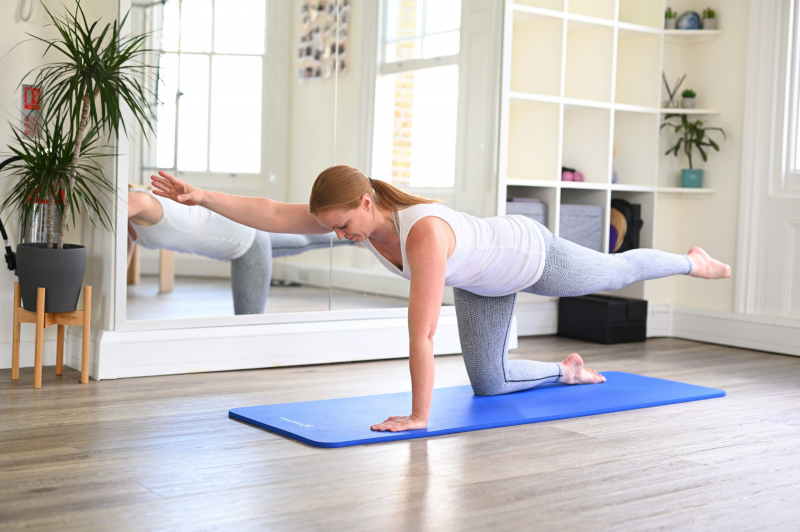
Source: complete-pilates -
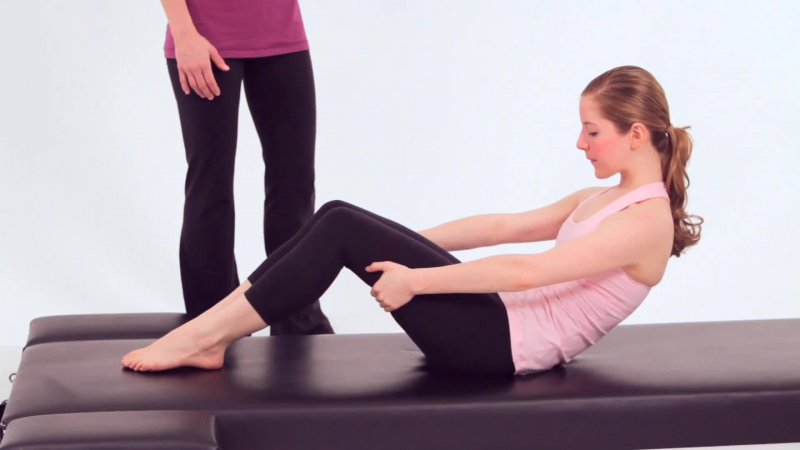
It's not only an abs exercise when you do a supported roll back. It's a tool for raising awareness. This mat workout will allow you to become more aware of your abdominals and how to use them to generate a deep scoop. Supported rollback is an excellent warm-up activity if rolling up is difficult for you, as it is for many individuals. Supported roll back, like other rolling exercises, helps your spine become more flexible. It allows you to stretch your spine and support it with your ab muscles, both of which contribute to keeping your spine healthy as you go about your everyday activities. Even though this is a starting workout, it may not be suitable if you have a back or neck issue. Avoid it if it causes you pain or discomfort until you can talk to your doctor or physical therapist about it.
Sit up straight on your sit bones to begin. With the knees bent and the feet flat on the floor, the legs are parallel. Place your hands right above the back of your knees on your thighs. Engage your pelvic floor and abdominal muscles to help support your upper body. The neck is relaxed and the shoulders are down. Extend your toes. As you roll back, this will assist keep the backs of your legs engaged and maintain a connection between your heel and sit bones. Take a minute to thoroughly inhale and exhale, focusing on the length of your spine up and down.
How to do:
- To begin the motion, pull the lower abdominals in tight. Allow your back to expand and form an "up and over" C-curve as a result. Maintain an open chest and a relaxed posture.
- As you draw in your abs, drop back and maintain your curve. Keep your abs engaged with the help of your hands, and don't let your back or neck become involved too much. Take note of where the abs engage in different ways. Try to make your back curve as deep as possible without hunching your shoulders. Go back as far as you can without becoming stuck. Back off if your abs start to tremble or your neck becomes stiff.
- Begin the return to the upright position with your lower abs. Maintain your C-curve until you're back on your sit bones, then lower your tailbone to the floor as you unroll your spine into the sky, shoulders sinking.
- Repeat 4 to 6 times.
Source: amazon.com -
Pilates swimming, one of the effective pilates exercises to relieve lower back pain, is a fun mat workout that also happens to be rather hard since it engages every muscle in the body. Fortunately, it's also simple to change. Swimming is a back extension activity that works well as a counter stretch to the various Pilates mat activities that call for forwarding flexion. This workout is great for your buttocks, lower back, and core. It works the gluteus maximus muscle, and you'll commonly see it in exercises aimed at giving your glutes greater definition. The rear of your thighs' hamstrings is utilized to pull your legs off the mat.
Swimming works the back extensor muscles as well. To relieve stress in your neck and shoulders, you'll need strong back extensors. They're an important part of the long spine position seen in Pilates workouts, and they'll help you keep good posture in everyday life. You'll also want to maintain your abdominals, particularly your obliques, engaged throughout the action. Your abdominal and back muscles work together to support your spine and neck, so you're not using your neck and shoulder muscles to elevate your upper body and head.
How to do:
- Stretch your arms straight above, keeping your shoulders away from your ears and your shoulder blades nestled in your back.
- Pull your abs in until your belly button is lifted off the floor.
- Extend your arms and legs to the point where they naturally rise off the floor in opposing directions. Simultaneously, stretch your spine such that your head rises off the mat as an extension of your spine's reach.
- Continue to stretch out from your center while pumping your right arm and left leg up and down in a tiny pulse. Pulses should be alternated between the right arm and left leg and the left arm and right leg.
- Inhale for 5 kicks and reaches, and exhale for 5 kicks and reaches. It should be similar to swimming in a pool.
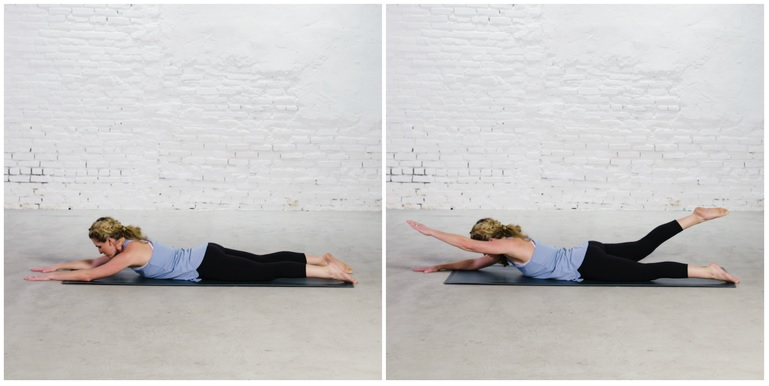
Source: prevention.com -
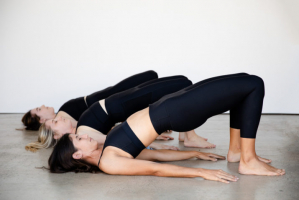
The shoulder bridge targets the glutes and hamstrings, as well as the posterior leg muscles. The abdominals and the back muscles are also worked. You may feel a stretch in your thigh muscles as you progress into the bridge. Other more advanced forms of the bridge exercises address the hip flexors and oblique muscles as well.
Consider your pelvic floor to be the threads in a piece of cloth that carries and stabilizes your pelvis as you move. They can't fully support those locations and functions if they're stretched out by pregnancy or aging. Incontinence, uncomfortable sex, and, yes, back discomfort can all be caused by weak pelvic floor muscles. Pelvic floor exercises have been demonstrated to effectively alleviate persistent lower back pain by isolating these often-ignored muscles. The glutes, hamstrings, back, and abdominal muscles, as well as the spine, benefit from the shoulder bridge exercise. It is a wonderful workout for back pain, hip pain, pelvic pain, and knee discomfort since it serves to increase strength and flexibility in these regions. The shoulder bridge exercise is also beneficial for hip and knee joint mobility.
How to do:
- Your knees should be bent, your heels should be in line with your bottom, and your arms should be by your side.
- Inhale deeply, then flatten your lower back to the floor, as if you were elevating your tailbone to the ceiling. Visualize each vertebrae leaving the floor one by one until your shoulders are weight-bearing.
- Make sure your head is comfortable and not pressed on the floor. It's important to be conscious of how hard your buttock muscles are working to keep the lift in place.
- Return to the mat one vertebra at a time when you're ready to inhale, starting with the upper back, working your way down to the mid-back, and finally the lower back. If your hamstring muscles cramp up throughout the workout, move your feet closer to your hips.
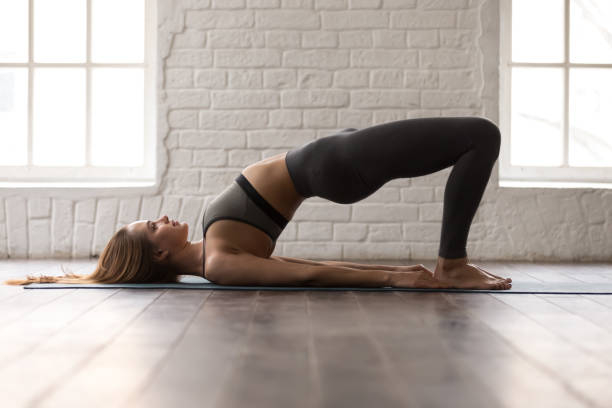
Source: istockphoto -
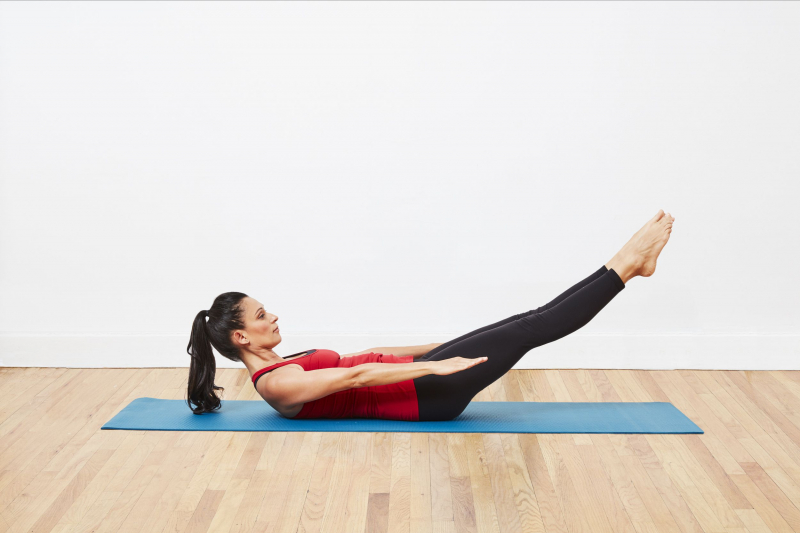
The Hundred is a Pilates mat exercise that has been around for a long time. You'll be instructed to do it at the start of practically every Pilates class you take. The exercise is named after the 100 beats of your arms made while holding your legs extended and your head and shoulders off the mat.
The hundred is quite beneficial to your diaphragm. The way you breathe has an impact on how effectively your muscles function. While different breathing techniques are appropriate for different types of exercise, studies have shown that proper Pilates breathing techniques allow the diaphragm (the dome-shaped sheet of muscle and tendon that separates the chest from the abdomen) to activate and strengthen its core stabilizing muscles. Using the same breathing methods in everyday lifting tasks helps you become more aware of how your body moves, lowering your chance of back injury.
How to do:
- Inhale. Curl your upper spine up off the floor to the base of your shoulder blades by bringing your head up with your chin down and activating your abdominal muscles. Keep the shoulders lowered down and the back engaged. Take a look down into the abs' scoop. Stay still and take a deep breath.
- Exhale. Deepen your abs pull and stretch your arms and legs at the same moment. Stretch your legs toward the point in front of you where the wall and ceiling meet. You can raise them if necessary, or reduce them for more sophisticated tasks. Only drop your legs as low as you can without shivering or lifting your lower spine off the mat. Extend your arms straight and low, just a few inches above the floor, and reach towards the far wall with your fingers.
- Hold your position. Take five brief inhalations and five short exhalations (like sniffing in and puffing out). Move your arms in a controlled up and down motion while doing so—a modest yet dynamic pumping of the arms. Make sure your shoulders and neck are relaxed. All of the work should be done by the abdominal muscles.
- Perform a 10-full-breath cycle. Five brief in-breaths and five short out-breaths make up each cycle. In time with your breath, your arms pump up and down. Maintain a scooped abdominal position, a flat back, and a downward-gazing head as an extension of your spine. It's crucial to take deep breaths. Breathe deeply into your sides and back. If you're not used to it, practice lateral breathing.
- Finish by bringing your knees in toward your chest while keeping your spine curved. Roll your upper spine and head down to the floor while holding your knees. Inhale deeply and exhale slowly.
Source: verywellfit