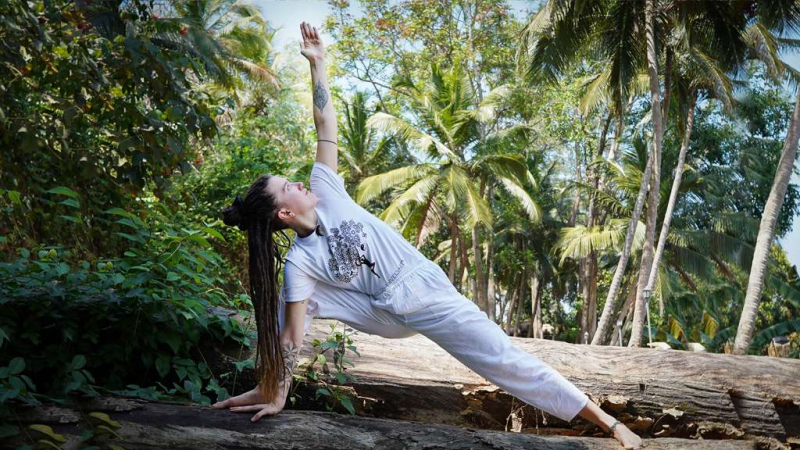
Triangle (Trikonasana)

Trikonasana is a basic yoga stance that can assist both your physical and mental health, whether you're new to yoga or an experienced practitioner. Trikonasana, often known as the triangle pose, is a yoga standing pose that strengthens and lengthens the hamstrings and groin while also stretching the hips and opening the shoulders. "Trikona" means "triangle" in Sanskrit, while "asana" means "position." The fundamental stance gets its name from the triangle shape your body forms as you put your bottom hand to the floor while keeping your feet stable.
Trikonasana, like many other yoga positions, has a number of health and mental benefits. Trikonasana helps you maintain balance and stability by activating your core muscles. This pose can help to loosen tightness in the spine and back, allowing for more flexibility. Trikonasana increases mobility and reduces injury risk by unlocking the hip flexors and shoulders. Perform this stance on both sides to benefit the right and left hips equally.
Trikonasana activates your core and upper body, potentially increasing your metabolism by stimulating your digestive organs. Trikonasana is a yoga pose that focuses on the lower back, which is where some individuals store their stress. This pose can assist relieve tension, which can lead to less anxiety and a more stable emotional state.
Step by step:
- It's easier to enter from Warrior II because your feet are already in the right place. For this transition, you shouldn't need to widen or restrict your stance. Straighten your front leg from Warrior II onwards (the right leg in this case).
- Draw your right femur into its socket by engaging your right thigh muscles. Keep your right hip tucked and extend your right hand toward the front of the room.
- Your right hand should be lowered onto your shin or ankle. Bring your right hand to the floor on the inside or on the right foot if you're more open. Choose the option that feels most natural to you.
- As you open your chest and raise your left fingertips toward the ceiling while keeping your left shoulder anchored in its socket, the left shoulder stacks on top of the right.
- Move your eyes up to your left fingertips by turning your head. It's also good to retain the head in a more neutral position if this is bothersome for your neck.
- Continue to pull the muscles in your right thigh upward, increasing the furrow in your right hip.
- To avoid hyperextension, gradually soften your right knee. (This is referred to as a micro bend.)
- Stay in this position for at least 5 breaths.
- Rep the stance, this time bringing your left leg forward.
Beginners’ tips:
- To keep both sides of your waist long, place your hand on a block on the inside or outside of the foot, depending on what feels best for your body.
- The press-rebound effect is achieved by pressing hard through the feet to make your upper body feel lighter.
Common Mistakes
- On getting your right hand to the floor, resist the impulse to bend your right knee. It's more vital to keep your right leg straight. Another alternative is to place a block on the floor under your hand.
- Avoid resting your hand directly on your knee since this puts too much strain on the joint. Also, make sure the right heel is aligned with the left foot's arch.


