How to Completely Disable Copilot by Modifying Registry Files

The final way to turn off Copilot on Windows 11 is to resort to modifying the registry file. This is a difficult step that requires you to do it carefully and concentrate. Before doing so, you need to back up all registry files or create a restore point. It helps you restore registry files in case something goes wrong.
Steps you need to take to disable Copilot via Registry Editor:
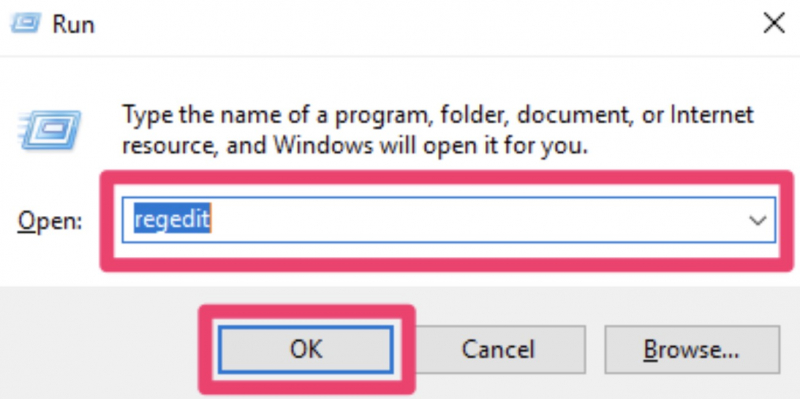
- Open the R dialog box by pressing Win + R on the keyboard,
- Type regedit in the text box and press Enter to open the Registry Editor.
- Check Yes when the User Account Control (UAC) prompt appears.
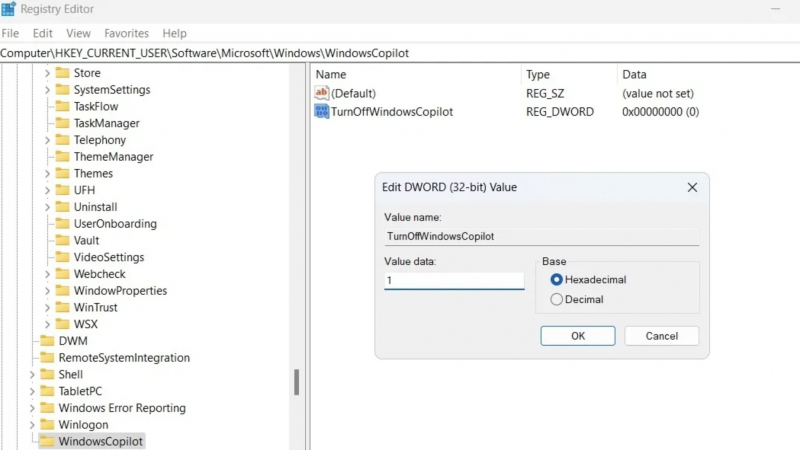
- Use the left pane to move to the HKEY_CURRENT_USER category cluster > Software > Policies > Microsoft > Windows.
- Right-click the Windows key and select New > select from Key. Name it WindowsCopilot.
- Right-click on WindowsCopilot DWORD, go to New > select DWORD Value (32-bit) from the submenu. Name the DWORD TurnOffWindowsCopilot.
- Double-click TurnOffWindowsCopilot DWORD, enter the number 1 in the text field > click OK.
- Once done, try restarting your PC for the changes to take effect.
- At this point, maybe disabled Windows Copilot on your PC. To re-enable it in the future, repeat the steps above and change the TurnOffWindowsCopilot DWORD value to 0. You can delete TurnOffWindowsCopilot DWORD instead.