Top 10 Fun STEAM Activities for Middle School Students

From creative art projects to exciting engineering challenges, these activities promise to ignite curiosity and foster a love for STEAMS among middle school ... read more...learners. Let explore of these interactive and educational endeavors with Toplist!
-
Alright, let's dive a bit deeper with simple words! Making a Cloud in a Jar is like having a mini science party to discover how clouds happen up in the sky. For this fun experiment, all you need are a jar, a balloon, hairspray in a spray can, and some ice cubes.
Start by pouring warm water into the jar until it's about one-third full. Cover the top of the jar with a balloon, think of it like putting a lid on a cookie jar. Now, grab some ice cubes and put them on the balloon. Let the jar sit for a bit so the air inside can get all cool.
While you're waiting, grab the hairspray. Give the inside of the jar a little spritz. The hairspray makes tiny things in the air for water to stick to. It's like having little helpers for making clouds. In real life, things like dust or tiny bits in the air help clouds form, just like our hairspray here. After a short wait, take off the ice cubes and watch what happens inside the jar. You'll see something magical, a cloud will pop up right before your eyes!
This experiment of Cloud in a Jar is like having your own weather show. It teaches us how clouds show up when warm air gets cool and little things in the air help water come together. It's like a secret recipe for making clouds, and it's a super cool way to learn about
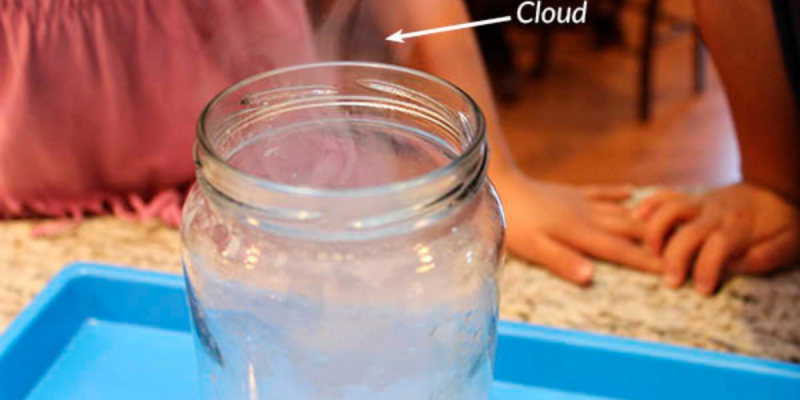
Cloud in a Jar - Photo via teachingexpertise.com 
Cloud in a Jar - Photo by Alena Darmel via pexels -
In this experiment, we're creating a make-believe mess to learn about a serious problem called an oil spill. We use simple things like oil, a shiny metal pan, and feathers to show what happens when oil gets into the water, like in the ocean. The pan represents the water, and the feathers are like animals in the water, such as birds or fish.
Now, we try to clean up our pretend mess using tools like soap, cotton balls, and sticks. These tools act like the things scientists and engineers use to clean up real Oil Spill. We become like cleanup engineers, testing different ways to fix the mess. Maybe we use soap to break down the oil, sticks to make barriers, or cotton balls to soak up the oil.
After the Oil Spill experiment, we talk about how hard it is to clean up a real oil spill and why it's so important to take care of our environment. This activity helps us understand the challenges of protecting nature and why finding solutions is crucial. It's like going on a mini science adventure to learn about helping the Earth when things go wrong.
Oil Spill - Video by Surrey Libraries BC via Youtube 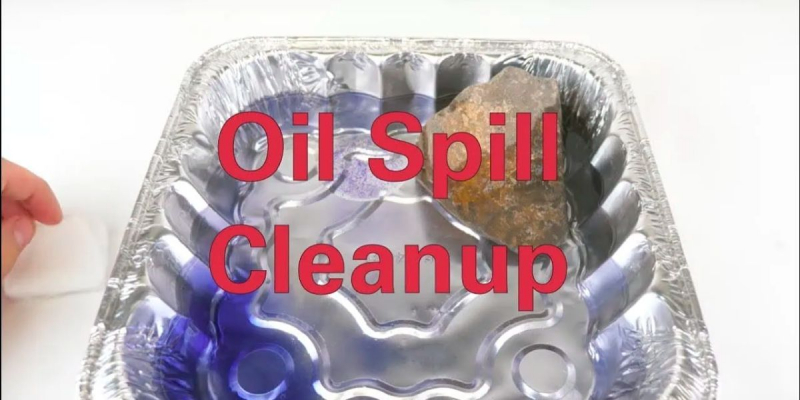
Oil Spill - Photo via teachingexpertise.com -
Let's embark on a fascinating plant exploration journey using some simple materials like plastic bags and plants from our school garden. Imagine being plant detectives for a day! To conduct Explore Transpiration, all we need are plastic bags, a bit of string, and, of course, our curiosity!
Now, let's get creative and outfit our plant detectives with plastic bags, essentially providing them with cozy raincoats. It's like we're gearing them up for a mission to reveal the secret world of plant sweat. We use string or twist ties to securely fasten the raincoats, making sure our detectives are snug but not squished.
As time unfolds, perhaps over a few hours or a whole day, we keep a vigilant watch on our undercover plant detectives. Inside the bags, we might start noticing tiny water droplets or a gentle wetness. This is the moment when the plants are showcasing their unique ability called transpiration. It's akin to witnessing plants engage in a cooling process, just like when we humans sweat to stay cool.
After our exciting plant adventure, we gather in class to share our discoveries. We engage in a lively discussion about why plants transpire and the importance of this natural process in keeping them healthy. This hands-on learning Explore Transpiration experience transforms our school garden into a living laboratory, making science not just informative but also an exhilarating journey into the wonders of the botanical world.
Explore Transpiration - video by Kids Fun Science via YouTube 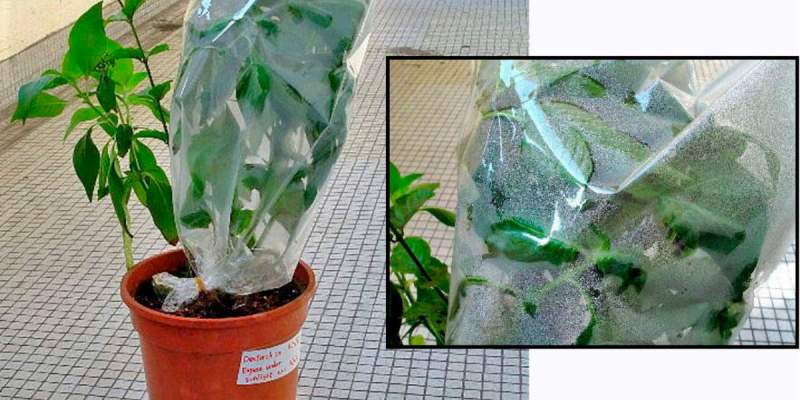
Explore Transpiration - Photo via teachingexpertise.com -
Drinking Straw Rollercoaster project invites students to explore their imaginations and construct an exhilarating rollercoaster solely using plastic straws and hot glue. To begin, we gather an assortment of straws in various colors, a trusty hot glue gun, scissors, and small objects like marbles for testing purposes.
The first step involves students brainstorming and planning their rollercoaster designs. They put their ideas on paper, envisioning twists, turns, loops, and slopes that will make their rollercoasters thrilling. With the plastic straws and hot glue, they dive into the construction phase, carefully connecting straws to bring their designs to life.
After the initial build, the testing phase begins. Students release small objects like marbles onto their rollercoasters, observing how well their creations perform. This testing phase is crucial as it allows them to identify areas for improvement and make necessary adjustments, turning the project into an iterative learning experience.
The iterative design process enables students to refine and enhance their rollercoasters continually. They learn from each test, making modifications to their designs to achieve better performance and functionality. As a final step, students proudly showcase their completed rollercoasters to the class. During this sharing session, they discuss their design choices, the challenges they faced, and the valuable lessons they gained throughout the project.
Drinking Straw Rollercoaster project not only repurposes plastic straws for an educational purpose but also provides students with a hands-on experience in engineering, problem-solving, and creative thinking. The result is a classroom filled with colorful and captivating rollercoasters, each one a testament to the imaginative minds and innovative spirit of our STEAM learners.

Drinking Straw Rollercoaster - Photo via teachingexpertise.com 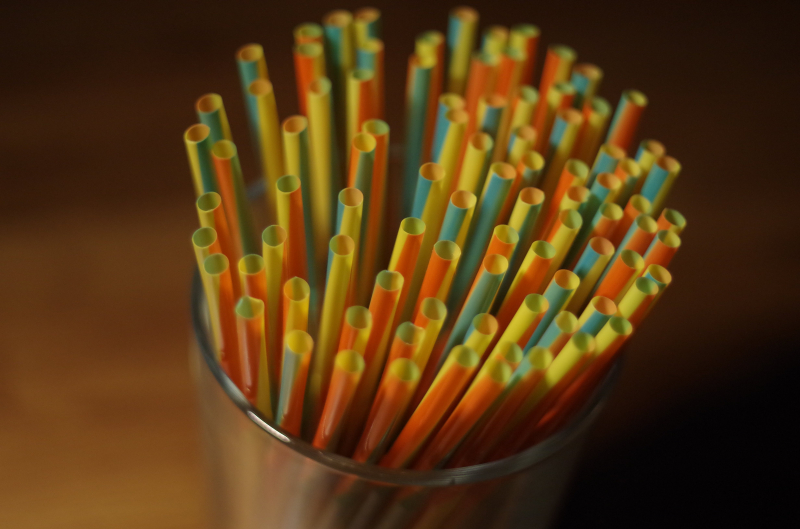
Drinking Straw Rollercoaster - Photo by Christopher via pexels -
Let's have some fun with Build a Solar City! We're going to use cardboard and little solar panels to create a city that runs on the power of the sun. First, gather your materials like cardboard, glue, and colorful craft stuff. We'll talk about solar power, which comes from the sun, and how it's good for our planet.
Now, think about your city, where do you want houses, parks, schools, and shops? You can get creative with shapes and sizes when making the buildings from cardboard. The cool part is that we're going to add small solar panels to the rooftops. These panels will catch the sun's energy and make our city run on solar power!
Once you've built your city and added the solar panels, use markers and colored paper to make it look fantastic. If you have small LED lights or tiny motors, you can even make your city light up or have things moving. It's like magic powered by the sun!
After your city is ready, show it to your friends and explain how it works. You're not just making a cool Build a Solar City project; you're also learning about solar power and helping the environment. This Solar City project is a fun way to discover how the sun's energy can create a city that's good for the Earth!

Build a Solar City - Photo via teachingexpertise.com 
Build a Solar City - Photo by eric anada via pexels -
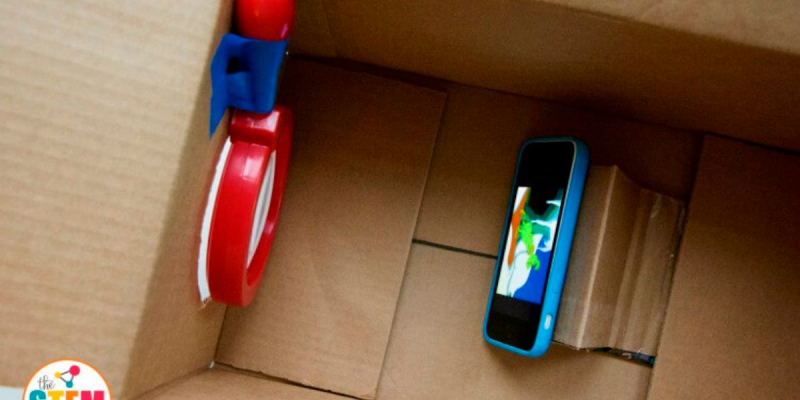
Begin this creative Smartphone Projector experiment by selecting a cardboard box, perhaps one that once held shoes, and carefully cut a hole in it that is big enough to fit the magnifying glass. The magnifying glass plays a crucial role as our special lens in this homemade projector.
Now, position the magnifying glass in the hole, ensuring it sits securely. Take your smartphone and place it inside the box, directing the screen downward towards the magnifying glass. To keep things steady, use tape or glue to secure the smartphone in place. This setup is what will bring our projector to life!
Next, fine-tune the focus by moving the smartphone back and forth until the displayed image becomes clear when projected onto a wall. For an even more captivating experience, dim the lights in the room. Now comes the exciting part, play a video or showcase pictures on your smartphone, and witness the magic unfold as they are magically projected onto the wall.
This ingenious DIY Smartphone Projector not only brings joy and entertainment but also serves as a playful lesson in optics. It allows us to explore how lenses and light work together to magnify images. The hands-on aspect of this project makes learning about these scientific principles fun and engaging. So, let's revel in the wonder of our homemade projector and discover the fascinating world of light and lenses!
Smartphone Projector - Photo via teachingexpertise.com Smartphone Projector - Video by TechBuilder via YouTube -
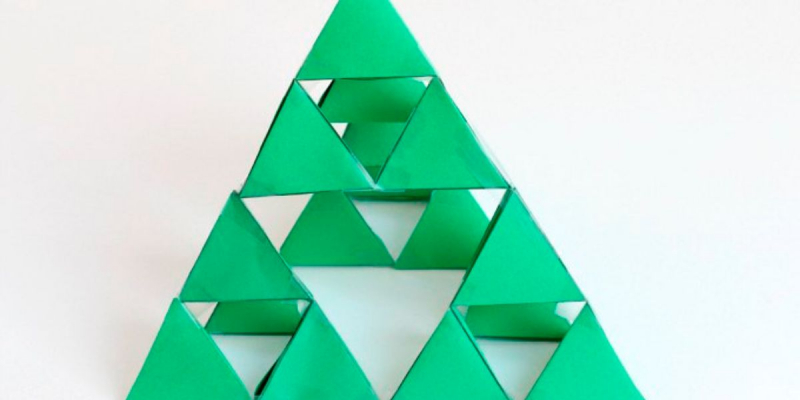
Tree is both creative and educational, and the best part is, you don't need to be a math expert to dive into the fun! With just a few materials, colorful papers, scissors, and glue, we can embark on this exciting project.
To begin, cut out a large equilateral triangle from your chosen colored paper, this serves as the base of our Sierpinski Tree. Now, from this large triangle, cut out three smaller equilateral triangles of the same size. These smaller triangles are the initial branches of our tree. Glue these smaller triangles onto the larger one, forming the first layer of our 3D Sierpinski Tree.
Here comes the intriguing part of the process, the repetition of the Sierpinski pattern. From each of the smaller triangles, cut out three even smaller triangles, mirroring the initial pattern. Glue these tiny triangles onto their respective larger triangles. This process can be repeated as many times as desired, creating layers upon layers of intricate geometric patterns.
Once our 3D Sierpinski Tree is standing tall, the artistic touch comes into play. Grab markers, glitter, or any decorative items you fancy to add a personal and vibrant flair to your creation. This moment of decorating not only adds a delightful aesthetic but also reinforces the joy of combining math and creativity.
3D Sierpinski Tree - Photo via teachingexpertise.com 3D Sierpinski Tree - Video by What Do We Do All Day? via YouTube -
Toys can teach us cool things, and using LEGO bricks with a solar panel is a super fun way to learn. We're talking about STEAM learning - that's Science, Technology, Engineering, Arts, and Math - and you get to use Legos!
So, first, gather your LEGO bricks, a small motor, a solar panel, wheels, axles, and maybe some gears if you have them. Now, let your creativity shine as you design your very own LEGO car. Think about where the wheels will go, how the motor fits in, and maybe add some gears for extra fun.
Attach the solar panel to your LEGO car design so it can soak up sunlight. This solar panel is like a tiny power station that uses the sun's energy. Now, connect the small motor to your design. Make sure it's linked to the wheels and axles, so when the motor spins, your car moves forward.
Want to make it even more exciting? Add some creative decorations or personal touches to your LEGO car. It's like giving it a unique style! Now, it's time for the real fun. Take your Solar-Powered LEGO car outside where the sun is shining or put it under a bright lamp. Watch closely as the solar panel collects energy from the sun, powering the motor, and off goes your Solar-Powered LEGO car, zipping around powered by sunlight.
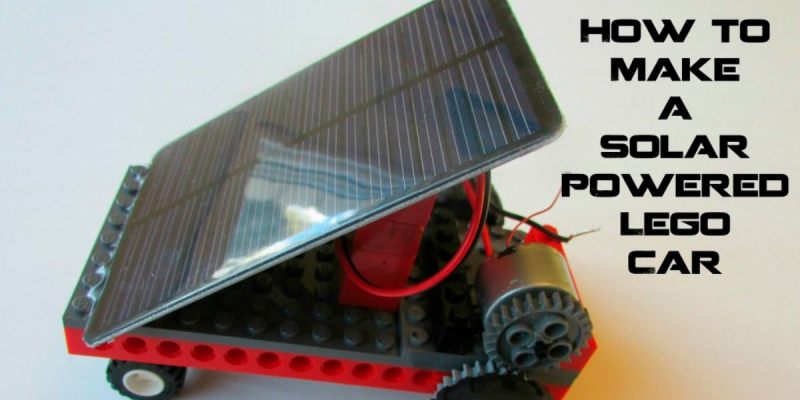
Solar-Powered Lego Car - Photo via teachingexpertise.com Solar-Powered Lego Car - Video by LEGO BY ABEER via Youtube -
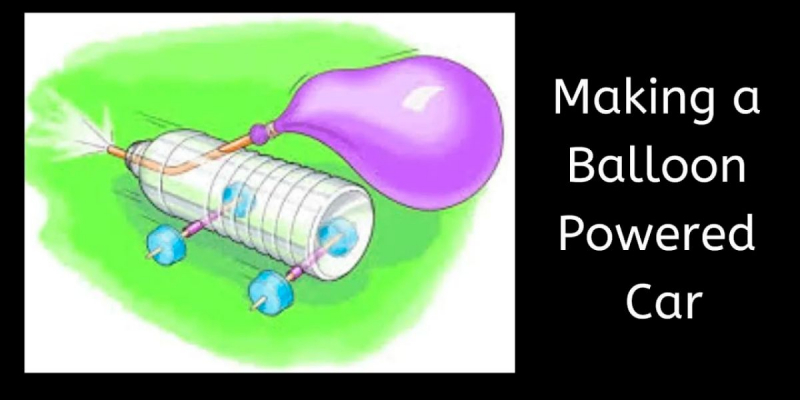
Imagine making a super fast Balloon-Powered Car using only a water bottle, some straws, and a balloon. It's like a fun and hands-on adventure to explore these amazing ideas. Kids can get creative and try out different designs for their very own Balloon-Powered Cars!
First, gather your materials, a water bottle, some straws, and a balloon. Then, build your car by attaching the straws to the sides of the water bottle. These straws are like the wheels of your car. Next, stretch the balloon and attach it to the opening of the water bottle, making sure it's nice and tight.
Now, get ready for the fun part! Blow air into the balloon through the water bottle's opening, but don't let it go just yet. When you're all set, let the air out, and watch your Balloon-Powered Car zoom forward! It's like your own mini race!
But the fun doesn't stop there. You can experiment with different designs for your car. Try changing the size or where you put the straws, or even try using a bigger or smaller balloon. See how these changes affect how fast and how far your car goes. It's like becoming a little scientist, testing out ideas and discovering what works best.
Balloon-Powered Car - Photo via teachingexpertise.com 
Balloon-Powered Car - Photo by Vika Glitter via pexels -
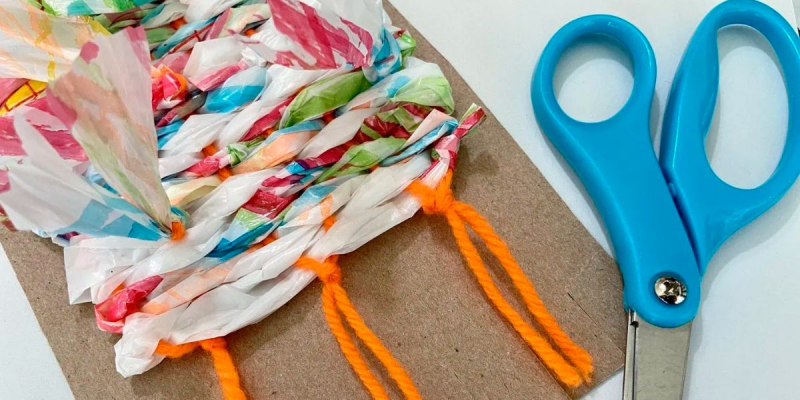
Making Plastic Bags Art is a super cool way for students to recycle and be creative. We're turning used plastic bags into beautiful weavings, and all we need is some cardboard, scissors, and creativity!
First, let's create a loom, that's like a frame for our weaving project. Cut a piece of cardboard into a rectangle. It should be strong enough to hold our artwork. Adjust the size if you want a bigger or smaller final piece. Now, gather some used plastic bags in different colors.
Cut them into strips, these will be our weaving material. You can make the strips different widths for texture. Attach the plastic bag strips to the cardboard loom, securing them at one end. These strips will go up and down, creating the base for our weaving.
When you finish weaving, secure the loose ends of the plastic bag strips by tying or tucking them. This makes sure our artwork stays put. Experiment with different patterns and techniques. You can make stripes, checks, or even fancy designs by changing how you weave.
Once you're happy with your weaving, trim any extra plastic bag bits, and secure the final ends. Now, you have a unique Plastic Bag Art piece! You can display it on its own or use it in bigger projects. This Plastic Bag Art activity isn't just fun, it's also a way to reuse materials and be kind to the environment. Turning everyday plastic bags into vibrant masterpieces is a creative and eco-friendly adventure!
Plastic Bag Art - Photo via teachingexpertise.com 
Plastic Bag Art - Photo by Anna Shvets Anna Shvets via pexels