Top 10 Best Yoga Poses for Beginners

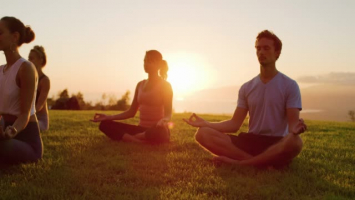
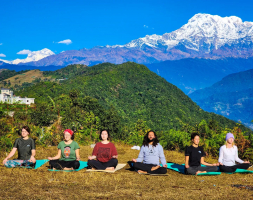
There are numerous compelling reasons to incorporate yoga into your routine. Yoga improves muscle tone, flexibility, and balance, as well as helping you relax ... read more...and reduce stress. If you are ready, here are the best yoga poses for beginners.
-
Downward-Facing Dog is the first yoga poses performed by yoga practitioners. Therefore, it is one of the best yoga poses for beginners.
- Begin on your hands and knees, stacked under your shoulders and knees under your hips.
- Spread your hands out wide and press your index and middle fingers onto the mat.
- Draw your hips toward the ceiling by lifting your tailbone and pressing your butt up and back. Straighten your legs as much as possible and softly press your heels towards the floor.
- Your back should be flat and your head should be between your arms, facing your legs.
- Hold the position for 5–10 breaths.
- You should focus on keeping your spine long, even if it means bending your knees. Spread your fingers wide, grab the mat with your fingertips, and put more weight into the pad where your first finger and thumb insert into your palm to assist keep the pressure off your wrists.
Downward-Facing Dog relaxes the nervous system, improves overall flexibility, decompresses the spine, tones the arms, sculpts the legs, and opens the shoulders. The posture is usually held for five breaths between sides, or longer if you want to get more strength out of it. On each inhale, lengthen from your wrists to your hips, and on each exhale, deepen your roots from your hips to your heels.
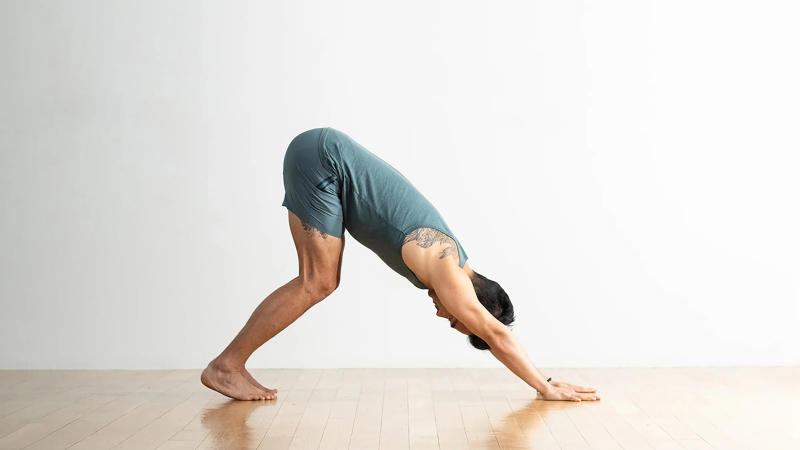
Photo: Yoga Journal Source: Yogi Approved -
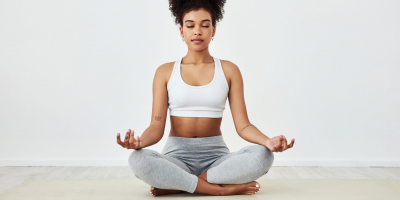
Mountain Pose is a simple pose, which can be easily done by the below instructions:
- Standing with your toes together and your heels slightly apart.
- Spread your toes and equally distribute your weight across both feet. Tuck your hips down a little and engage your core so your tailbone is pointed down toward the floor. Roll your shoulders back and forth to relax them.
- Inhale and extend your arms upwards while pressing your feet down. You can alternatively rest your hands by your sides or in a prayer position in front of your chest—all are typical variations, and your instructor may cue one or offer you the option.
- Inhale and exhale slowly and deeply through your nose.
- Hold the position for 3–5 breaths.
To begin Mountain Pose in a balanced way, place your feet where they would naturally fall when walking forward, with a few inches between them. Maintain a forward-facing posture with your hips and knees. To keep your stance strong and maintain the integrity of the pose, gently activate your core and avoid locking your joints.
Mountain Pose serves as a foundation for the rest of the poses. It puts your mental focus and concentration to the test. It strengthens your thighs, knees, and ankles, firms your tummy and buttocks, soothes sciatica and reduces flat feet on a physical level.
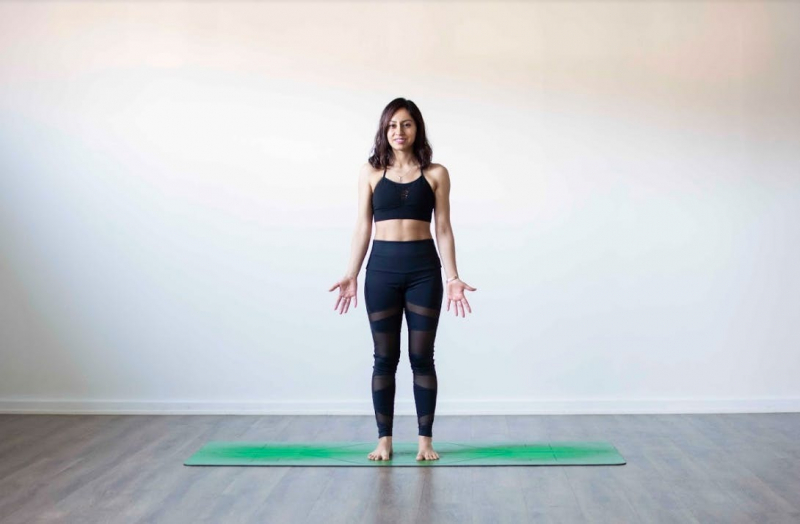
Photo: Leep.App Source: Yoga Screen -
- Start in a staggered stance with your feet almost mat-length apart by taking a big stride forward with your left foot.
- Keep your rear leg straight and your heel high off the floor while bending your front knee. Bend your front leg to the point where your thigh is parallel to the ground. Your hips should be squared to the front.
- Extend your arms on either side of your head toward the ceiling and stretch up while pressing into the mat and feeling the stretch in your hips.
- Hold for 5 breaths before switching sides.
- Drop your back knee to the floor in Low Lunge, keeping the leg extended long and the shin flat on the mat.
- It's more crucial to maintain a long spine than it is to straighten your back leg. If it would assist you to lift your torso and stretch your back, freely bend your back leg.
The hip flexors and quadriceps are stretched when you practice Crescent Lunge Pose. This is a good counter-stretch for front-loading workouts like cycling and running, as well as for people who spend most of their time sitting. The chest, shoulders, and torso are also opened. Crescent Lunge Pose can be used to improve your balance and stability. It is thought to be energetic and a heart opener.
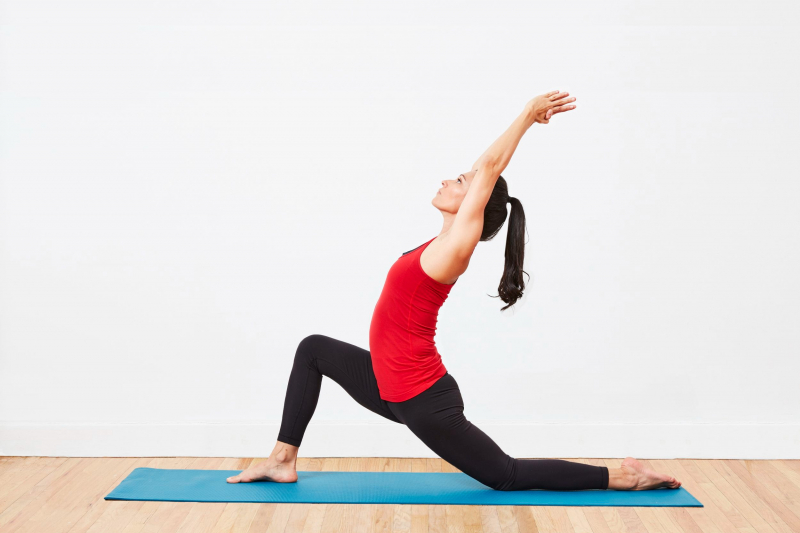
Photo: Verywell Fit Source: Alo Moves - Online Yoga & Fitness Videos -
All yoga novices start with Warrior II when they are first exposed to this exercise. It’s also one of the best yoga poses for yoga beginners.
- Start in a staggered stance with your feet almost mat-length apart by taking a big stride forward with your left foot.
- Extend your arms in front of you until they are parallel to the ground.
- While keeping your right leg straight, bend your left knee to a 90-degree angle with your thigh parallel to the floor.
- Turn your right foot out to the right, perpendicular to your left foot, and point your left toes forward. Your left heel should be parallel to your right foot's arch.
- Twist your torso to the right at the same moment, so your left hip is facing the front of the room and your right hip is towards the rear.
You can increase your patience and attention by staying in the Warrior II pose for a long time. Keep your attention on your bodily and mental sensations. Recognize any discomfort and determine whether your need to straighten your leg and let go of your arms stems from a bodily or psychological need. Always practice in accordance with your current needs. This discernment is a genuine warrior's discipline and power.
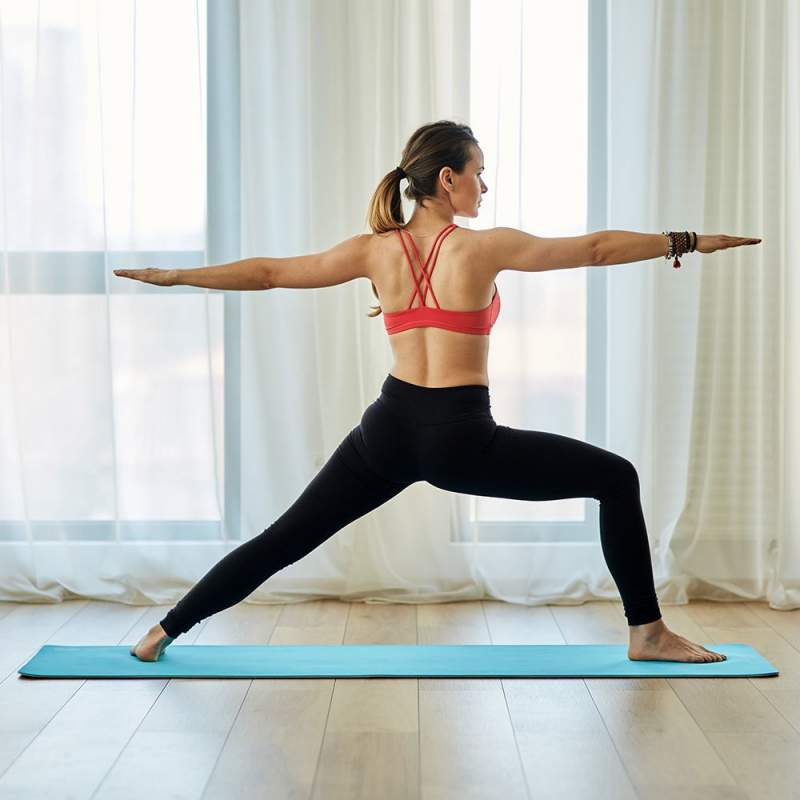
Photo: Yoga Source: Yoga with Adriene -
The foundational triangle pose is named for the triangle shape your body makes during the move.
- To do the triangle pose, get into a good position. Starting in mountain pose (or Tadasana), spread your feet slightly wider than shoulder-width apart and extend your arms parallel to the ground, palms facing down. Starting on the right side, your right foot should be at a 90-degree angle with the mat's end, while your left foot should be at a 45-degree angle.
- Take a step to the side. Exhale as you bend your body at the hip joint, stretching to the side over your right leg (if you're starting on the right). Keep your waistband long and not twisted. Stretch your tailbone all the way to your back heel.
- Extend your arms in front of you. Gently hold your right ankle with your right hand as you extend down your right arm to your right foot. At the same time, extend your left arm upwards, with your left hand's fingers pointing to the ceiling, producing a straight, vertical line with your arms and shoulders.
- Hold for a second and then repeat. Turn your head up to the ceiling with your shoulders aligned. Hold for a few moments before returning to the beginning position and repeating with the left leg.
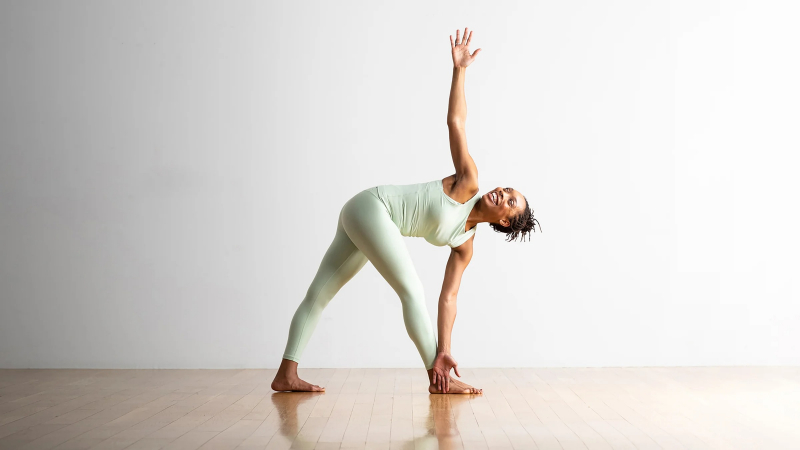
Photo: Yoga Journal Source: Well+Good -
Plank Pose can be done by the following steps:
- Start Plank Pose by getting down on your hands and knees, with your wrists exactly beneath your shoulders. Smoothly and evenly inhale and exhale via your nostrils. Bring your attention back to the current moment.
- Spread your fingers and squeeze your forearms and hands together. Keep your chest from collapsing.
- Lengthen the back of your neck and bring your abdominal muscles toward your spine by gazing down between your hands.
- Tuck your toes and take a step back with your feet, forming a straight line with your torso and head.
- Maintain a high thigh position and avoid allowing your hips to fall too low. Realign your body such that your shoulders are squarely above your wrists if your butt is sticking out in the air.
- As you tense your abdominal muscles, draw your pelvic floor muscles toward your spine. Maintain a straight line between your head and your spine. Broaden the area between your shoulder blades and your collarbones.
- Do not allow your hands to slide open toward your pinkie fingers as you draw down through the bases of your index fingers.
- Extend your tailbone toward your heels while pressing the front of your thighs (quadriceps) up toward the ceiling.
- Hold the stance for five breaths while breathing evenly. Remain in your position for up to five minutes if you're trying to gain strength and stamina.
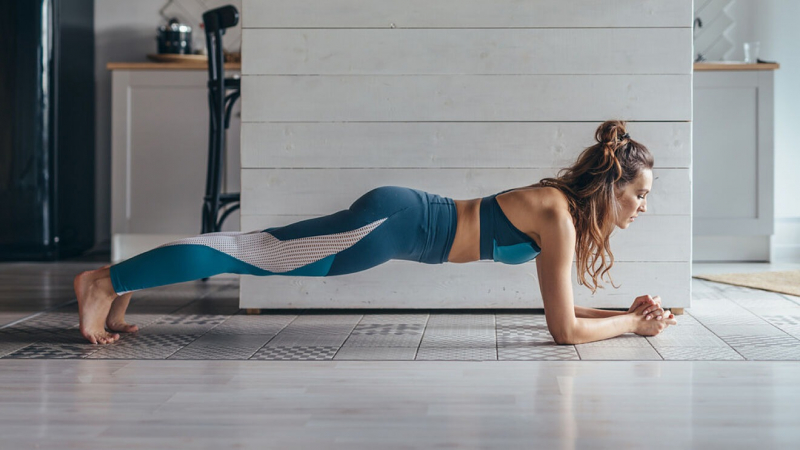
Photo: Marca Source: Bowflex -
Low plank is another foundational pose that all beginners do in their first lessons:
- Begin in the plank position. Hands shoulder-width apart, shoulders stacked precisely over wrists, legs extended, and core engaged.
- Slowly lower yourself to a Low Plank by bending your elbows until they create 90-degree angles, keeping them tucked in tight to the side of your body.
- Take a single breath and hold it.
- This pose is usually followed by Upward-Facing Dog, which is the next on the list.
- This pose strengthens your erector spinae, and the muscles on either side of your spine, and is similar to plank workouts. This aids in the development of core strength, posture, and stability.
- While performing this pose correctly needs a certain degree of power and technique, it may be modified to suit a variety of fitness levels. Even if you can't execute the full expression of the position, practicing low pank will help you gain strength.
Beneficially, the low plank pose can aid in the development of functional strength. This helps you with anything from ordinary sitting and moving to more complex movements like those found in a kickboxing class.
Yoga can also assist to treat back discomfort, promote flexibility, and improving mental well-being in general.
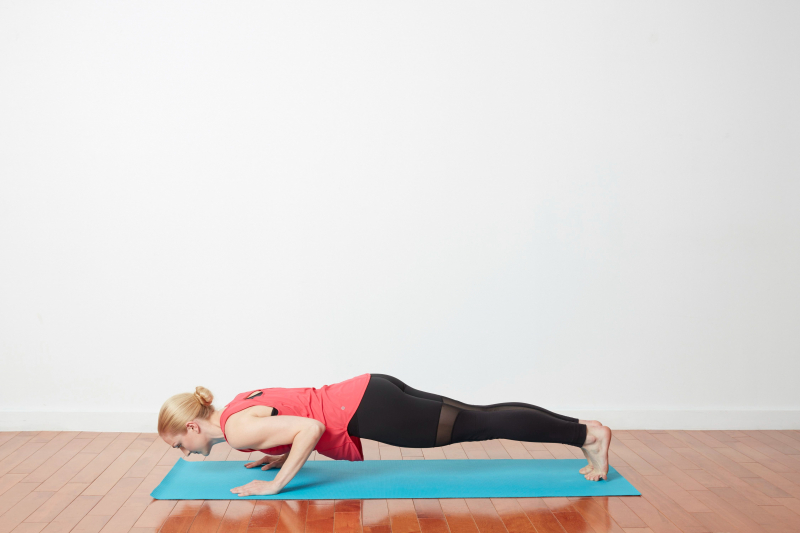
Photo: Verywell Fit Source: Ways and How -
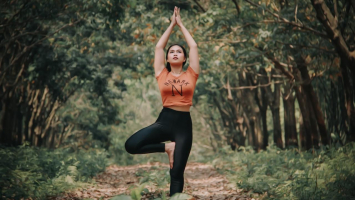
The tree pose is one of the best poses for yoga beginners to practice:
- Begin in mountain pose by bringing your toes together and spreading your heels slightly apart.
- Bring your right foot up to your left leg's inner thigh. Squeeze your inner thigh and foot together. Your right leg's knee should be turned out and your right thigh should be at a 45-degree angle to the ground.
- Lift your hands to a prayer position in front of your chest (as indicated), or up overhead if that seems more comfortable for you.
- To stay balanced, keep your attention locked on a fixed spot in front of you.
- Switch sides after 5–10 breaths on each side.
Although the tree pose appears to be one of the most straightforward balancing postures, it necessitates appropriate placement and alignment:
- Maintain a straight back. Improper form can reduce the effectiveness of tree pose or, in the worst-case scenario, cause harm.
- Don't stomp your foot on your knee. Your elevated leg's foot should not put any more weight on your standing leg's knee.
- Make sure your hips are in the right place. It's critical to keep your left and right hips level when bending your leg in. Make sure neither hip "pops up" such that one side is higher than the other.
- Maintain a straight line with your feet. To preserve appropriate alignment, the toes on your standing leg should point straight ahead, while the toes on your bent leg should point down towards the floor.

Photo: Yoga Journal Source: Yoga with Adriene -
Dancer Pose step-by-step instructions:
- Stand tall with your feet together.
- Bring your left foot toward your glutes by bending your left knee. With your left hand, grab the inside arch of your left foot and slowly lift your foot toward the sky. Reach your right arm forward and up toward the ceiling at the same moment.
- As you open your chest and drag your lifted leg up, actively press your full right foot into the floor. Maintain a raised chest.
- Hold for 5-10 breaths on one side, then swap sides.
- It's more vital to keep your hips level than it is to raise your foot to a high position. This will keep your lower back in a good position and prevent overextension. In addition, to do it right, make sure your supporting foot's toes are split wide. Your knee should be supple, not locked, hyperextended, or bent too much.
Dancer Pose stretches the shoulders, strengthens the legs, and enhances balance and core strength. In contrast to tight hips caused by too much sitting, it opens the hip flexors (psoas muscles). Many daily activities and sports benefit from improved balance and core strength.
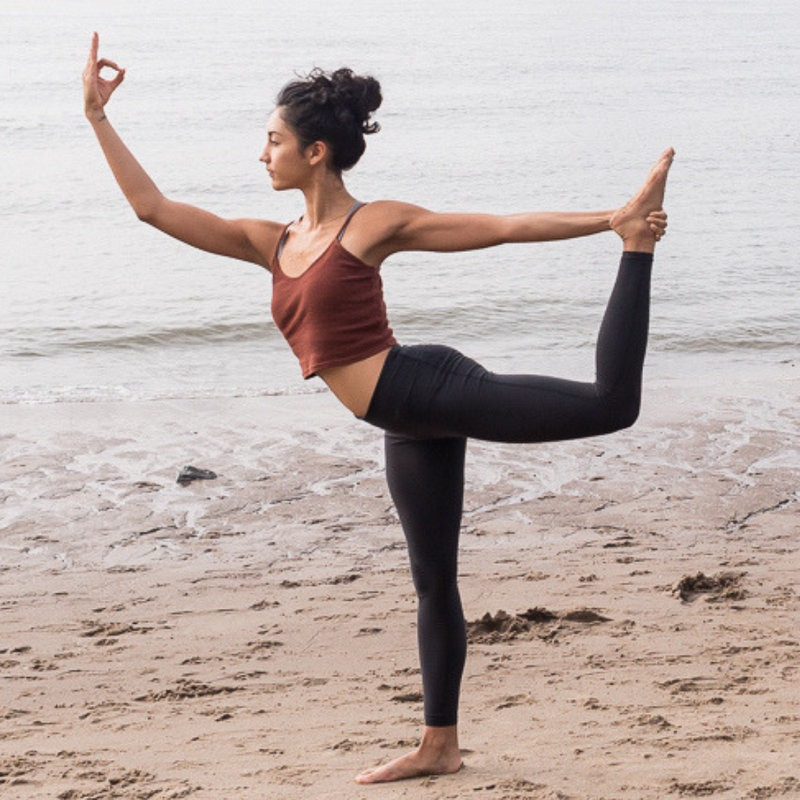
Photo: Sara Lyn Source: Alo Moves - Online Yoga & Fitness Videos -
To do the half pigeon pose correctly, you can follow the suggestion below:
- Extend your left leg high from Downward-Facing Dog, then bring it below your body and in front of you, with your chin parallel to the top of the mat.
- Straighten your right leg behind you. Place your foot on the floor at the top.
- Maintain a flexed left foot. Maintain as near to the mat as possible with your right hip. Bring your left foot in closer to your body if it lifts off the floor.
- For three breaths, remain upright. Then, for 5–10 breaths, fold over and rest your head on the ground.
- Replace with the opposite leg.
- If this pose causes you any knee pain, try Reclined Figure Four instead. Lying on your back, cross your left foot over your right leg while maintaining your left foot flexed.
- This position of the half pigeon pose emphasizes opening your hips, which promotes hip mobility and flexibility.
Half pigeon Pose also extends your hip flexors and lower back, which can become stiff from sitting for lengthy periods of time. Stretching these muscles on a daily basis can help relieve minor lower back and hip pain. This pose is also thought to aid digestion by gently stretching and moving the lower abdomen. Peristalsis, or the passage of digested food through the intestinal tract, may be aided by this.

Photo: Dick's Pro Tips Source: DICK'S Sporting Goods