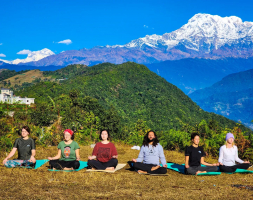
Top 10 Best Yoga Poses You Can Do In Bed Before You Sleep

Yoga can benefit your nervous system. Yoga can help you get a good night's sleep by including deep breathing, long stretches, and soothing postures to help you ... read more...feel refreshed and ready for the day ahead. For yoga lovers, Toplist gives you the list of the best yoga poses you can do in bed before you sleep.
-
Legs up the wall is one of the easiest and also the best yoga poses you can do in bed before you sleep. To do this pose, you can follow the below steps:
- Bring your hips as near to the wall (or your headboard, if you're using a headboard) as possible; the closer it is, the better you are.
- Lengthen your knees by bringing your legs up the wall. To make a letter T, open your arms to the sides. Relax your entire body, including your face muscles, and close your eyes lightly.
- You can relax your mind by listening to peaceful, soothing music or focusing on your breath, making sure it is deep and even. Hold this position for at least two to five minutes.
The legs up the wall pose will release the tension that has built up in your spine by standing or sitting in a posture that may increase the curve of your spine. This is also beneficial for fatigued legs because it lowers blood pressure in varicose veins and promotes blood flow.
Even if you don't have chronic venous insufficiency, standing or sitting for long periods of time might reduce your body's ability to easily circulate blood back up. Legs up the wall, therefore, can be beneficial. It is also recommended this pose should be done toward the end of your practice.
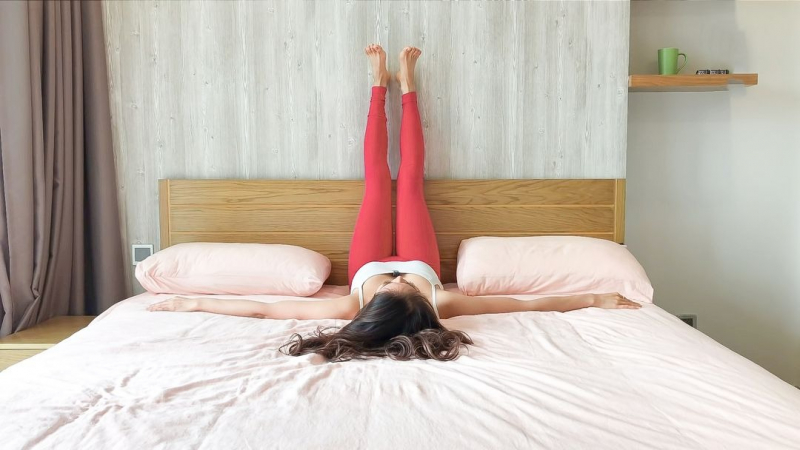
Photo: Do you Source: Good life tube -
To practice the pose of the eye of the needle, you can follow this instruction:
- First, you bend both knees from Legs Up the Wall.
- Place your left foot's sole against the wall.
- Cross your right leg over your left thigh; if your right ankle is pressing down on your thigh, move it slightly to the left side. Keep your right foot flexed to keep your right knee safe.
To extend your lower back, draw your tailbone down toward the bed while maintaining the natural spinal curve. - Gently push the right thigh on the wall with your right hand. If the left knee tilts to the side, keep it pointed up to the ceiling. Your right hip should open and you should experience a lovely stretch.
- Switch to the left leg and alternate between 2 and 5 minutes on each side.
This pose is well-known for relieving lower back discomfort while also expanding the hips. It also increases circulation in the legs, hips, and back, which can help with stiffness and inactivity-related discomfort. In addition, the eye of the needle can assist you to maintain the flexibility of your entire low back. It's a relaxing alternative to backbends and twists of the spine. Your mind will automatically move inward as you draw your limbs in toward your torso, which will help calm your thoughts, ease stress, and soothe anxiety.
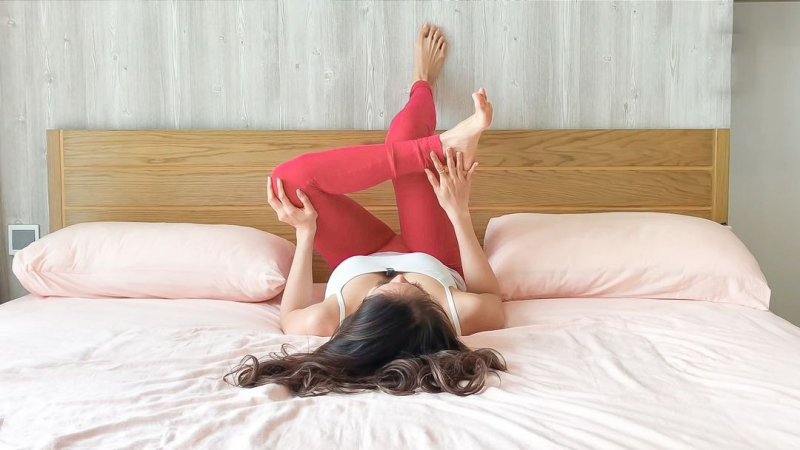
Photo: Do you Source: Do you -
Frog Pose is easily practiced by following these steps:
- Lower your elbows to the bed and open your knees to the side as far as you can and as comfortably as possible from the tabletop posture.
- Bend the knees and feet to a 90-degree angle.
- Maintain a straight line between your knees and hips. If you have a side mirror, you should be able to see your knees and hips form a straight line.
- To stretch the spine and shoulders, lower your chest and upper torso to the bed and reach your arms forward.
For added support and comfort, place a pillow or bolster beneath your chest. To enjoy the hip-opening advantages of the frog pose, draw the tailbone down toward the bed. - Close your eyes and concentrate on your hips and deep breathing. This is a more advanced hip-opening position, so stay within your comfort zone and do what feels right for you.
Frog pose, also known as Mandukasana, is a hip opener that stretches the inner thighs, hips, and groin. It also elongates the spine, opens the heart, and stretches the shoulders. Mandukasana, like other hip-opening positions, can help you relax and sleep better by lowering tension, anxiety, and moderate depression. Therefore, frog pose is one of the best yoga pose you can do in bed before you sleep.
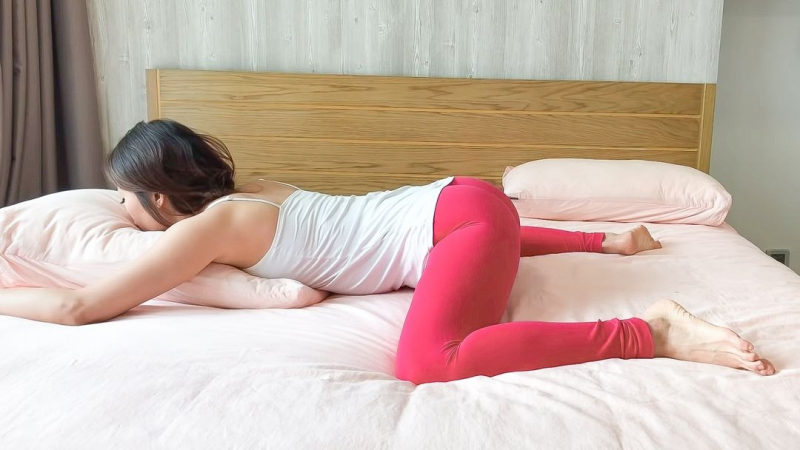
Photo: Do you Source: Adison Briana -
Rabbit pose can be done by following the below instruction:
- Begin by lying on your back with your knees on the bed and your buttocks on your heels.
- Lower your head to the front of your knees; the closer the crown of your head is to the knees, the better.
- Allow your forehead to touch your knees if you are able. With both palms facing in, firmly grasp your heels with both hands.
- Lift the hips away from the heels, round the back, and stretch the elbows. The stretch should be felt in the back of your neck and spine.
- Engage your core and round your back a little more with each exhalation.
Rabbit pose will help your brain and face receive more blood and oxygen. It helps to relieve stress while also providing a healthy glow to your face. The crunching position stimulates and strengthens your core while also correcting spine alignment by allowing space between the vertebrae. Rabbit posture, last but not least, opens the back of the heart chakra, promoting self-love and relieving stress and anxiety. It also helps for recent or chronic injuries to the knees, neck, spine, or shoulders.

Photo: Do you Source: Yoga with Adriene -
Reclined spinal twist is said to be one of the best yoga poses you can do in bed before sleep.
- First, you can begin by lying on your back with both legs stretched out in a Corpse posture.
- Hug your right knee against your chest and open your right arm to the side.
- Open your right shoulder to the side as you inhale, making sure it touches the bed.
- Bring your right knee to the left side as you exhale. Take a look at your right arm.
Next, move your hips all the way to the right before twisting and bringing your right knee to the left side to twist even more. - Instead of forcing the right knee down to the bed, suck the tummy in and maintain the right shoulder pressing down to avoid hurting your lower back.
- For more height and support, place a cushion under your right knee. Continue to breathe deeply while softly placing your left hand against your right thigh with each exhalation.
- On each side, switch sides and hold the stance for 2-5 minutes.
Beneficially, reclined spinal twist improves spine flexibility while also increasing digestion. It opens and expands the shoulders while also assisting in the correction of spinal alignment, making you feel more at ease as you lie in bed and sleep.
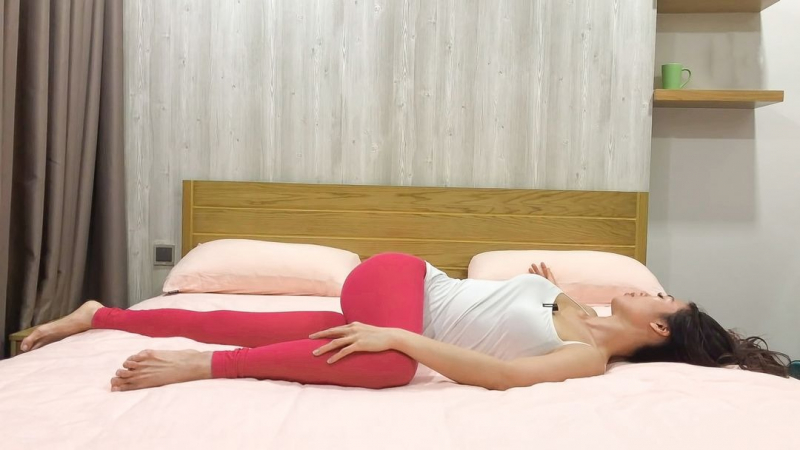
Photo: Do you 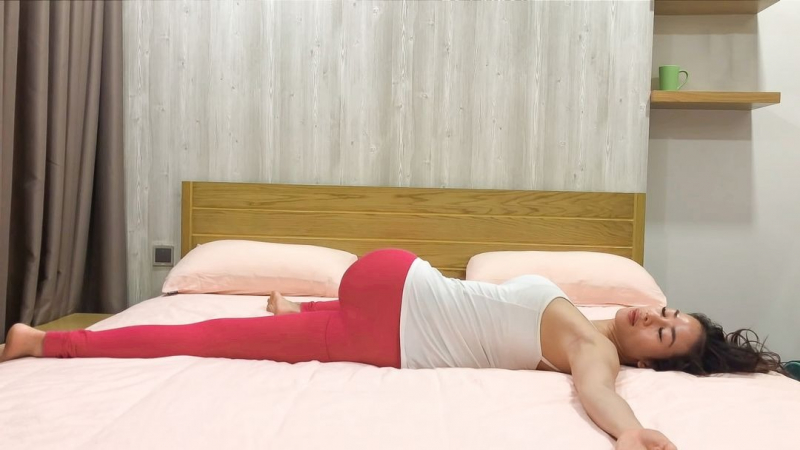
Photo: Do you -
When practicing the reclining bound angle, you can use 2-4 pillows to get more support and comfort:
- Place one pillow beneath your spine and another beneath your head. If the groin and hip stretch is too much for you, place a pillow beneath each knee.
Once you're ready, lay comfortably on your back, legs extended and arms at your sides, palms facing up. - Bend your knees and get your feet as near to your hips as your body will allow. If you're having trouble stretching your hips and inner thighs, simply lower your feet until you achieve a comfortable stretch.
- To facilitate deep breathing, lift your chest and make space between your shoulders. Your hips, knees, and shoulders should all naturally sink down.
- Hold this position for 5 to 15 minutes.
Hug your knees to your chest as you exit the pose to relieve your lower back. After that, lower your legs and stretch them out, and you're ready to sleep. Reclining bound angle helps you calm your mind and body while stretching your hips, groin, and shoulders. Try this quick and easy pattern that you can do right in bed to feel relaxed and blissed out while you drift off to sleep.
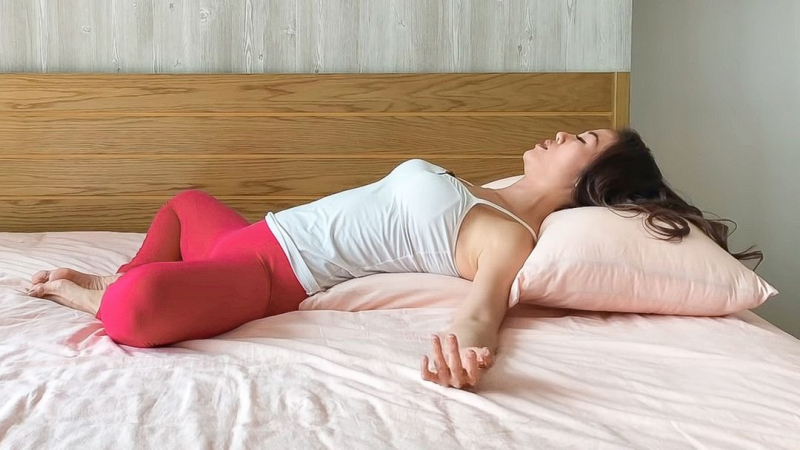
Photo: Do you Source: Noble Savage Yoga TM - Place one pillow beneath your spine and another beneath your head. If the groin and hip stretch is too much for you, place a pillow beneath each knee.
-
The Happy Baby pose (also known as Ananda Balasana) is a yoga and Pilates stretch. Because of its soft, calming action and numerous health advantages, the Happy Baby Pose is frequently incorporated into these two types of training. The pose is properly termed "happy baby" since you'll resemble a baby resting on its back when in this position - lying on your back and grasping your feet. Happy Baby Pose is a simple technique that is suitable for beginners. There are 4 steps to do the Happy Baby pose.
- First, on the floor or a mat, lie flat on your back.
- Secondly, bend your knees at a 90-degree angle toward your chest with your head flat on the mat. Turn your feet up toward the ceiling with the soles of your feet facing up.
- Thirdly, grab and grasp the inside or outside of your foot as you reach forward. Shift your knees toward your armpits by spreading them apart.
- Finally, gently rock from side to side while flexing your heels into your hand (like a happy baby). Hold this position for many breaths, deeply inhaling and expelling.
- The Happy Baby Pose stretches the inner thighs, hamstrings, and groin while also releasing the hips and back, increasing flexibility and mobility. It's one of the best yoga poses you can do in bed before you sleep.
Photo: Heathline Source: Yoga with Rachel -
To do the half-wheel pose, you can try the following steps:
- Start by lying down on your mat with your palms at your sides, knees bent, and soles of your feet on the mat about hip-width apart.
- Placing your palms flat against the carpet near your ears is a good place to start.
- Lift your glutes, lower back, and shoulders off the mat by pressing your palms into the mat and engaging the front of your legs, glutes, and shoulders.
- You can rest the crown of your head on the mat.
- Hold for up to 30 seconds in this position. Return your glutes to the mat and gradually return your palms to the starting position.
The half-wheel pose can improve blood circulation. The blood transports oxygen and nutrients throughout the body. As a result, appropriate flow is critical. The Half Wheel Pose increases blood flow throughout the body. The enhanced blood flow guarantees that the organs, muscles, tissues, and joints receive an adequate supply of oxygen and nutrients.
It also eases menstrual discomfort. The pose is thought to help with menstruation discomfort since it increases blood flow and strengthens muscles. Females can use this position to relieve pain and suffering by paying close attention to the subtleties.
Photo: Omegist Soure: Well+Good -
Knees to chest start by lying down on your back, knees and arms extended:
- Draw both of your knees to your chest as you exhale. Make a fist and wrap your hands around them.
- Wrap your forearms around your shins and grip each elbow with the opposite hand if feasible. Then maintain a flat back on the mat while allowing your shoulder blades to fall toward your waist as you relax. Increase the width of your collarbones.
- Draw your tailbone and sacrum down toward the mat to further stretch your spine.
- Softly rock back and forth or side-to-side for a light spinal massage if it is comfortable for you.
- Next, tuck your chin in slightly and look along your body's center line. Hold the position for up to one minute.
- Maintain a smooth and uniform breathing pattern. Release and extend both legs along the floor with an exhalation, then rest. Do again six times more.
If you're recovering from abdominal surgery or a hernia, the knees to chest pose is not for you. If you have a spinal, knee, or hip ailment, stay away from this pose. Do not elevate your head if you have a neck injury. After the first trimester, pregnant women should avoid doing this pose. Always stay within your own capabilities and restrictions. Before doing yoga, see your doctor if you have any medical problems.
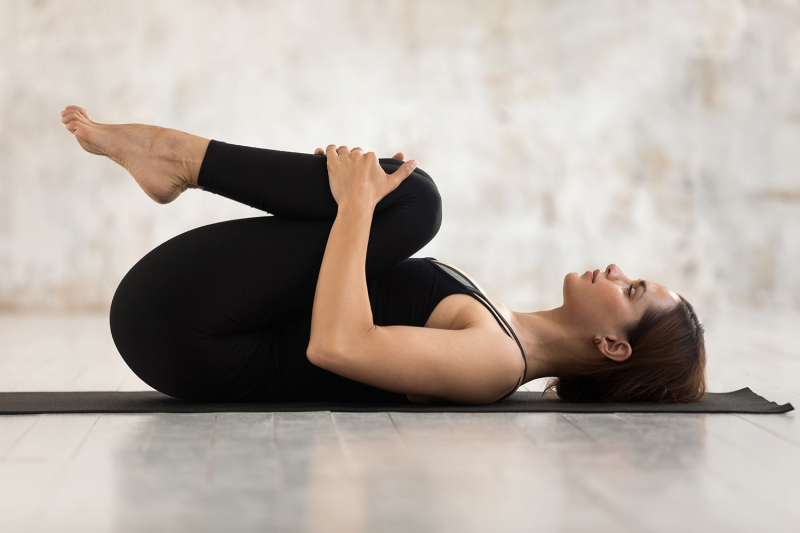
Photo: Fitgenic Source: Yoga Screen -
Pigeon pose is extremely beneficial for loosening tight hips and hip flexors.
- Extend your left leg behind you while bending your right knee. Arc your back gently by placing your hands on your hips.
- Fold your torso over your front leg to make this pose more comfortable. Rest your head on your forearms and rest your arms on the bed.
- Hold for five breaths (or more if you prefer it), then switch to the left knee in front and repeat Pigeon.
When done correctly, the pigeon pose can help to develop hip flexor and lower back muscular flexibility while also benefiting digestion. Some people also believe it can help with mental tension and anxiety.
When performing this stance, there are some safety issues to bear in mind. You can induce stress, strain, or damage if you try to practice mermaid pose when your body isn't open enough. If you suffer tightness or soreness in any part of your body, don't force yourself into the posture. It's preferable to gradually work your way up to the full expression of the mermaid pose rather than forcing your body into any position that could jeopardize your alignment or safety. Please note that this pose can vary as your body changes from day to day. It may be much easier on one side of your body.
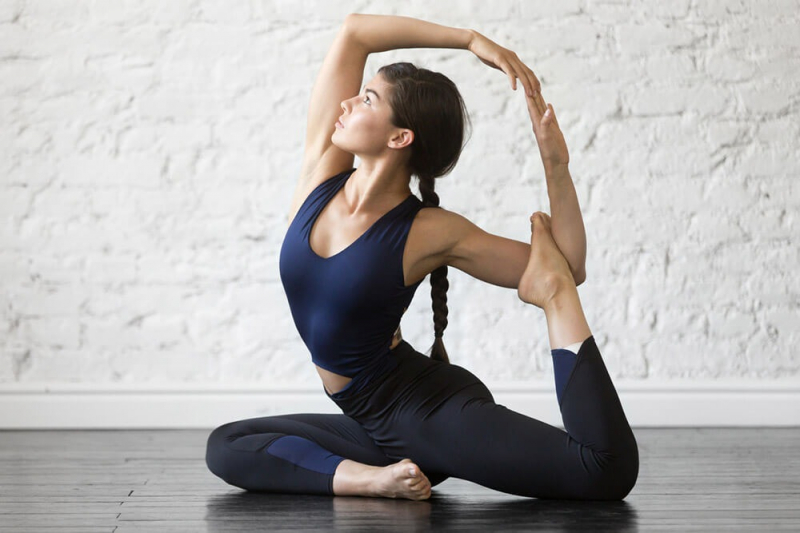
Photo: Yogapedia Source: Well+Good