Check Windows Search and Disable SysMain

Need to check if the Windows Search error is an error that leads to increased disk load due to search problems.
To check and prevent, you need to do the following:
- Right-click on Start.
- Click Windows PowerShell (Admin).
- Entering net.exe stops "Windows Search".
=> Helps solve most problems. If there are no changes, immediately after restarting, you can permanently disable Windows Search and Indexing.To turn it off completely, do the following:
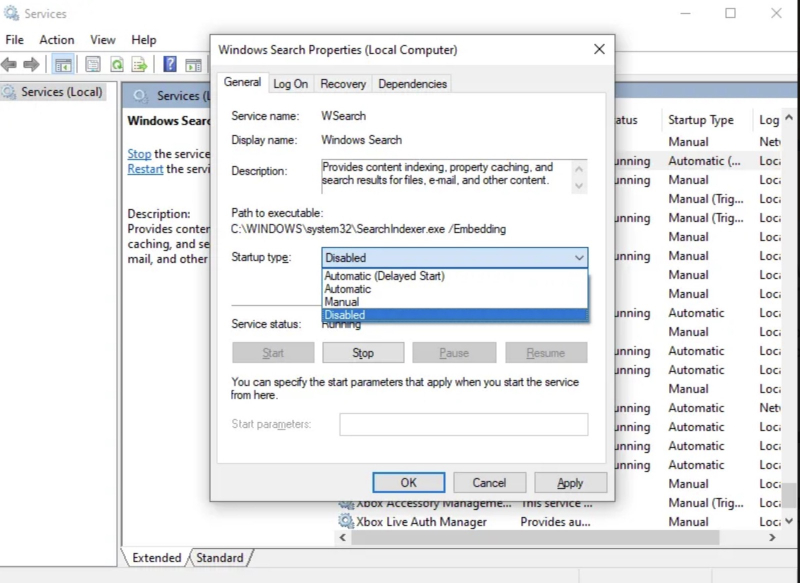
- Press WIN + R.
- Type msc, then click OK.
- In the Services window that opens, find Windows Search and double-click to open it.
- In Windows Search Properties, find the Startup type and select Disable.
- Or you click Stop to cancel the service
- Click OK to save your changes.
=> Moments after turning off Windows Search, your Windows 10 performance will improve significantly.
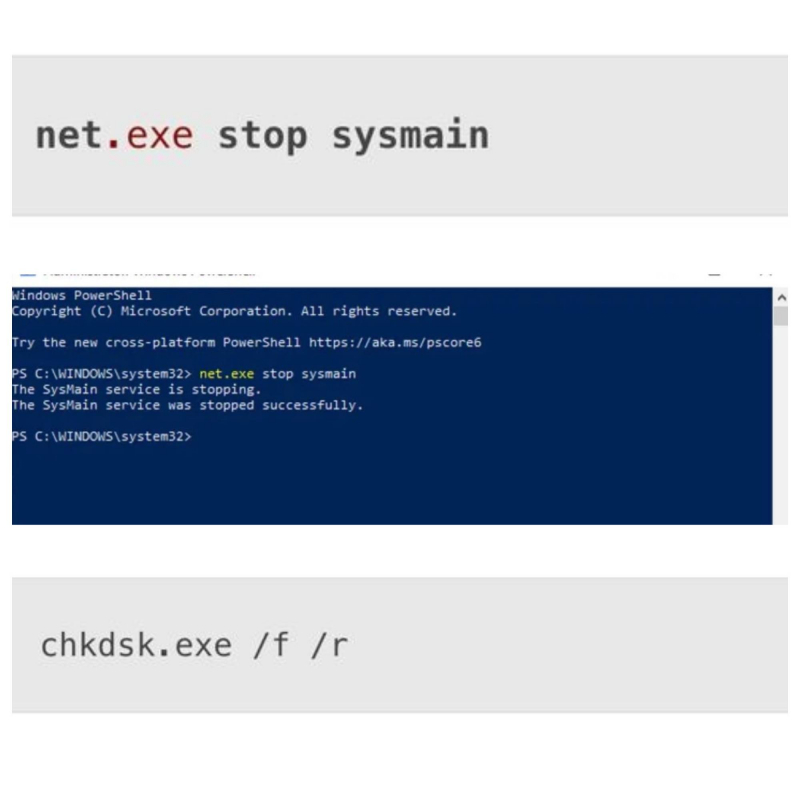
The SuperFetch service is called "SysMain". Is the service that causes disk usage problems in Windows 10.
- To prevent this service from causing disk usage problems, open another Windows PowerShell (Admin) and enter: net.exe stop sysmain. A series of data will appear for you to check.
- You run Check Disk in PowerShell. By typing chkdsk.exe /f /r
- It does not say that your PC must be restarted for Check Disk to complete, so make sure you have closed all your applications first.