Reset Virtual Memory

Windows will use virtual memory to save files when RAM is not running enough processes and continuously switches between virtual memory and RAM. If the RAM is too small, leading to full hard drive errors, you need to delete virtual memory. Virtual memory is a combination of RAM and hard drive. If not ignored, it will cause the hard drive to overwork.
To reset virtual memory to resolve the 100% disk usage issue, you should do the following:
- Press Windows + Break/Pause
- On the right, find and click Advanced System Settings
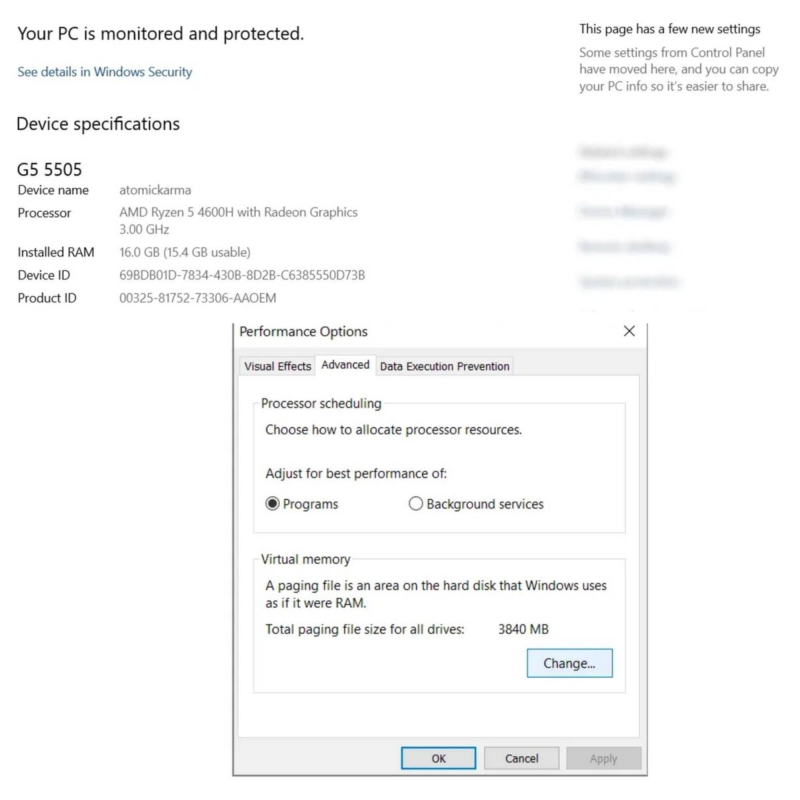
- In the Advanced tab, go to Performance > Settings
- Select the new Advanced tab
- In the section labeled Virtual Memory, click Change
- Uncheck the Automatically manage paging file size for all drives check box
- Next, select the Windows drive (usually C:) and select Custom size
- Add initial size and maximum size; note both are measured in MB, not GB
- After entering the values, press Set then OK to continue
- These numbers can be confusing, so for the first value, rely on the recommended option. For maximum value, aim for no more than 1.5 times your system RAM.
The next step is to delete the temporary files that were used in the previous virtual memory allocation:
- Open Run with WIN+R
- Enter the temperature and press OK
- In the temporary folder, select all files with Ctrl+A and press Delete