Top 6 Best Ways to Fix Time Wrong on Win10/11

Windows 10 and 11 both have built-in tools to automatically sync the system time with a time server and ensure its accuracy. However, sometimes the time on ... read more...your computer may be incorrect, which can lead to issues with scheduling, file timestamps, and other time-dependent tasks. Toplist has scanned some of the best ways to fix the time on your Windows 10 or 11 that you can do it.
-
Syncing your Windows clock manually allows you to ensure an accurate time display. Fix it manually through the Date and Time settings on your laptop computer.
Step 1: Open the Date & Time Settings
- Click on the Start button and select the Settings gear icon. In the Settings app, click on "Time & Language," then choose "Date & Time" from the left sidebar.
Step 2: Sync the Windows Clock
- In the Date & Time section, toggle the "Set time automatically" switch to Off, if it's already On. Click on the "Sync now" button to manually synchronize your computer clock.
Step 3: Adjust Time Zone
- Scroll down to the "Time zone" section and click on the drop-down menu. Select your desired time zone from the list.
Step 4: Change Time Format
- If needed, click on the "Change date and time formats" link below the time zone settings. Choose between the 12-hour or 24-hour clock format.
By following these simple steps in the date and time screen, you can easily fix time discrepancies on your Windows 10 or 11 computer.
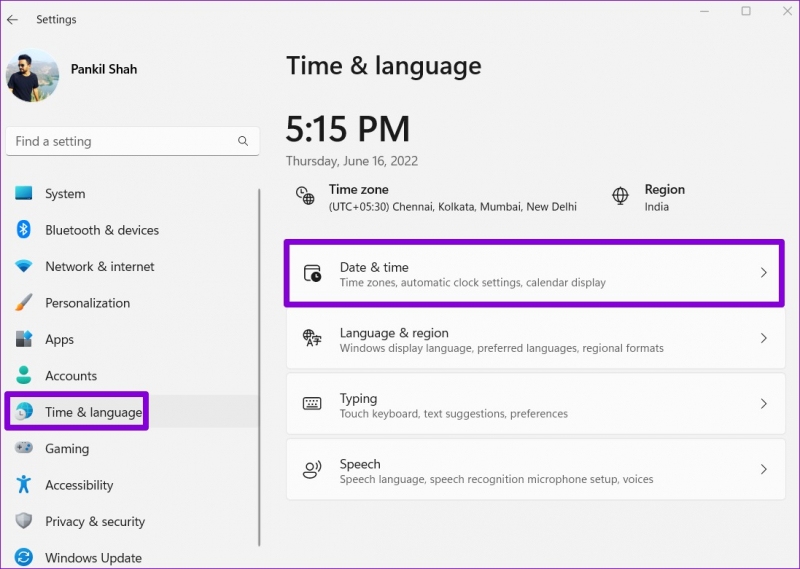
Image via www.guidingtech.com/ 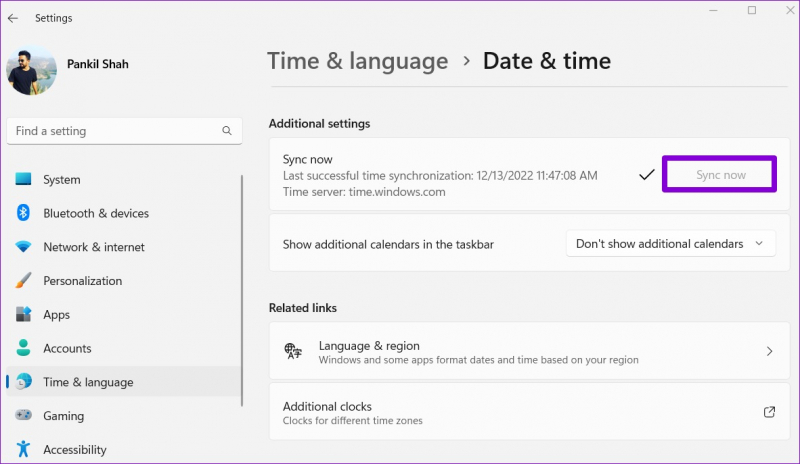
Image via www.guidingtech.com/ -
To enable automatic time synchronization on your Windows computer, follow these steps for accurate time syncing:
Step 1: Open the Settings Menu
- Click on the Start button and choose the Settings option on your Windows computer.
Step 2: Access the Date & Time Settings
- From the Windows Settings menu, select the "Time & Language" category. In the left-hand sidebar, click on "Date & Time" to access the date and time settings.
Step 3: Enable Automatic Time Synchronization
- In the "Date & Time" settings, toggle the "Set time automatically" button to the ON position. Windows will then automatically sync the time with the Microsoft Time server.
Step 4: Adjust the Time Zone and Format
- To change the time zone, click on the "Change" button under the Time Zone section. Select your desired time zone from the drop-down menu. Additionally, you can customize the time format to a 12-hour or 24-hour clock.
Step 5: Verify and Update Date & Time
- Go back to the "Date & Time" screen and check if the time is now displaying correctly. If not, click on the "Sync now" button to manually sync the time.
Enabling automatic time synchronization, selecting the correct time zone, and adjusting the date and time formats will ensure your computer's clock is accurate and up-to-date. Take control of your computer clock and enjoy accurate timekeeping on your Windows device!
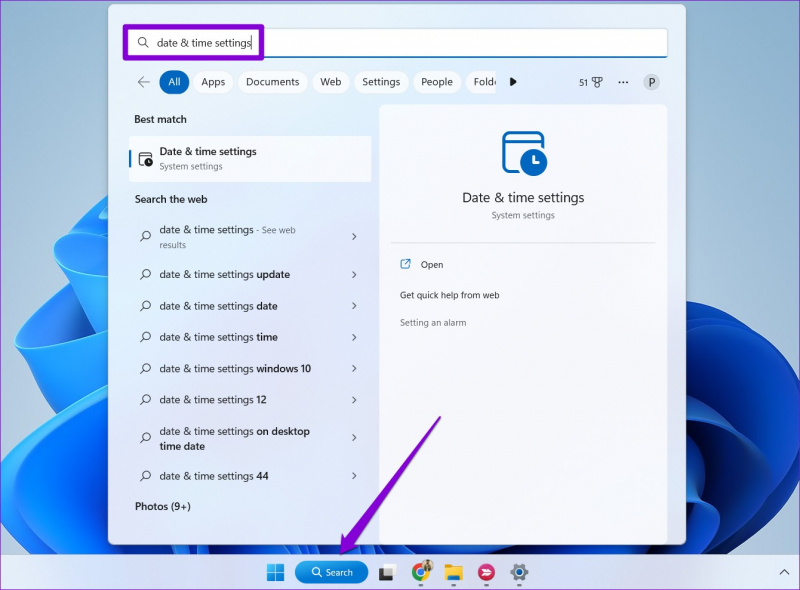
Image via www.guidingtech.com/ 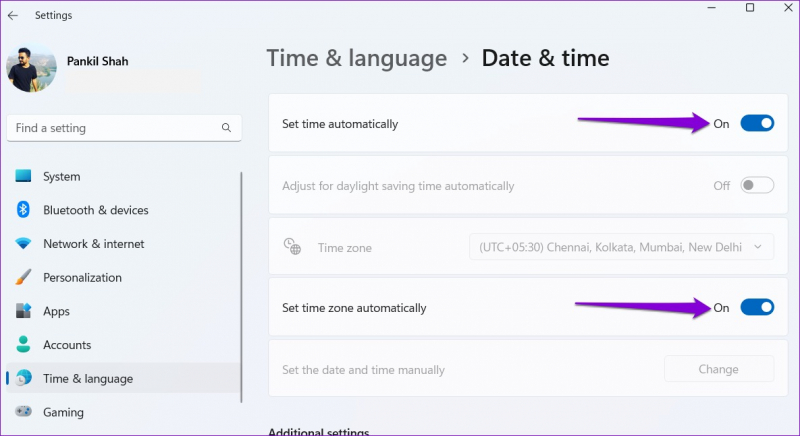
Image via www.guidingtech.com/ -
When encountering issues with time synchronization on your Windows 10 or 11 computer, using another internet time server can be an effective way to resolve the problem. Here are the steps to guide you through this process:
Step 1: Open the Date and Time Settings
- Click on the clock located in the taskbar. Select "Date and time settings" from the drop-down menu.
Step 2: Adjust the Time Zone and Region
- In the "Date & Time" settings window, click on "Change" under the "Date and Time" section. Set the correct time zone for your location.
Step 3: Change Date and Time
- Under the "Time" section, toggle off the "Set time automatically" option. Click on "Change" and manually set the correct date and time using the provided fields.
Step 4: Use Another Internet Time Server
- To ensure accurate time synchronization, click on "Sync now" to use the default internet time server. If the default server fails, click on "Server" and select an alternative server from the drop-down menu.
Step 5: Apply Changes and Restart
- Click on "OK" to save the changes and exit the Date and Time Settings window. Restart your computer for the changes to take effect.
With these straightforward steps, you can quickly resolve the issue of incorrect time on your Windows 10/11 laptop computer. Ensure your computer clock stays accurate and synchronized, allowing you to stay on top of your schedule effortlessly.
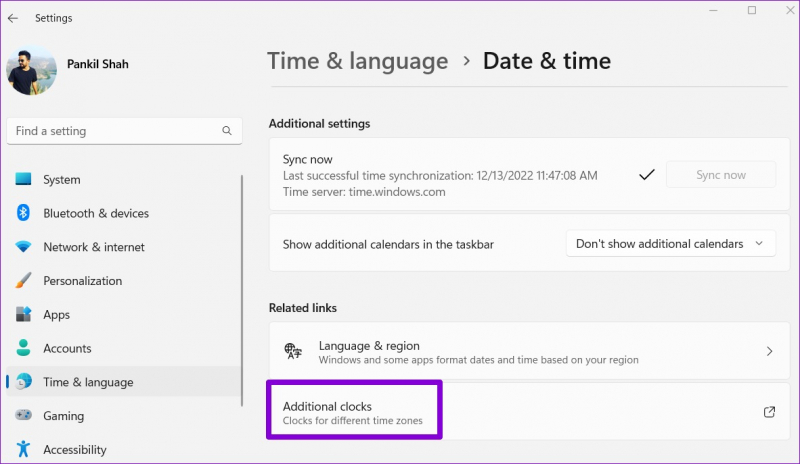
Image via www.guidingtech.com/ 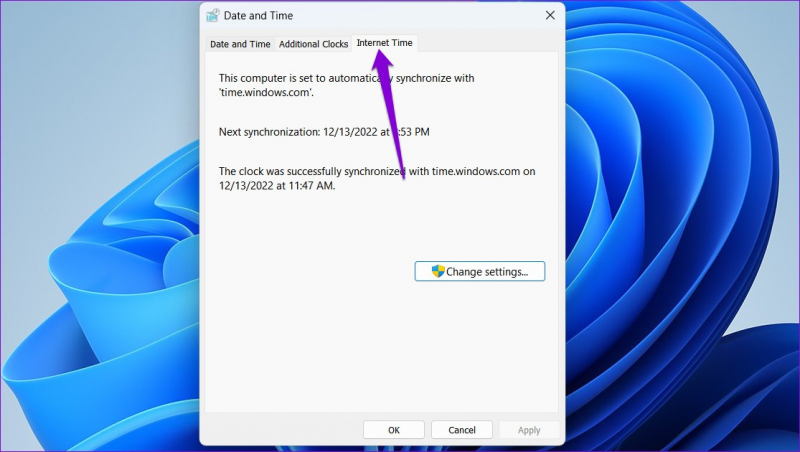
Image via www.guidingtech.com/ -
When leveraging PowerShell to force time sync for maintaining precise time across networks and servers, the following steps offer a quick and powerful solution:
Step 1: Launch Windows PowerShell
- To begin, press the Windows key and type "PowerShell." Then, right-click on "Windows PowerShell" and choose "Run as administrator."
Step 2: Re-register the Windows Time service
- In the PowerShell window, type "w32tm /resync /rediscover" and press Enter. This command re-registers the Windows Time service and triggers the synchronization process.
Step 3: Verify time synchronization
- Open the "Date and Time" screen by right-clicking the clock on the taskbar and selecting "Adjust date/time." Ensure the "Set time automatically" option is enabled.
Step 4: Adjust time zone and date formats
- To change the time zone, click on "Change time zone" and select the appropriate option. To modify the date and time formats, scroll down and click on "Change date and time formats."
By following this guide, you can ensure that your computer's time is synchronized correctly, which is essential for seamless operations and reliable timestamping.
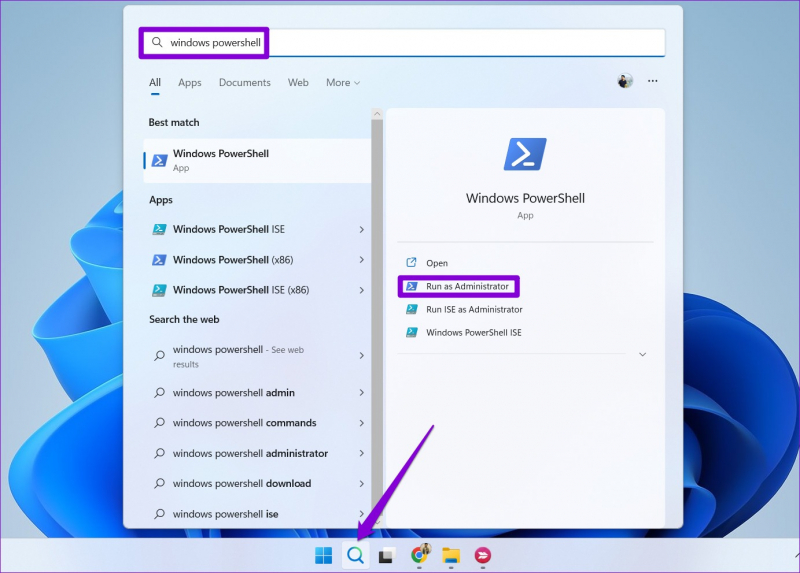
Image via www.guidingtech.com/ 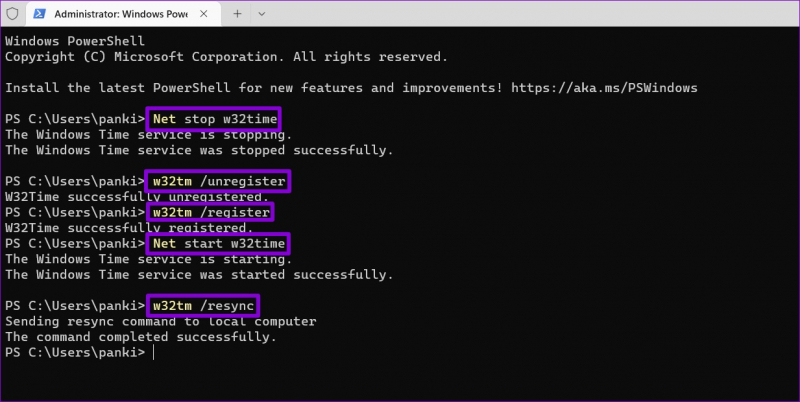
Image via www.guidingtech.com/ -
The CMOS battery serves a crucial role in maintaining accurate time and system settings on a computer. To ensure the correct time and date settings on your Windows computer, follow these steps:
Step 1: Open the Date and Time Settings
- Navigate to the Windows taskbar, right-click on the clock, and select "Adjust date/time" or "Date and time settings" from the drop-down menu.
Step 2: Correct Time Zone and Date
- On the "Date & Time" screen, ensure the correct time zone is selected. Click on the "Change" button to adjust the date and time if necessary.
Step 3: Enable Automatic Time Synchronization
- Toggle on the "Set time automatically" option to synchronize the time with the Internet time servers, ensuring accuracy.
Step 4: Verify 24-Hour and 12-Hour Clock Formats
- If you prefer a specific clock format, click on the "Change date and time formats" link. Here, you can select either the 24-hour clock or the 12-hour clock format based on your preference.
Step 5: CMOS Battery Check (Optional)
- If the time issue persists despite following the above steps, it could be due to a faulty CMOS battery. Consider consulting a professional technician to diagnose and replace the battery if necessary.
Remember to regularly check your CMOS battery for potential replacement to avoid recurring time inaccuracies.
Image by Christian Wiediger via unplash.com 
Image by Olivier Collet via unplash.com -
To configure the Windows time source for accurate time synchronization, follow these steps:
Step 1: Accessing the Date and Time Screen
- You can access the Date and Time settings by clicking on the clock on the Windows taskbar and selecting "Date and time settings" or by right-clicking on the clock and choosing "Adjust date/time."
Step 2: Selecting the Correct Time Zone
- Once on the Date & Time screen, locate the "Time zone" section and click on the drop-down menu to select the correct time zone from the list provided.
Step 3: Setting the Correct Date and Time
- Under the "Date & time" section, ensure that the toggle switch for "Set time automatically" is turned on. This allows your computer to synchronize with the time server and automatically set the accurate time and date.
Step 4: Configuring the Time Server
- If the automatic time synchronization is not working correctly, you can configure the time source manually. Scroll down to the "Additional date, time & regional settings" section and click on "Set the time and date." This will open the Control Panel.
Step 5: Configuring Windows Server Time Source
- In the Control Panel window, select the "Date and Time" option, navigate to the "Internet Time" tab, and click on "Change settings." Check the box next to "Synchronize with an Internet time server" and choose a server from the drop-down menu. Click "Update now" and then "OK" to save the changes.
By following these steps, you can ensure that your computer clock, whether it's a 24-hour clock on a desktop or laptop computer, displays the correct date and time in both the date and time settings and on the taskbar.
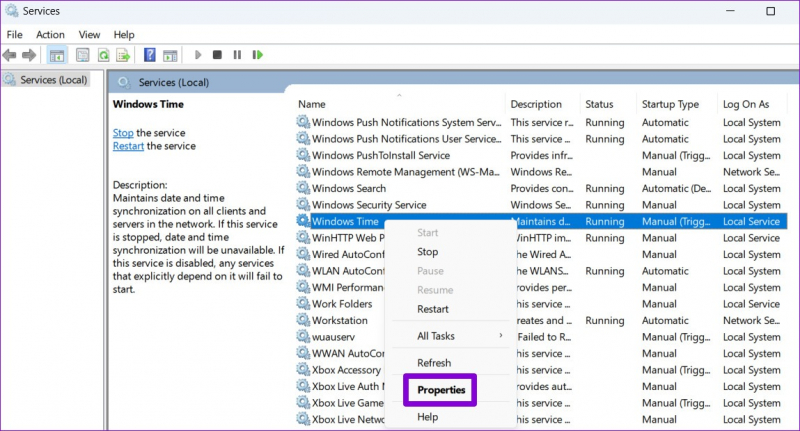
Image via www.guidingtech.com/ 
Image via www.guidingtech.com/