Top 9 Best Ways to Fix the Troubleshooters Not Working in Windows 10 & 11

When users encounter problems on Windows 11/10, they often use the built-in troubleshooter in Settings to resolve the issue. However, sometimes an error ... read more...message appears, such as "An error occurred while troubleshooting" or "An error occurred while loading the troubleshooter," rendering the troubleshooter ineffective. Here is how Toplist brings you to fix the troubleshooter not working error on Windows 11/10.
-
Users have reported that using the system image and file repair tool helped them fix the problem when the troubleshooting tools on Windows 11/10 were not working. Specifically, using the System File Checker is an effective way to fix system file errors via the command line.
Here's how to do error checking on Windows:
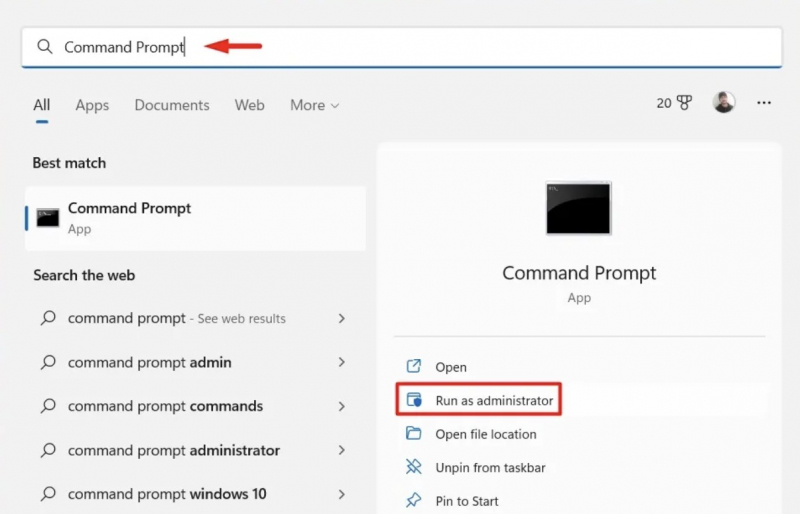
- Press the key combination Win + S to open Windows Search.
- Type Command Prompt in the search box.
- The search results will display the Command Prompt. Right-click and select Run as administrator.
- When the UAC prompt appears, click Yes to allow the administrator to make changes.
- In the opened Command Prompt window, enter the following command: SFC /scannow.
- Press the Enter key to start the process of scanning and fixing errors on your system.
Scan and Repair System Files 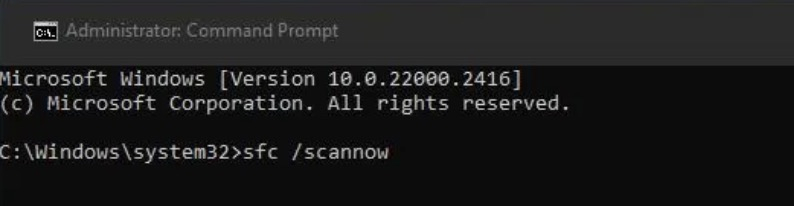
Scan and Repair System Files -
If the Windows Troubleshooter stops working, it may be because important services are turned off or not running. Enabling and starting services such as Cryptographic Services, Windows Update, BITS, and Windows Installer may resolve the issue.
How to proceed is as follows:
- Open the application management service.
- Click on Cryptographic Services to display the settings window.
- Tap the Startup type drop-down menu and select Automatic installation if choosing another option.
- Next, select the Start option to run the service.
- Tap the Apply option and click OK to set your settings.
- Windows Update, Windows Installer, and similar platform transport services also follow this step.
- If all services are running and set to automatic mode, restart the computer and check if the issues are resolved.
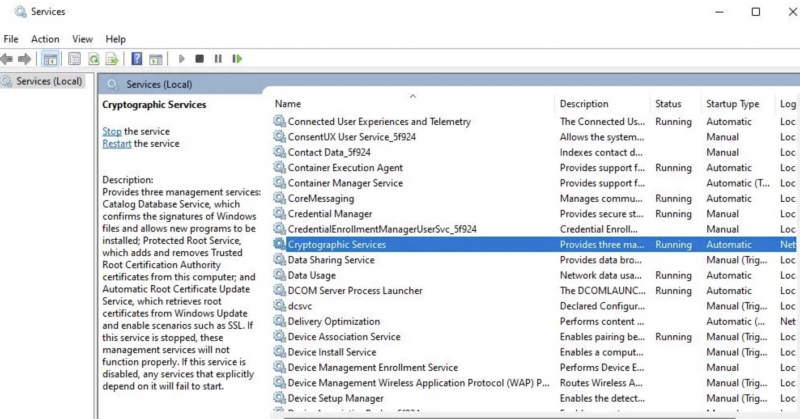
Enable or Restart Required Services 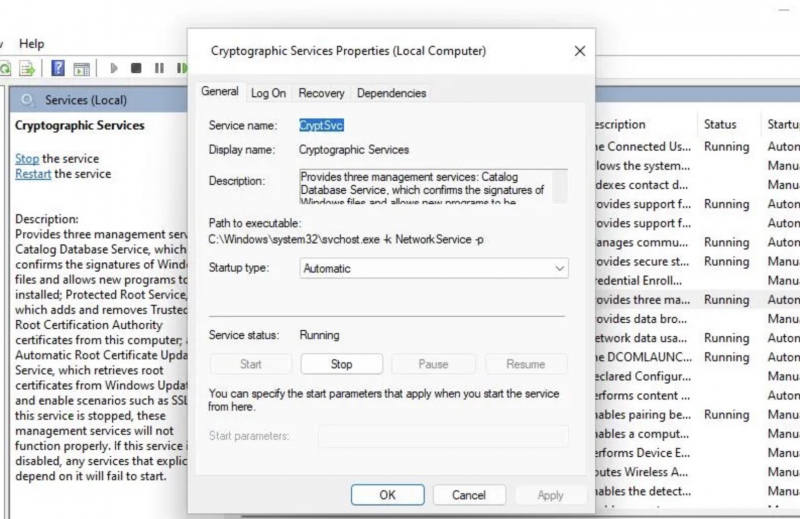
Enable or Restart Required Services -
To resolve network issues, and especially useful for troubleshooting Windows Update, you can execute the following two commands to clear the DNS cache and reset the Winsock catalog.
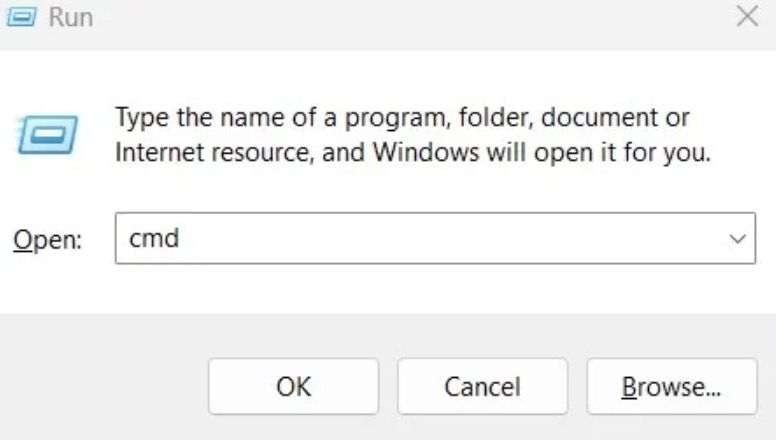
- Open the Command Prompt by pressing Win + R on your keyboard > In the Run dialog box, type “cmd” in the field > then press Ctrl + Shift + Enter.
- Once you get the Command Prompt screen, enter and execute this command to flush the DNS cache: ipconfig /flushdns > press Enter.
- To reset Winsock, execute this command then enter: netsh winsock reset > press Enter.
Flush the DNS Cache and Reset the Winsock Catalog 
Flush the DNS Cache and Reset the Winsock Catalog -
Sometimes, security software programs may include firewalls that can obstruct Windows troubleshooters from establishing a connection with Microsoft servers. If you have a third-party security app installed on your PC, it's advisable to disable the software's firewall feature to ensure it doesn't interfere with Windows troubleshooters. After disabling the firewall component, try running the troubleshooter again to check if it works properly.

Image by Lisa Fotios via pexels.com 
Image by Bich Tran via pexels.com -
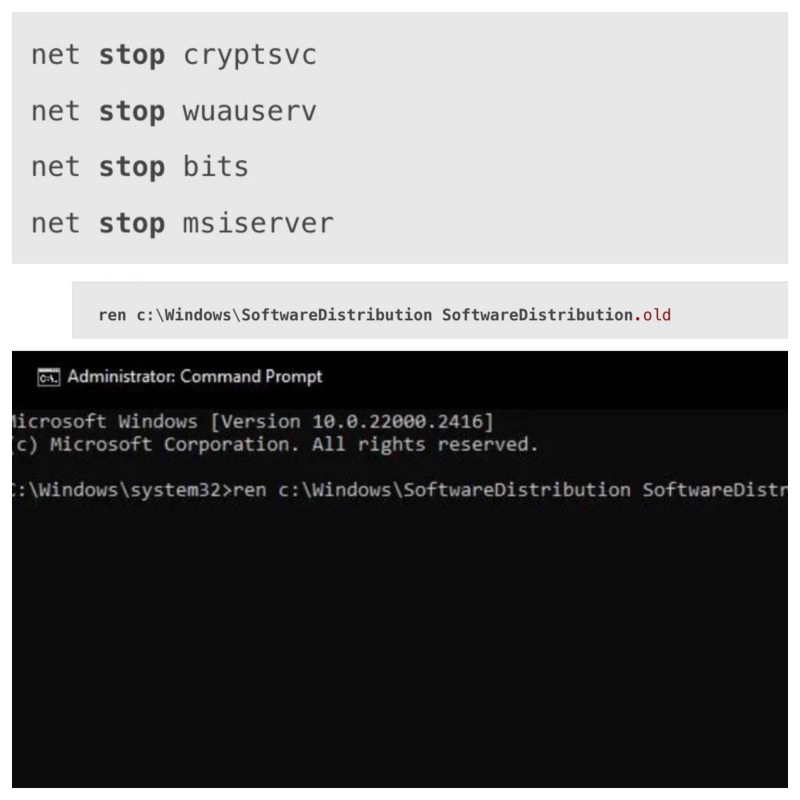
If you are experiencing issues with the Windows Update troubleshooter, one solution to consider is renaming the catroot2 and SoftwareDistribution folders. These folders contain data pertaining to Windows updates and renaming them has been known to resolve issues that prevent the troubleshooter from functioning properly.
Simply follow these steps to rename the folders:
- Launch the Command Prompt app as administrator.
- Input four commands, pressing Enter after each, to stop update services: net stop cryptsvc, net stop wuauserv, net stop bits, and net stop msiserver.
- Next, input this command > hit Return to rename the SoftwareDistribution folder: ren c:\Windows\SoftwareDistribution SoftwareDistribution.old
- Enter this command for renaming the catroot2 folder and press Return: ren c:\Windows\System32\catroot2 catroot2.old
- Restart services by entering and executing these commands: net start cryptsvc, net start wuauserv, net start bits and net start msiserver.
Rename the Catroot2 and SoftwareDistribution Folders 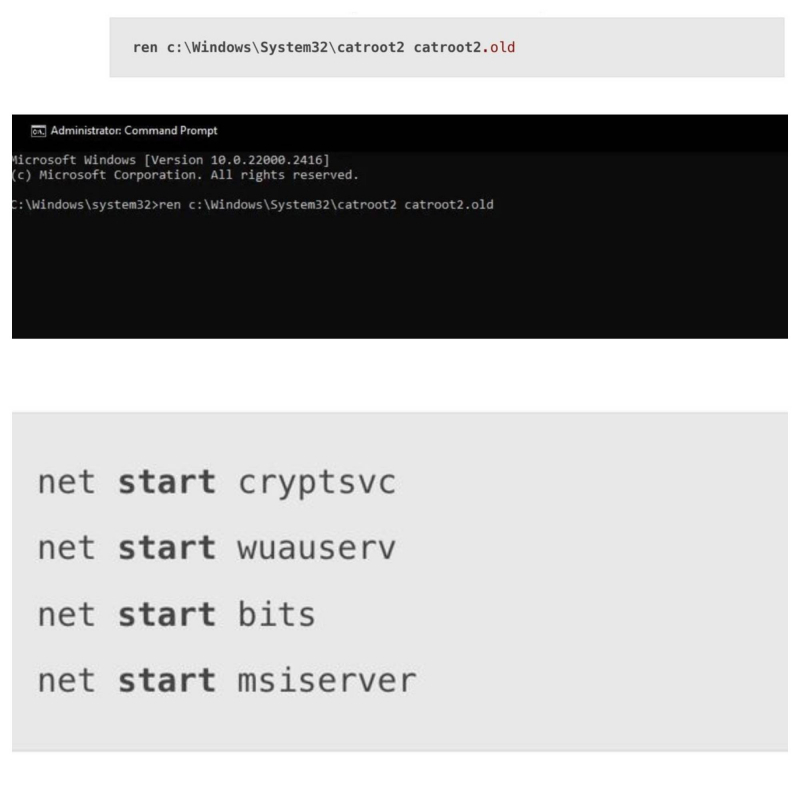
Rename the Catroot2 and SoftwareDistribution Folders -
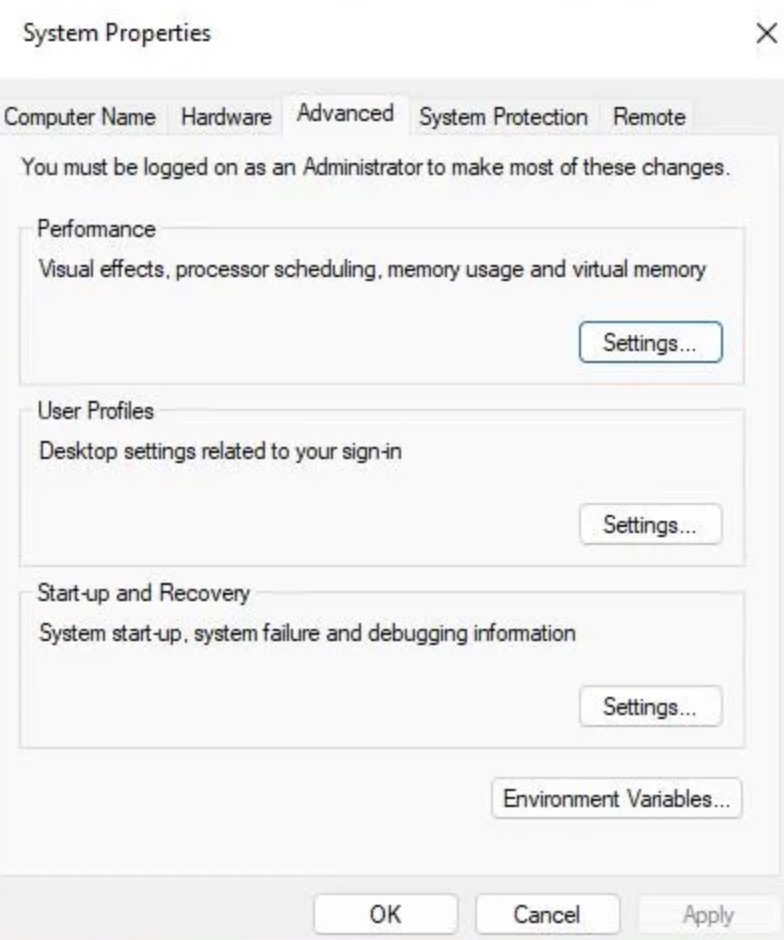
Troubleshooter problems can also arise when the TEMP and TMP environment variables are changed from their default values. To resolve this issue, set the TMP and TEMP environment variables to their default values as follows:
- Press the Windows key + S keyboard button to open the file finder with
- Enter advanced system settings in the search box.
- Click View Advanced System settings > System Properties window appears.
- Press the Environment Variables button on the Advanced tab.
- Check the TEMP and TMP values in the System variables box. If they are not set to C:\Windows\Temp, then proceed to edit their values.
- Double-click TEMP in the System Variables box.
- Delete the text in the Variable value box. Then enter %SystemRoot%\TEMP inside the Variable value box.
- Click OK on the Edit System Variables window.
- Repeat the previous three steps for the TMP variable.
- Select OK on the Environment Variables window.
Modify TEMP and TMP Environment Variables 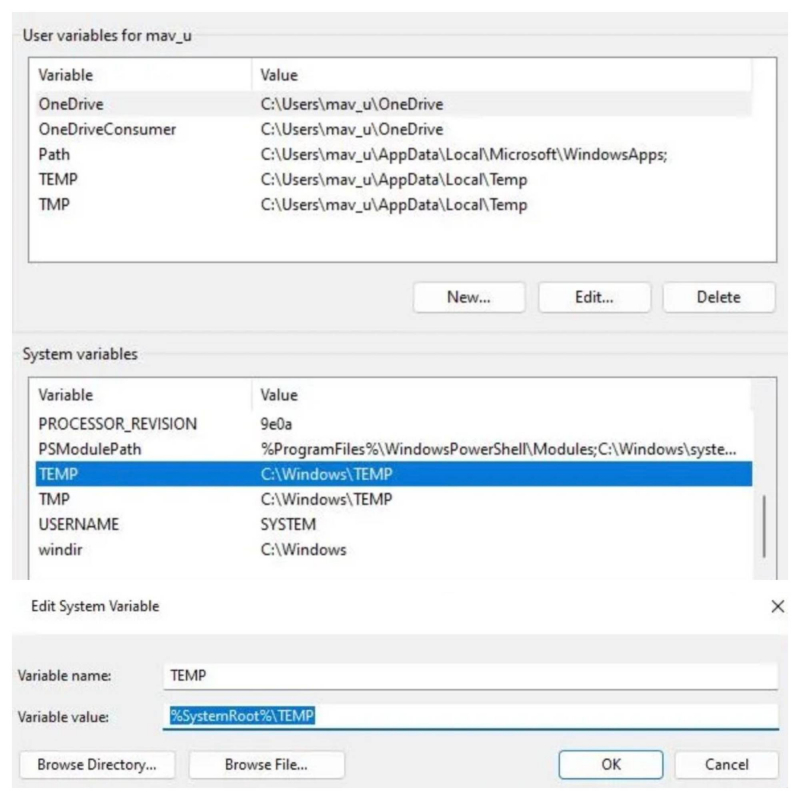
Modify TEMP and TMP Environment Variables -
It is possible to disable the Windows troubleshooter using the local group policy editor. If you are using Windows 10 Pro or Enterprise and are receiving an error message saying that troubleshooting has been turned off, it is likely that Group Policy has disabled the troubleshooter.
To open the Local Group Policy Editor, follow these steps:
- Open Local Group Policy Editor and double-click Computer Configuration in the utility.
- Double-click Administrative Templates, then System, and then Troubleshooting and Diagnostics.
- Double-click Scripted Diagnostics to view the policy settings for troubleshooting.
- Double-click the Troubleshooting policy: Allows users to access and run the Troubleshooting Wizard policy.
- If the policy is disabled, click Enabled to re-enable the troubleshooter.
- Press the Apply and OK buttons.
- Repeat steps 4-6 for Troubleshooting: Allow users to access online troubleshooting content and Configure Security Policy for Scripted Diagnostic policies.
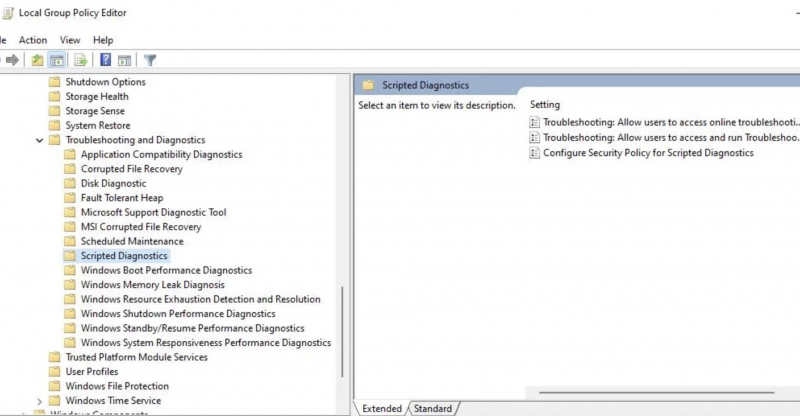
Enable Troubleshooters in Group Policy Editor 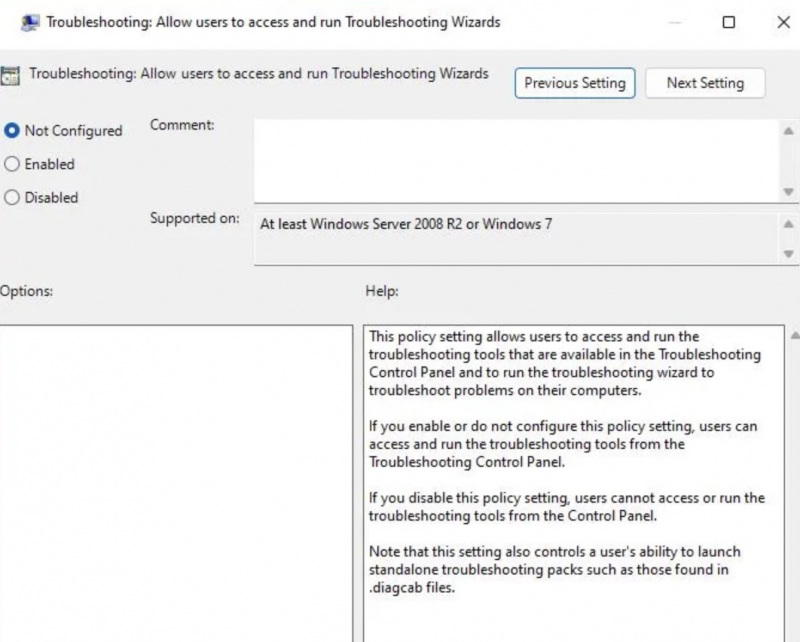
Enable Troubleshooters in Group Policy Editor -
System Restore is a powerful utility that can help you undo system changes by returning Windows to an earlier point in time. This tool can be especially helpful in fixing issues that caused the troubleshooter to fail. Depending on the situation, choosing a restore point can bring Windows back to a state where you can use all the troubleshooters without any issues.
When selecting a restore point, Windows will take you back to a time when all troubleshooters were working on your PC. If you're unsure which restore point to choose, it's recommended to go with the oldest one available.
To perform a system restore on Windows, follow these steps:
- Press the Win key and type "system restore".
- Then Click "Create a restore point" to open the System Properties dialog box.
- You see System Properties, open the "System Protection" tab.
- Click System Restore.
- Or, press Win + R to open Run, enter rstrui.exe and click OK to open System Restore.
- Click Next. Select the restore point you want. Choose more or less depending on your System Restore settings.
- To see all available restore points, click Show more restore points.
- Select the restore point and click Scan for affected programs to see the programs and drivers that will be affected. Then click Close.
- Make sure the correct restore point is selected and click Next.
- In the confirmation dialog, read the terms and descriptions carefully.
- Click Finish to begin the recovery process.
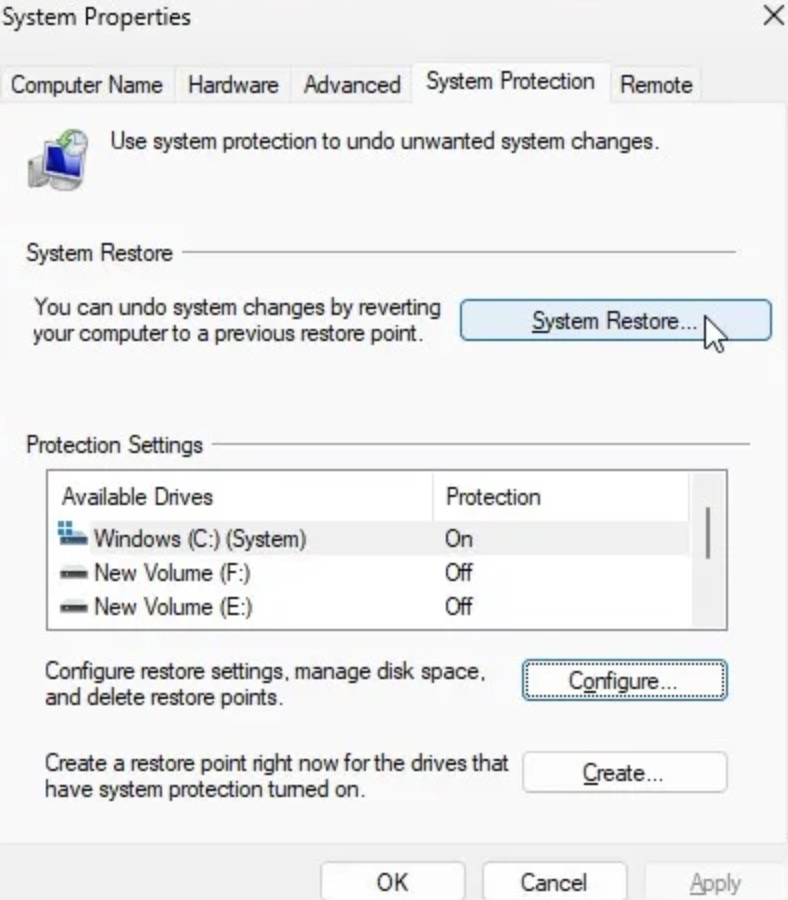
Utilize the System Restore Tool 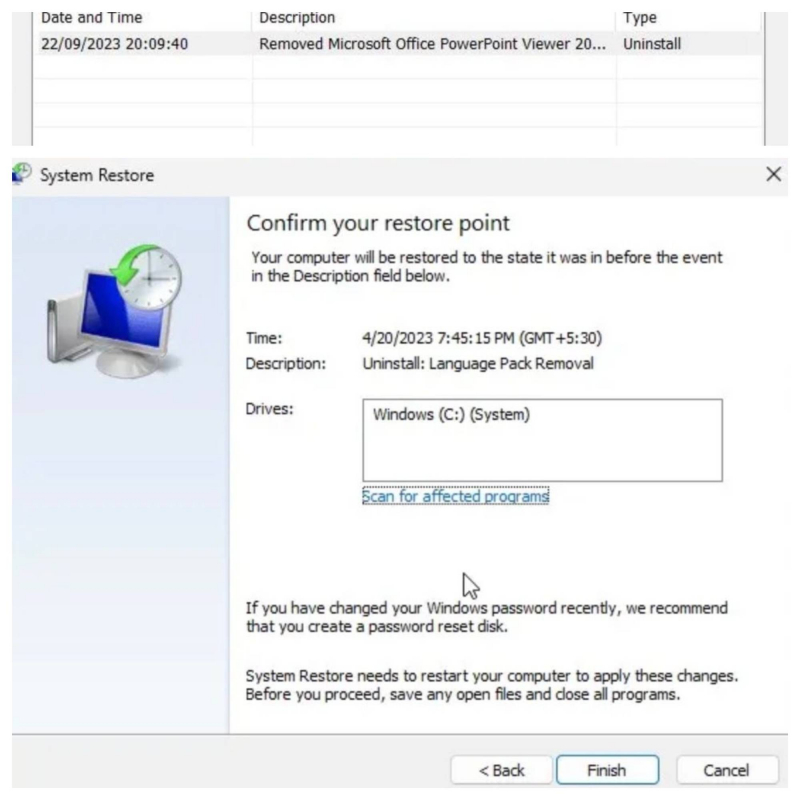
Utilize the System Restore Tool -
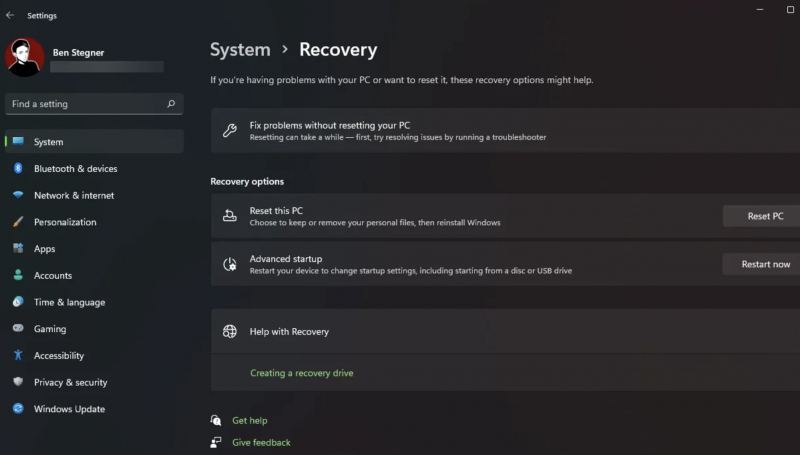
If troubleshooters persistently fail to function even after attempting the suggested solutions, the last resort is to consider a Windows reset. While this may seem like a drastic measure for troubleshooter issues, performing a reset can effectively address underlying system issues that might be affecting their functionality. It's essential to note that this potential resolution will erase all the software and applications you've installed.
To execute this solution, you can utilize the Reset this PC tool, as detailed in our guide on how to factory reset Windows.
When using this tool:
- Options for Keep my files to preserve your user files.
- Additionally, ensure the Restore preinstalled apps option is set to Yes to retain the preinstalled software.
Remember, before proceeding with a Windows reset, back up any crucial data to avoid permanent loss. While it may involve a bit more effort, this approach ensures a comprehensive resolution to potential system issues affecting troubleshooters.
Factory Reset Your Windows PC 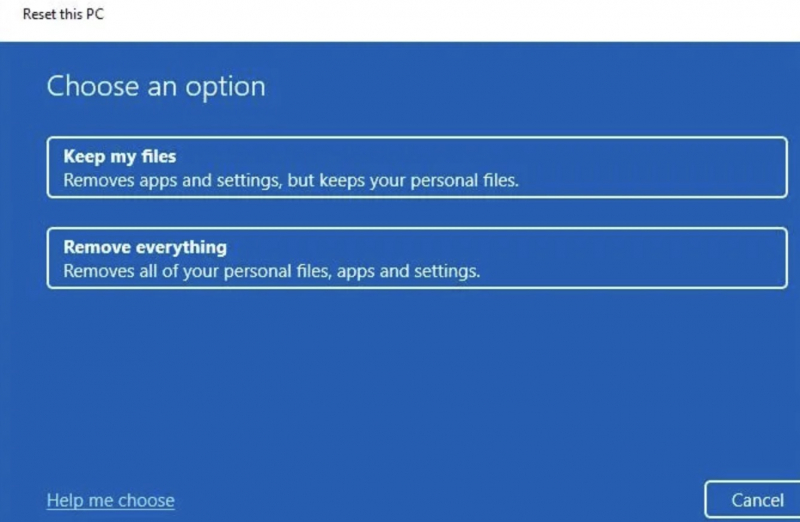
Factory Reset Your Windows PC