Top 10 Best Ways to Fix the "Disk Is Write Protected" USB Drive Error

You are looking to store both work and study files on a USB flash drive. However, after archiving the files, you receive an error message that says "The disk ... read more...is write-protected. Please remove the write protection or use another disk". This error is preventing you from copying, deleting, or modifying files on the USB drive. Now, you need to repair your USB drive. Fortunately, Toplist has provided some simple ways to fix write protection on USB drives. You can refer to their article for more information.
-
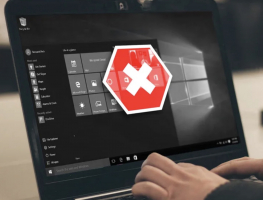
It is important to remember to scan for viruses when you plug a USB into your computer. This action helps to protect your computer and files more securely.
Viruses can often fill your USB drive with meaningless files, which may cause your drive to respond with a Write Protected error:
- You can manually configure the software to automatically scan the USB drive when it is plugged in for the first time to protect against viruses.
- Or you can navigate to the USB drive in Windows Explorer, right-click, and force a manual virus scan.
If you suspect that your system has been infected with a virus, it is important to remove it using reliable antivirus software. Toplist suggests that you perform a complete system scan after updating your virus definitions to ensure that any lurking viruses are detected and removed. Remember that if a virus is present on your USB drive, it could easily spread to your main system, causing significant damage.
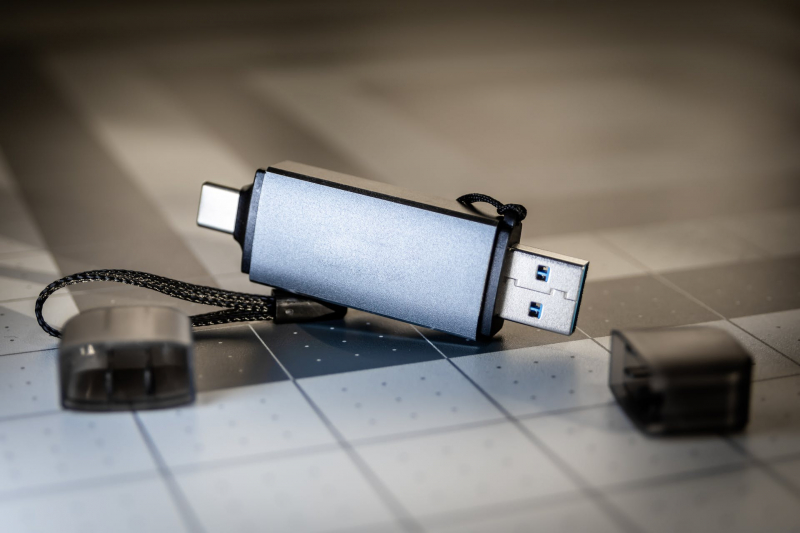
Image by Get Lost Mike via pexels.com 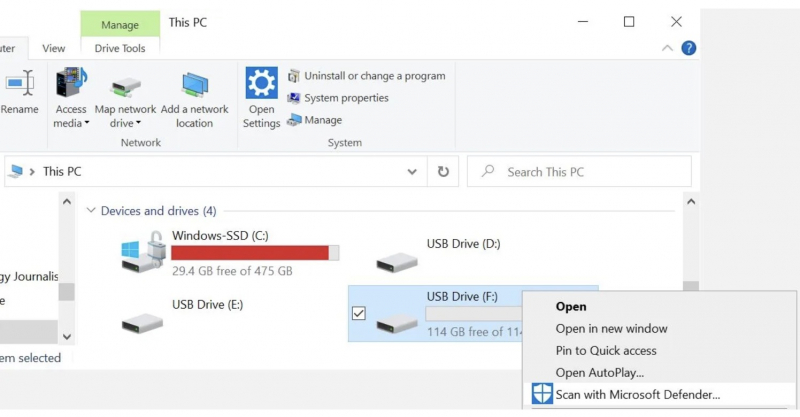
Check the USB Stick for Viruses -
Checking the USB drive body means you check the unlocked position of some old USB drives that still have this structure. These are mechanical switches; you just switch them to Write Protect USB mode. The switch is quite small and sometimes gets caught on something in your bag or computer case. In this case, you just need to move the switch to the unlocked position and copy the files again.
Now, USBs have modern designs and there are almost no USBs with this switch anymore.

Image by Karolina Grabowska via pexels.com 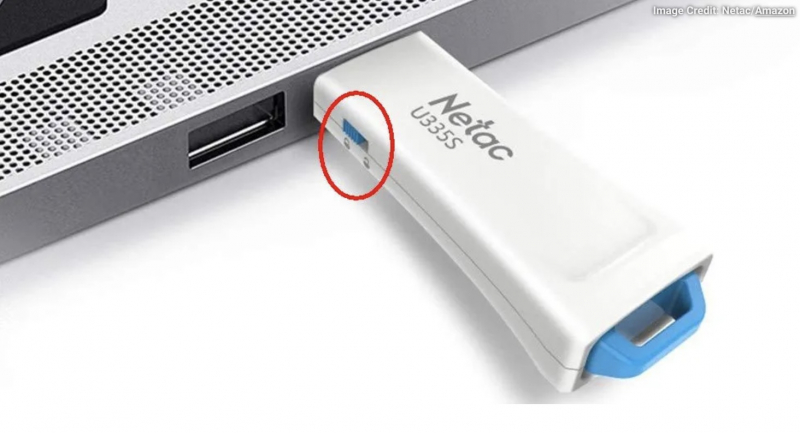
Check the USB Drive Body -
The USB stick is full and the screen displays a Write Protected error message.
You proceed with the repair as follows:
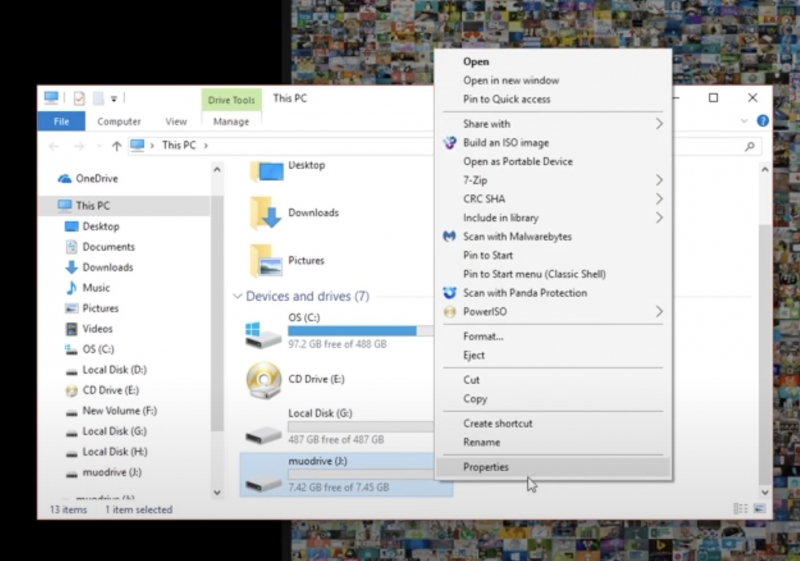
- Open Windows Explorer and browse to This PC. (With this step you will get an overview of all drives connected to your system)
- Right-click your USB drive and select Properties > the pie chart appears > see your display drive capacity.
- If the capacity is gray, it means there is still space for you to store new data. If it is not gray, your USB is full > a Write Protection error appears.
Check to Make Sure the USB Stick Isn't Full 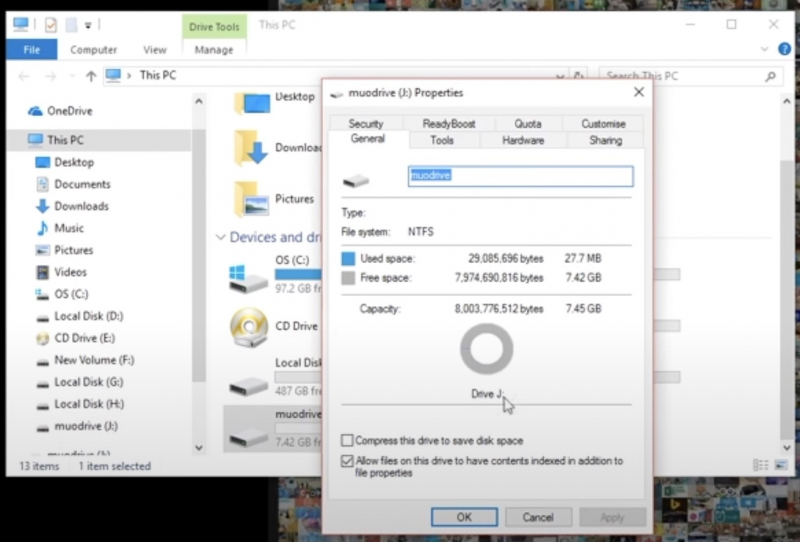
Check to Make Sure the USB Stick Isn't Full -
To carefully check the drive's permissions, follow these steps:
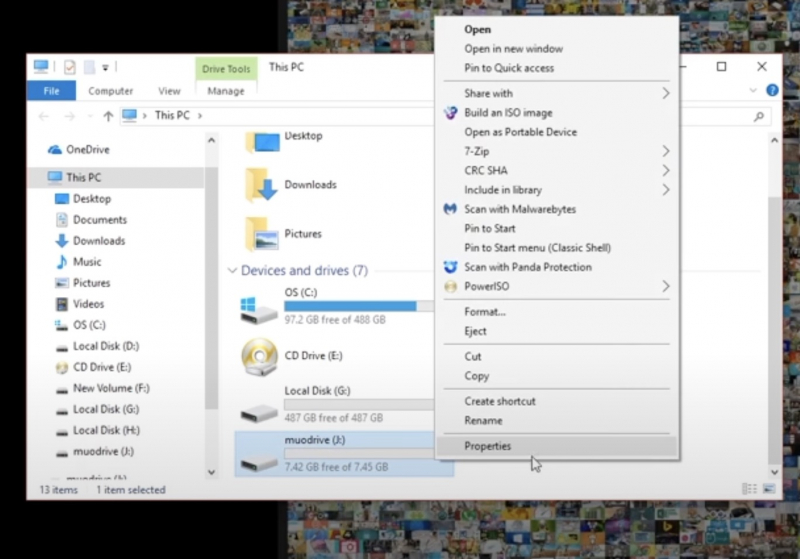
- Open the drive properties window by clicking File Explorer > This PC, right clicking your USB drive, and selecting Properties. Make sure you have sufficient permissions to write to the drive.
- Switch to the Security tab, check the permissions for the group, or use the permission called Everyone and make sure you see a check mark next to Write.
- If you don't see that check mark, select Everyone, click the Edit button, check the box next to Write in the Allow column, and click OK.
Note: If you don't see the Security tab in the USB drive properties window, your drive is probably formatted with the FAT32 or exFAT file system.
Double-Check Drive Permissions 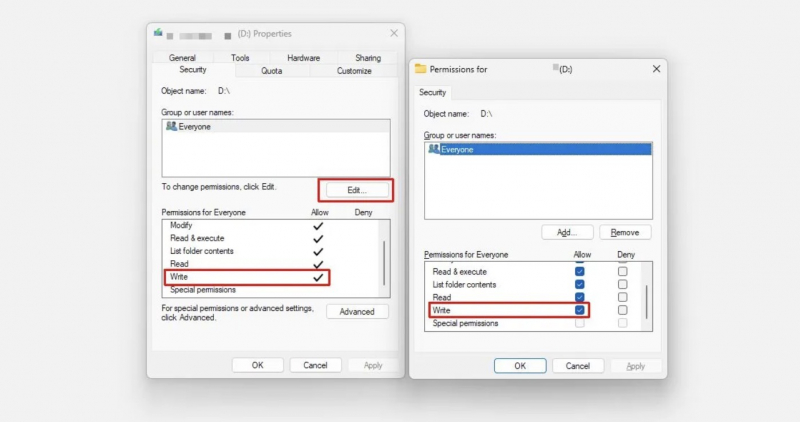
Double-Check Drive Permissions -
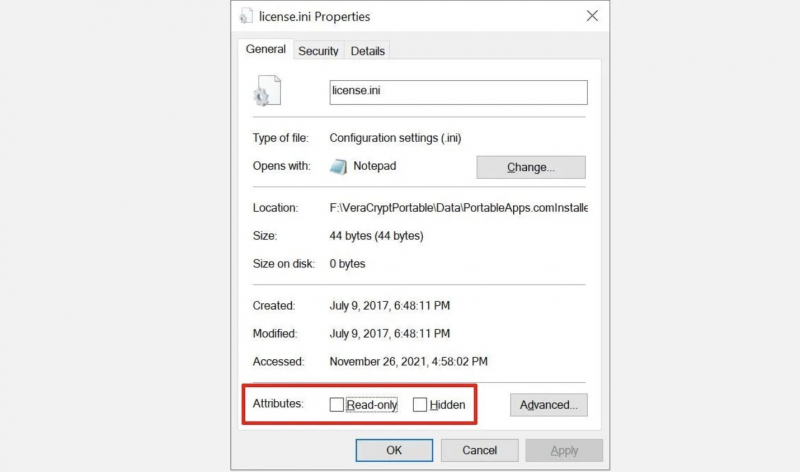
Some files, when opened, have many different modes installed, leading to an imbalanced file. For example, a file marked "read - only" cannot be deleted from the drive. Of course, there will still be errors that make you uncomfortable.
Browse to your USB drive > find the offending file > right-click and select Properties > At the bottom of the panel, under Properties, make sure Read Only is unchecked.
You should also pay attention to files with long names, even exceeding 255 characters, as many errors will occur. To be able to delete long file names, you need to perform the following steps:
You need a command prompt because Windows Terminal and PowerShell do not support the necessary DOS commands.
Here's how:
- Press Windows + R, type cmd, and press Enter or click OK.
- In the command prompt, enter the path to the folder containing the affected files and press Enter. I entered D: to navigate to our USB drive.
- Type the text dir /x and press Enter to list all the files in that directory, along with their short names. If you have a long list of files, try dir /x /p, which pauses the list to show you one screen at a time.
- Type del followed by the short name of the affected file and press Enter to delete it. Type dir WETALS~1.TXT to delete your test file.
If you're unable to delete a file due to it being locked, there are several ways to force deletion or unlock it.
Remove Individual Files With Write Protection 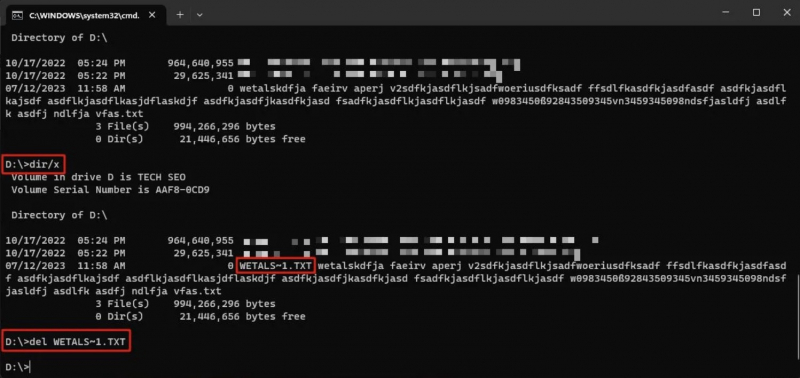
Remove Individual Files With Write Protection -
If you're using Windows 10 or 11, you'll come across several command prompts like Command Prompt, PowerShell, or Windows Terminal. You can use the following commands in one of these tools, but today we'll talk about using Windows Terminal. It is also one of the ways to fix your USB stick.
Please follow these steps:
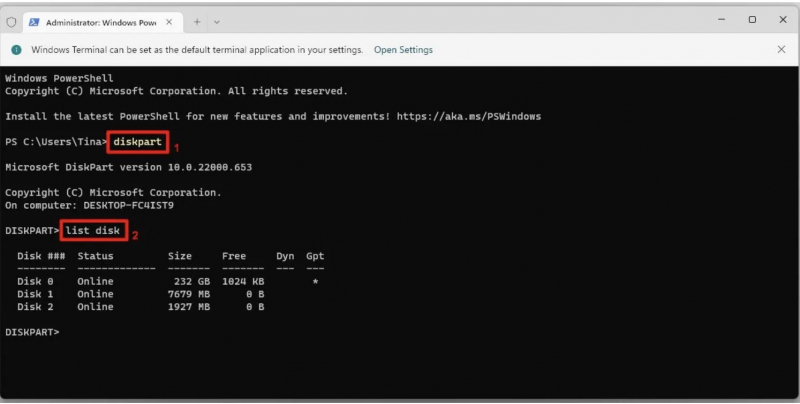
- Press Windows Key + X > select Windows Terminal (Admin) in the menu bar > enter diskpart > press Enter (number 1 in the image below).
- Next, type list disk > press Enter > a list of currently mounted disks appears, like so (number 2 in the image below).
- Make sure you can see your USB drive. Depending on how many disks your USB has, write down your disk number. Now enter the following command: select disk [your disk number]
- Once selected, enter the following command: attributes disk clear readonly
=> You have now removed any remaining read-only file attributes from the USB drive you wanted.
DiskPart Command Prompt Utility 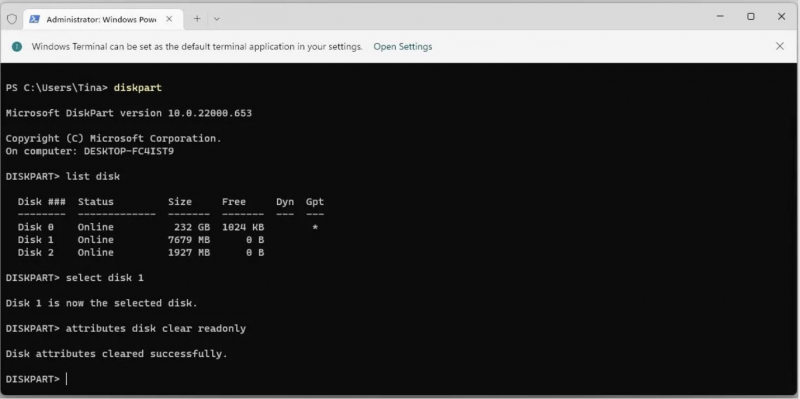
DiskPart Command Prompt Utility -
The next way you can refer to editing the Windows Registry.
You can do the following:
- Press Windows Key + R to open the Run dialogue > Type regedit and press Enter. Now, navigate to the registry location, the command line will appear: HKEY_LOCAL_MACHINE\SYSTEM\CurrentControlSet\Control\StorageDevicePolicies
- Then look for the key named WriteProtect. If it exists, double-click it > the Edit DWORD Value (32-bit) dialog box appears. Now you can set one of two values: 0 or 1. Where 1 means "Yes, write protect my USB storage device". Conversely, 0 means "No, do not write protect my USB storage device". Set the value to 0, then press OK.
You can add the WriteProtection registry value with these steps:
- Use the keyboard shortcut Windows + R to open the Run command.
- Type regedit and click OK to open the registry.
- Browse to the following path: HKEY_LOCAL_MACHINE\SYSTEM\CurrentControlSet\Control
- Right-click the Control key (folder) > select New > click on Key.
- Name the new key StorageDevicePolicies > press Enter.
- Select the newly created key and right-click on the right side, select New, and click DWORD Value (32-bit).
- Name the new DWORD WriteProtect and press Enter.
- Double-click the newly created DWORD and change its value from 0 to 1.
- Click OK.
- Close the registry to complete the task.
Note: If issues arise, the Windows registry can be reset to default.

Clear Write Protection Error in Windows Registry 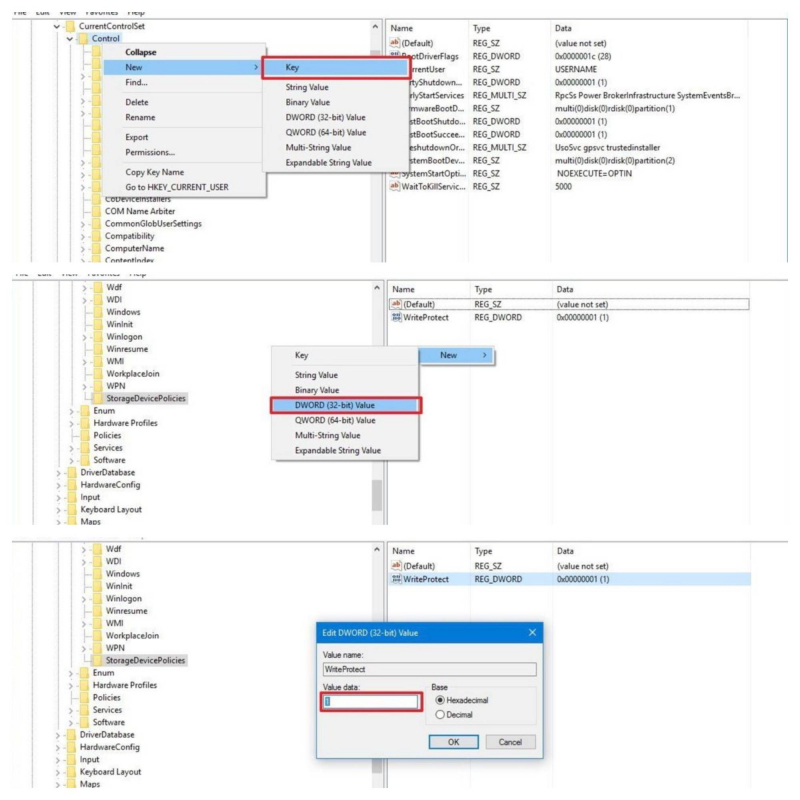
Clear Write Protection Error in Windows Registry -
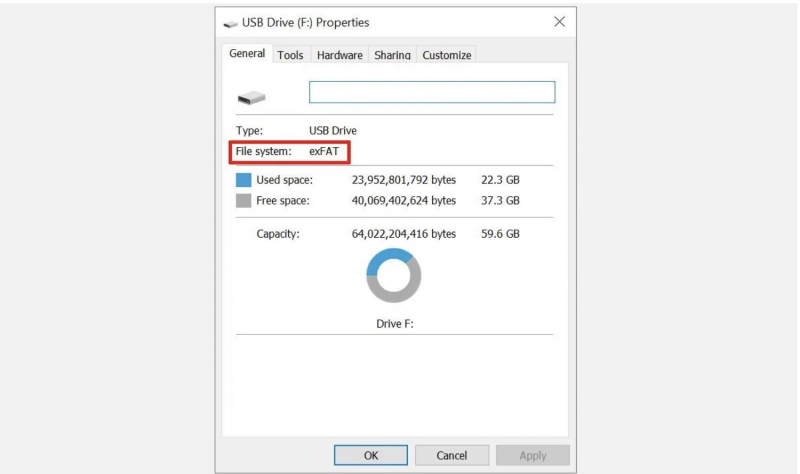
Formatting your write-protected USB stick is the solution you need to adopt. However, it will make your USB drive readable and writable. Before formatting the USB drive, determine the type of file system present—NTFS or FAT32. Typically, the existing file system is the most suitable file system for the drive.
- Open Windows Explorer > Browse to This PC > Right-click your USB drive and select Properties.
- Close the Properties window > Continue right clicking the USB drive again, this time selecting Format. The Format window contains several customizable options, such as the aforementioned File system, Allocation unit size, the Volume Label, and Quick Format options.
- Change the Volume label to something easy to remember. Since the machine deals with a potential hardware problem, uncheck the Quick Format box. That forces formatting to do more than just delete files. Typical example: if this USB drive has bad sectors then "full" format will return an error.
The formatting process doesn't take much time, and the larger the drive, the longer you'll have to wait. Assuming there are no physical problems with the drive, your USB drive will be quickly formatted, cleaned, and ready to go.Note: Before repairing your USB, make sure you back up all files and information from the USB drive to your computer. All data will be lost after you format the USB drive.
Format the USB Drive 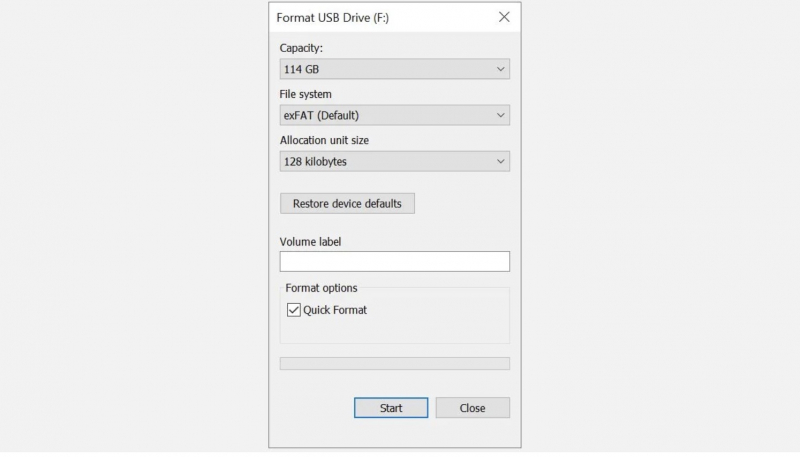
Format the USB Drive -
You should disable BitLocker or Remove Encryption so that changes can be made to files on locked partitions or drives.
You proceed as follows:
- Open File Explorer, right-click your BitLocker partition or drive > select Manage BitLocker.
- In the BitLocker Drive Encryption window > click to select the failed drive > click Turn off BitLocker.
- At this point, BitLocker will begin decryption. When you're done, you can edit and save the file without seeing the error message again.
Image by Esa Riutta via pixabay.com 
Image by Photo Mix via pixabay.com -
It's important to be careful with USB and SD cards, even if they're in good shape, error-free, and include a write-protect switch. Many of the solutions for fixing write protection on USB drives also work with SD cards. Prior to repairing the USB, double-check that the switch is on.
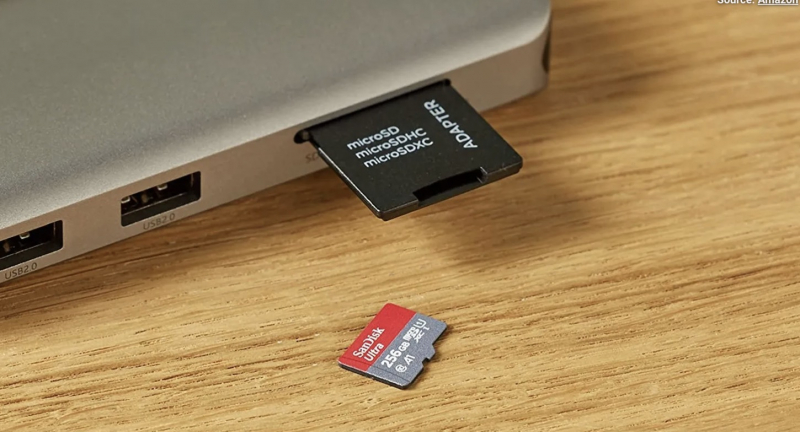
But I've Got an SD Card 
Image by Luis Quintero via pexels.com