Top 8 Best Ways to Fix CCleaner Not Working on Windows 10 & 11
CCleaner is a popular software recommended for third-party system maintenance for PCs running Windows 10 and 11. However, there is still a case where CCleaner ... read more...cannot be accessed. You need to fix this problem through how you can fix CCleaner not working on Windows 11/10 PCs recommended under the following article.
-
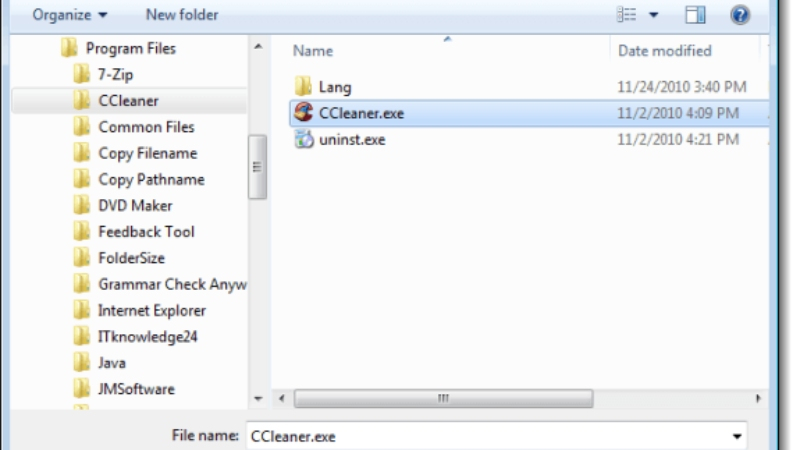
If you are having trouble launching CCleaner from the desktop, taskbar, or Start menu shortcuts, try opening it directly from its installation folder.
To do this:
- Navigate to the software's installation directory and double-click the CCleaner64.exe application file.
- This way, you can bypass any issues with its shortcut and launch CCleaner successfully.
If you find that you are unable to launch CCleaner using the shortcut, it could be due to an issue with the shortcut itself. In such a case, you can fix it by creating a new desktop shortcut for CCleaner.
To do this:
- Right-click on the CCleaner EXE file and select 'Send to (Desktop)'.
- Once you have created the new shortcut, try launching CCleaner through it.
- This should resolve the issue and allow you to use CCleaner without any problems.
Run Synapse in Compatibility Mode 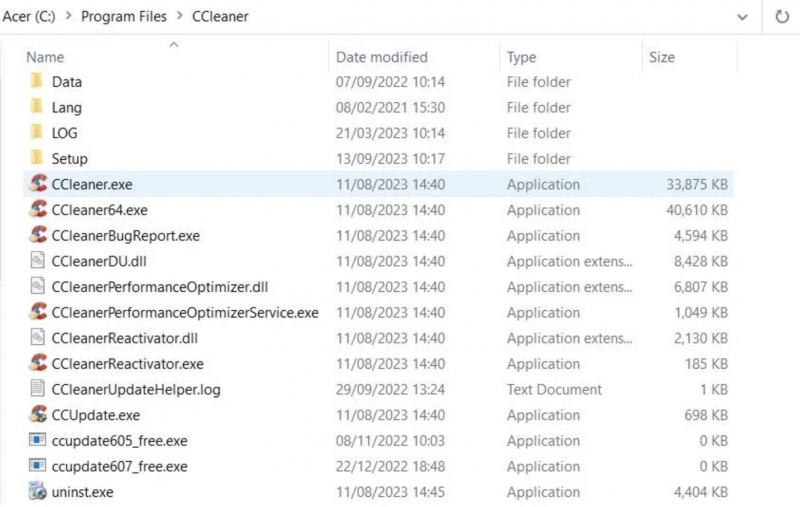
Try Opening CCleaner From Its Installation Directory -
Running CCleaner with administrator privileges is not always necessary for the software to function properly. However, in some cases, permission issues may prevent CCleaner from starting, which can be resolved by running it as an administrator. To determine if this workaround is effective, right-click on the CCleaner shortcut or the EXE file in the installation directory and select Run as administrator.
If CCleaner works fine on your computer but requires elevated privileges to run, you don't have to manually select it every time you need to open it. You can set CCleaner to always run with elevated privileges.
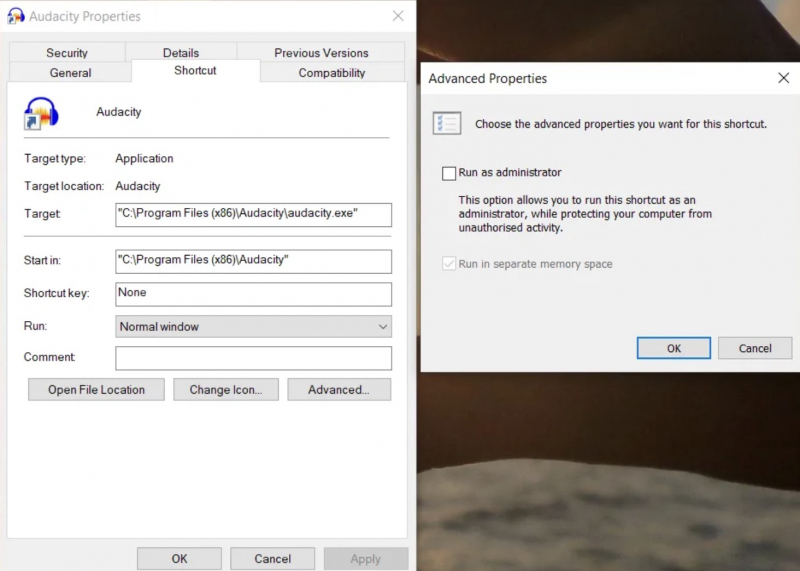
To change the permissions of an app and run it as an administrator, follow these steps:
- Click on the Start button on your computer.
- Find the app you want to modify by scrolling down the All Apps list.
- Right-click on the app's name and select More > Open file location.
- This will open File Explorer. Right-click on the app's name again.
- Click Properties and select the Shortcut tab.
- Click Advanced.
- Check the box next to Run as administrator.
- Click OK to save your changes.
Run CCleaner With Administrator Rights 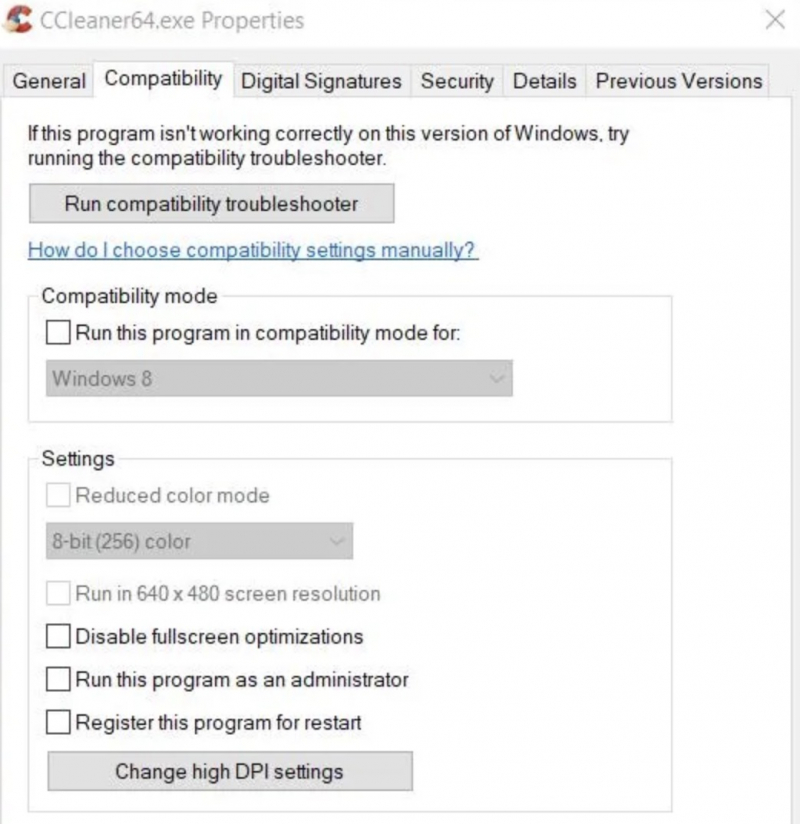
Run CCleaner With Administrator Rights -
Deleting a specific registry key has been confirmed by many users as a solution to fix issues with CCleaner. However, we recommend backing up the Windows registry before deleting any keys.
To delete the CCleaner registry key, follow these steps:
- Press the Windows logo key and R simultaneously to start the Run accessory.
- Type "regedit" in the Open command box and click on OK.
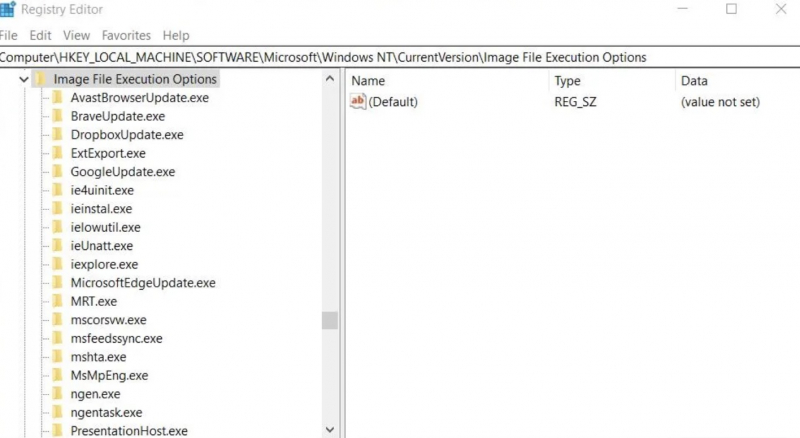
- Navigate to the registry location either by entering the address in the address bar or by clicking the keys in the sidebar: Computer\HKEY_LOCAL_MACHINE\SOFTWARE\Microsoft\Windows NT\CurrentVersion\Image File Execution Options.
- To delete the CCleaner64.exe key, you can right-click on it and select the Delete option.
- Please confirm the deletion by selecting the Yes option on the prompt window.
Click the X Close window of the Registry Editor application and try opening CCleaner.
Delete the CCleanerx64 Registry Key 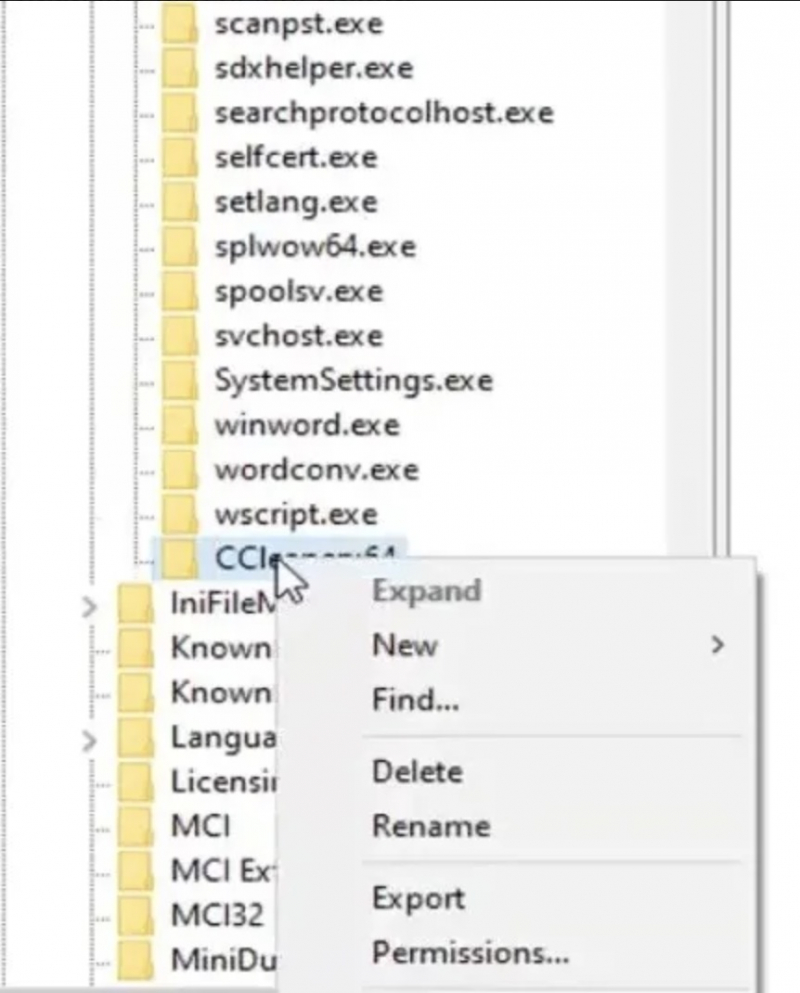
Delete the CCleanerx64 Registry Key -
CCleaner can be identified as unwanted software by certain antivirus programs, which can prevent it from functioning properly. This is more likely to occur due to previous malware incidents involving CCleaner. Some users have reported that disabling their Trend Micro antivirus resolved issues with CCleaner not working on their computers.
In order to solve this issue, you might have to add CCleaner's installation folder to the exceptions list of your antivirus software. If you use a different security application, then you should include CCleaner into its Antivirus Software’s Exceptions List.
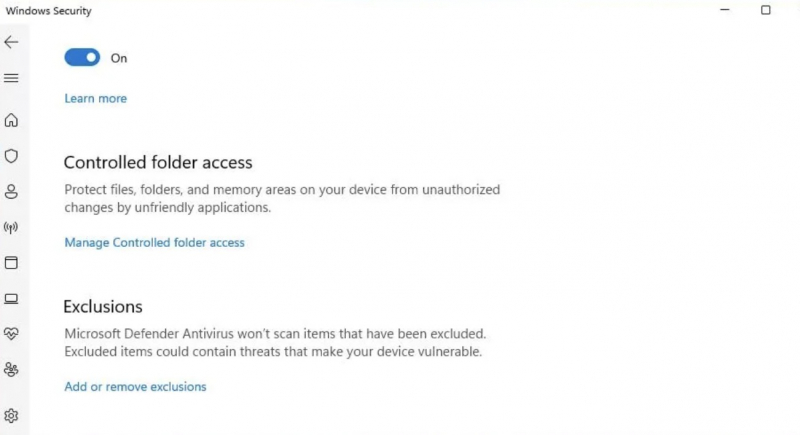
Add CCleaner to Your Antivirus Software’s Exceptions List 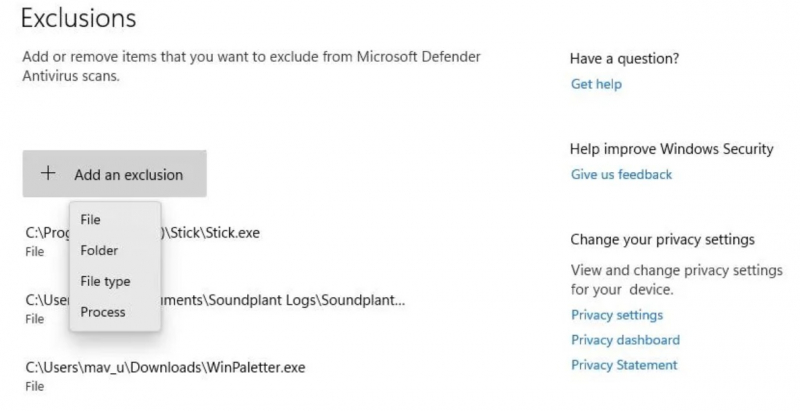
Add CCleaner to Your Antivirus Software’s Exceptions List -
Please make sure that your PC's firewall is not blocking CCleaner's internet connection, as it requires an Internet connection for updates, error reporting, and its online features. If you are facing issues with CCleaner, it could be due to firewall blocking. Hence, it is recommended to turn off your PC's firewall to ensure that CCleaner can access the Internet without any interruption.
This guide provides complete instructions for disabling Microsoft Defender Firewall protection.
To turn off Windows Defender Firewall, follow these steps:
- You need to open the Control Panel.
- In Control Panel > click System and Security" then click "Windows Defender Firewall.
- From the left pane, select Turn Windows Defender Firewall on or off.
- Select Disable Windows Defender Firewall (not recommended) for each network setting.
- Click OK to save your changes.
Note: Users who already have third-party firewalls installed can simply disable them through their settings tab. If you have antivirus software from a third-party installed on your computer, make sure to disable its firewall component if it has one. This will help avoid any potential conflicts or issues that may arise.
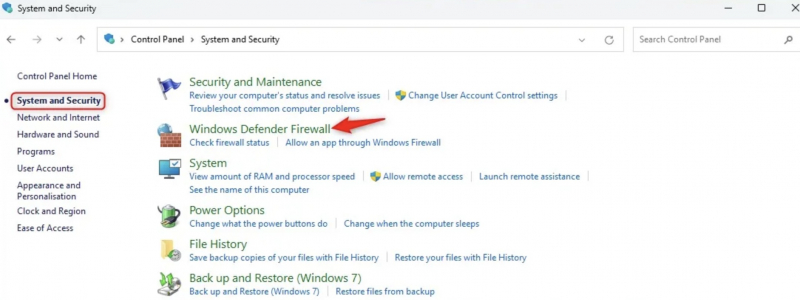
Disable Your Active Firewalls 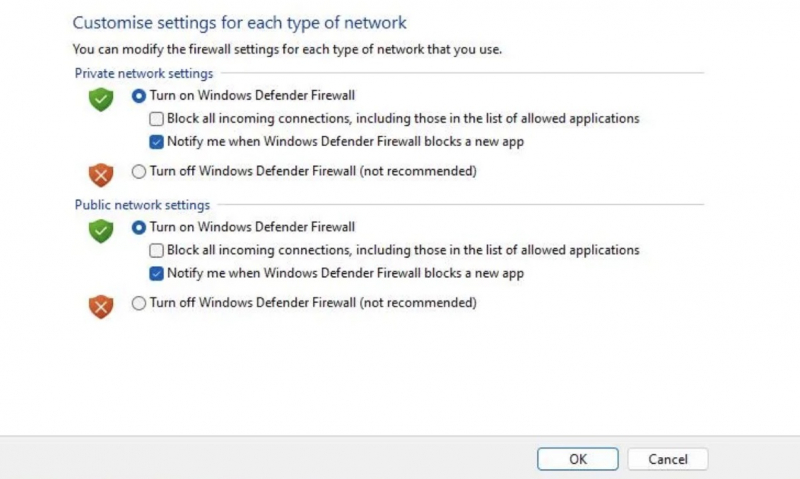
Disable Your Active Firewalls -
You should also cleanly reboot your PC's Windows 11/10. It is highly recommended to perform a clean boot of Windows 11/10, as it can often resolve any potential issues that may be causing problems. It will not disable any device drivers so rest assured.
To apply this solution for CCleaner not working, follow the instructions as follows:
- To begin, click on the Start menu search bar and type in "msconfig". From the results that appear, select System Configuration.
- Once you have done so, switch over to the Services tab, and then select the option Hide all Microsoft Services. After that, click on Disable all.
- Next, move over to the Start tab and select Open Task Manager.
- Once you're there, disable each app listed under the Startup tab one by one.
- Finally, go back to the Startup tab in System Configuration and select OK.
note: This is the application method for Windows 11.
=> After your system has restarted, try opening CCleaner again. If the software still malfunctions, it's possible that a disabled app or service is the cause.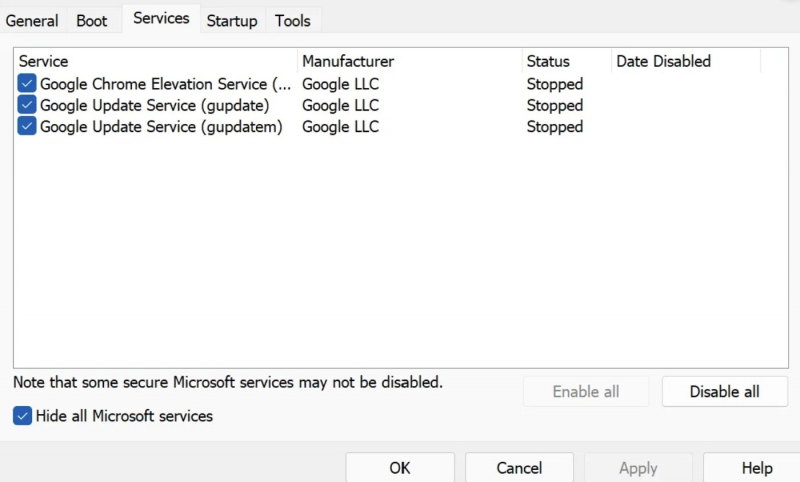
Run CCleaner After Clean-Booting Windows 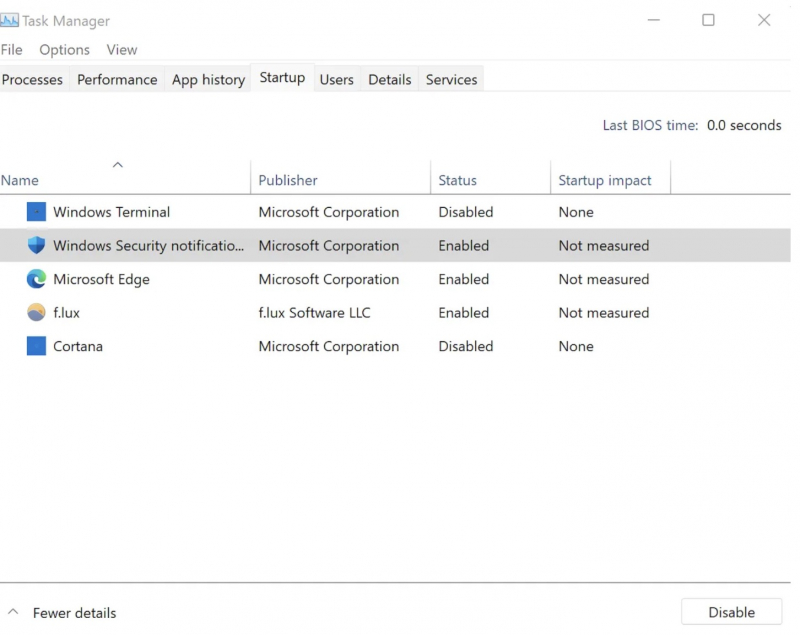
Run CCleaner After Clean-Booting Windows -
The last way you need to get CCleaner working is to reinstall the software. This will refresh all CCleaner files and registry entries. You should uninstall using one of the best uninstaller utilities to remove all remaining debris.
You should use the UWP (Universal Windows Platform) app to uninstall it. To remove an uninstall package from your PC, follow these steps:
- Right-click Start on the taskbar > select the Power User’s menu Run shortcut.
- Select the Run option and type in appwiz.cpl.
- Click OK and the Programs and Features window will appear.
- From the list of installed software, select the one you want to remove.
- Click the Uninstall button.
- A confirmation dialog may appear; click Yes to proceed.
- You may then see an uninstallation wizard; follow the prompts to select the necessary uninstall options.
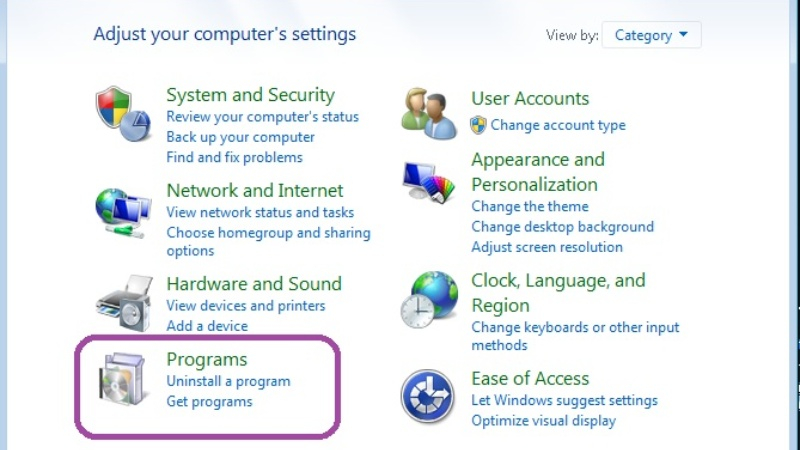
Uninstalling Windows software. 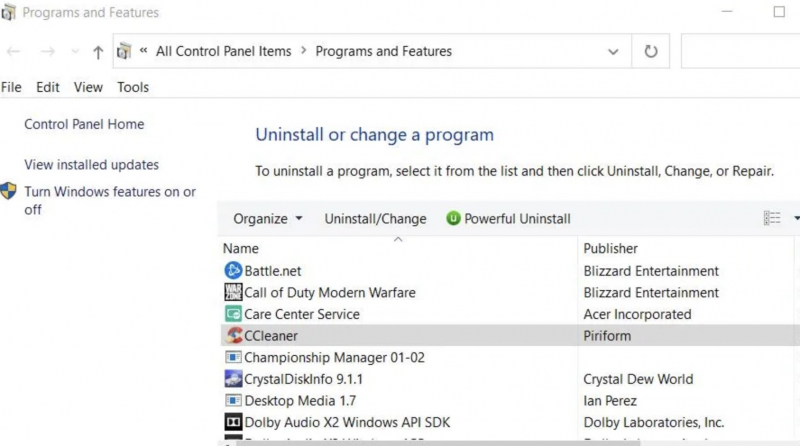
Uninstalling Windows software. -
You can reinstall CCleaner UWP or the desktop app:
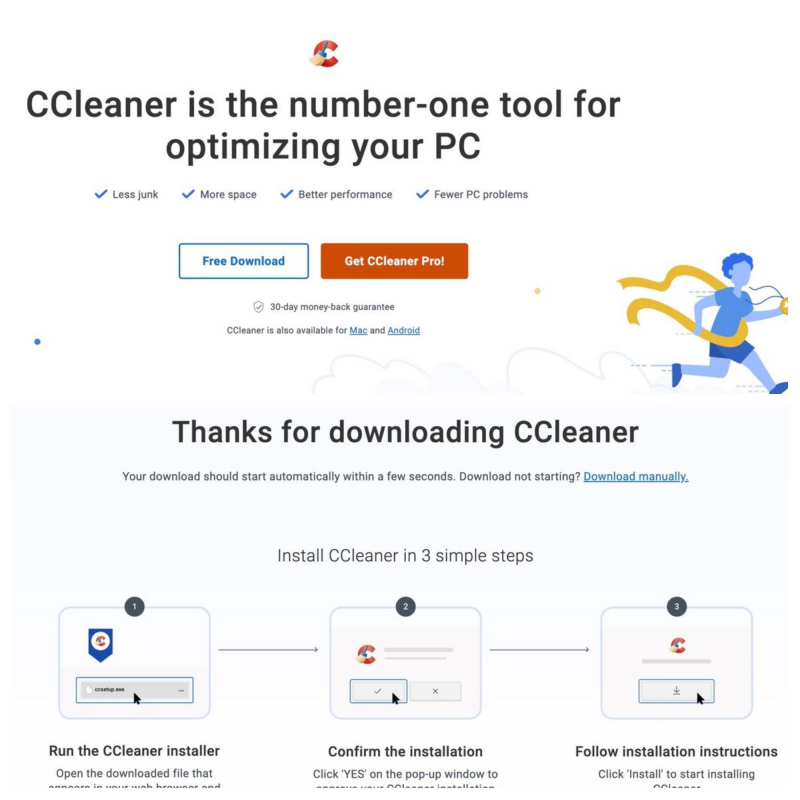
- To download the desktop app, click Free Download on the CCleaner page.
- After downloading, double-click the ccsetup615.exe file in the folder to open the setup window.
- Finally, click Install in the setup wizard to reinstall CCleaner.
The second app you should try is UWP on the CCleaner Microsoft Store page. Proceed as follows:
- Go to the CCleaner page on the Microsoft Store.
- Click Get and then Open to access settings.
- Click Install to start the installation of the app.
CCleaner UWP 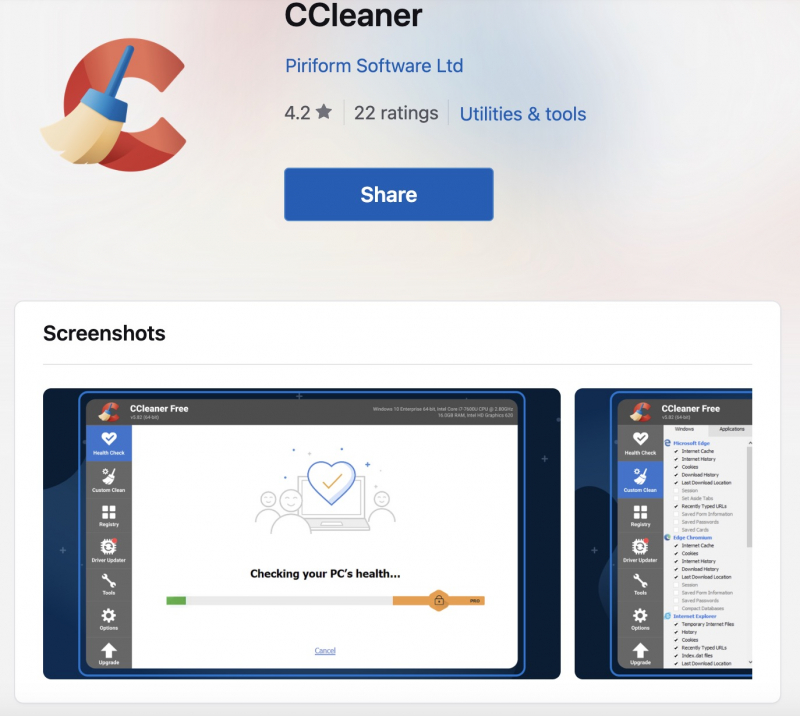
CCleaner Microsoft Store page


