Top 9 Best Way to Fix Razer Synapse Not Working in Windows 11/10
Razer Synapse is an important application that helps users configure Razer peripherals such as mice, keyboards, and headsets. sometimes crashes when booting ... read more...incorrectly. If you see an annoying "Failed to start" error message, sometimes there is no message at all. If you are facing this problem on Windows 11/10, try the following solutions to fix it quickly.
-
Try running Synapse in compatibility mode first to reduce the chance of software compatibility not starting.
You do the following:
- You can click the app on the desktop > right-click it > select Properties. Or right-click the Razer Synapse.exe file in the Razer Synapse 3 Host subfolder in the Synapse3 installation folder.
- Select Properties on Synapse's context menu.
- Click Compatibility to access options on that tab.
- Select the Run this program in compatibility mode checkbox
- Select Windows 8 from the compatibility drop-down menu
- Apply the new settings by tapping Apply
- Click OK to exit the Synapse properties window.
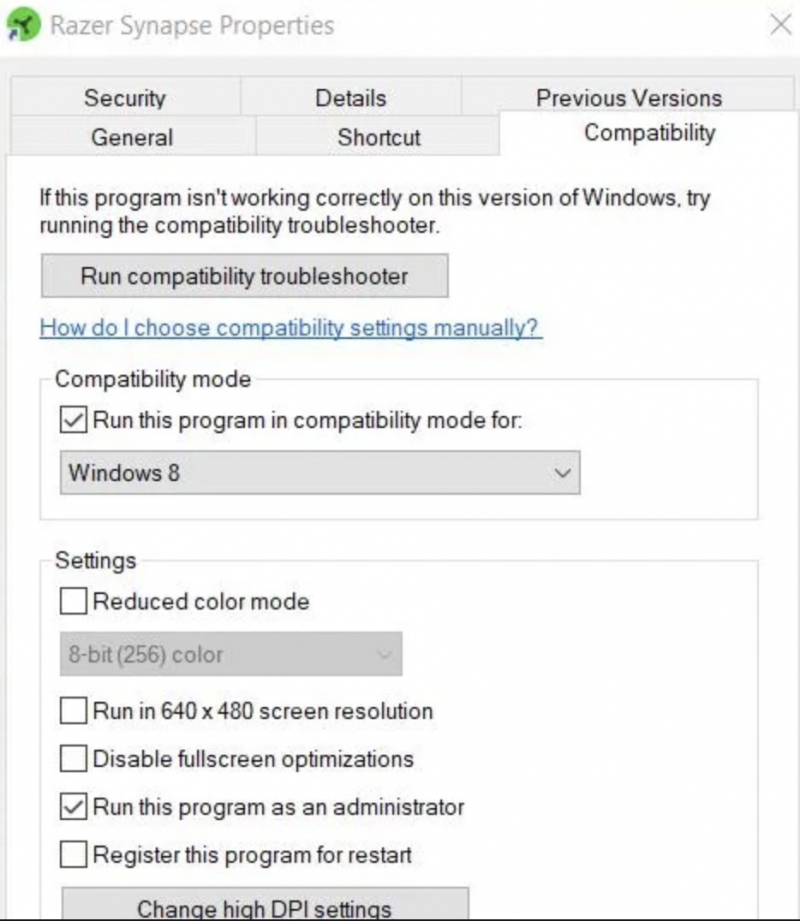
Run Synapse in Compatibility Mode 
Image by ThisIsEngineering via pexels.com -
Sometimes, the problem of Razer Synapse not working can stem from a lack of system administrator rights.
To fix this, perform the following detailed steps:
- Open the Razer Synapse application's Properties Window, right-click the icon, and select Properties. Go to the Compatibility tab.
- In the Compatibility tab, find and select the Run as administrator option.
- After selecting the above option, click Apply and then click OK to save the changes.
This way you are ensuring Razer Synapse is running with full administrative rights, which can help fix the inactivity issue. Don't forget to restart the application after performing the above steps to ensure the best performance.

Image by Pramod Tiwari via pexels.com 
Image by Erik Mclean via pexels.com -
Razer Synapse provides a "Fix problems" option in the uninstall window to resolve the issue easily.
Here's how you can do it:
- Press the Windows + R key combination to open the Run dialog box, then type appwiz.cpl and press OK to open Programs and Features.
- Find and select Razer Synapse software in the Programs and Features list.
- Click the Change button for Razer Synapse.
- Select the Repair option.
This way, you can use the built-in repair feature in Razer Synapse to fix the problems you are facing conveniently and effectively. After completing the repair process, check to see if the issue is resolved.
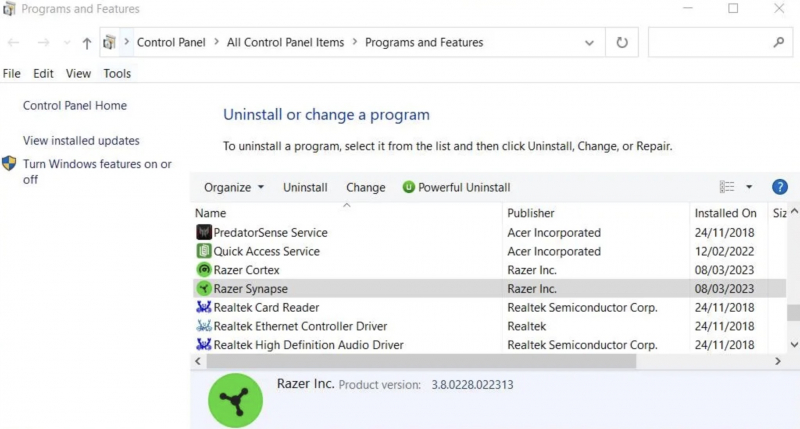
Select to Repair Razer Synapse 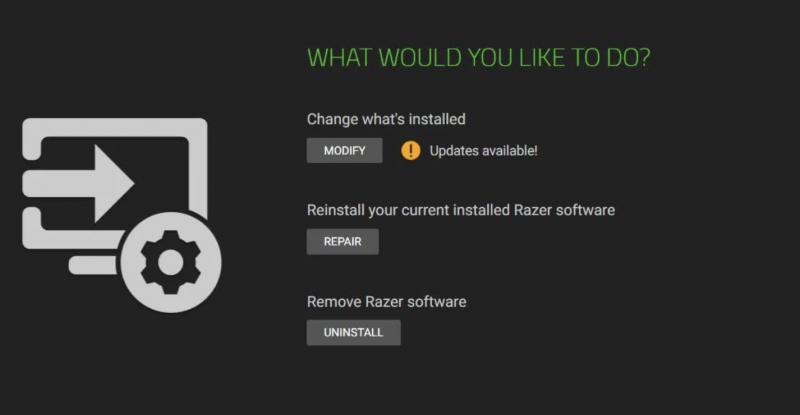
Select to Repair Razer Synapse -
Please refer to using Razer Synapse Service or Razer Central Service to fix the Synapse not working error.
You do the following:
- Start the Run application and enter the command services.msc in the Open box.
- Click OK to open the Services application.
- Double-click Razer Synapse Service.
- If Razer Synapse Service has been disabled, toggle the Startup Type option to Automatic.
- Click Start in the service's window
- Select Apply to save the Razer Synapse Service settings.
- Click OK to exit the service window.
- Repeat steps three through seven for Razer Central Service.
- If those services were already running when you tested them, right-click them and select Restart. Or you can open the service's properties window and click Stop and Start.
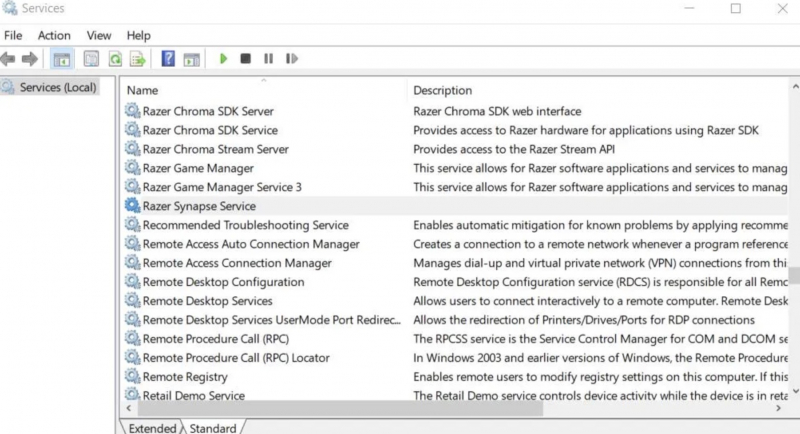
Start or Restart the Razer Services 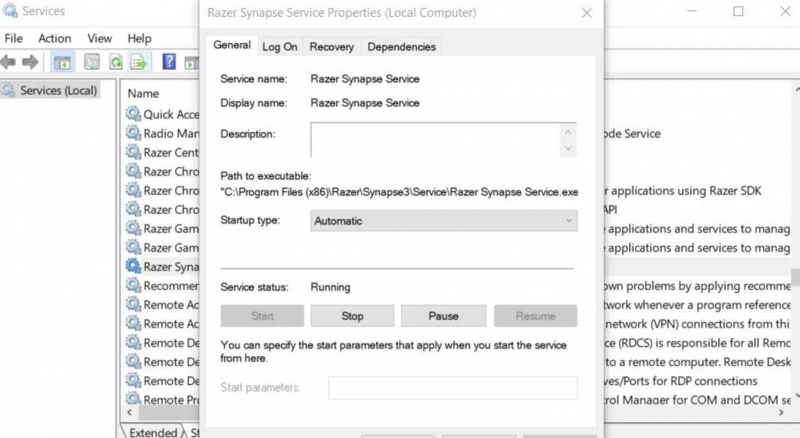
Start or Restart the Razer Services -
Razer Synapse contains a data folder that stores cache files. When these files get corrupted or accumulated over time, it can result in Synapse issues. To resolve these issues, you can clear Synapse's cached data folder by deleting it.
Here's how you can do it:
1. Open the Run dialog box and type %appdata% in it.
2. Click OK to open the Roaming folder in Windows Explorer.
3. Click AppData in the address bar of the Explorer window to access the directory.
4. Double-click the Local folder to open it.
5. Right-click on the Razer folder inside the directory and select Delete.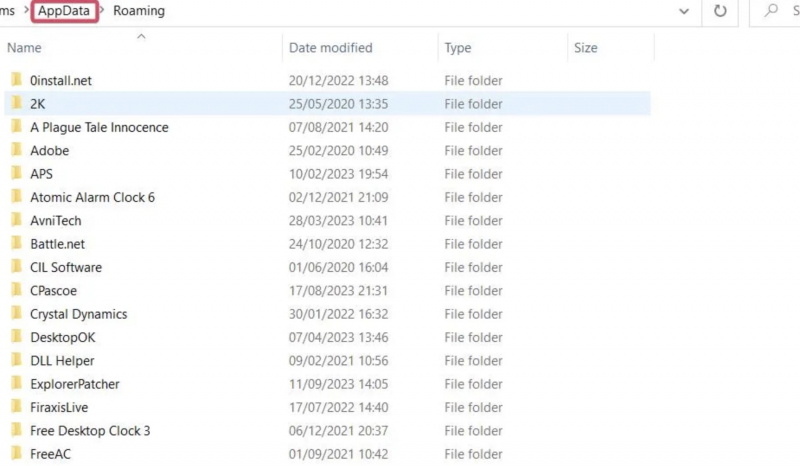
Clear Razer Synapse’s Cache Data 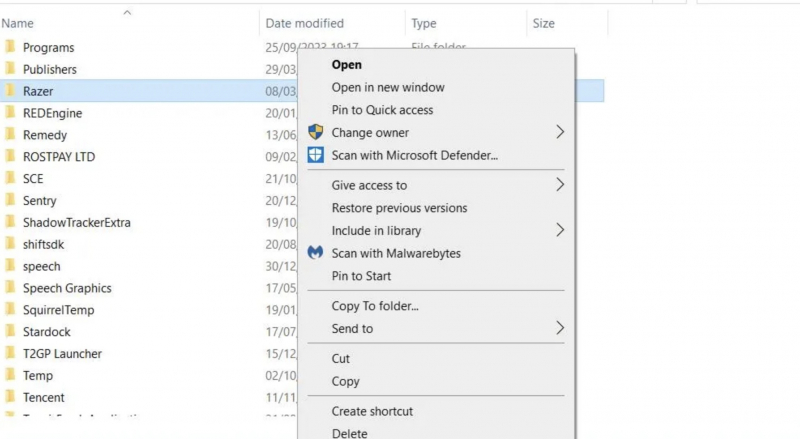
Clear Razer Synapse’s Cache Data -
It is possible that your Windows 11/10 PC already has a version of .NET Framework installed, but you may need to update it in order to use Razer Synapse. To do this, you can download and install the latest version of .NET Framework 4.8.1 by following these steps:
1. Go to the .NET Framework download page.
2. Click on ".NET Framework 4.8.1" on the page.
3. Click on the "Download .NET Framework 4.8.1 Runtime" link on the next page.
4. Navigate to your browser's Downloads tab and click on the NDP481-Web.exe file.
5. Check the "I have read and accept the license terms" box.
6. Click "Install" to proceed with the installation of .NET Framework 4.8.1.If you prefer, you can also try repairing your current .NET Framework installation on your PC. For instructions on how to do this, you can refer to our guide on repairing .NET Framework on Windows PCs.
Download here: https://dotnet.microsoft.com/en-us/download/dotnet-framework

Install .NET Framework 4.8.1 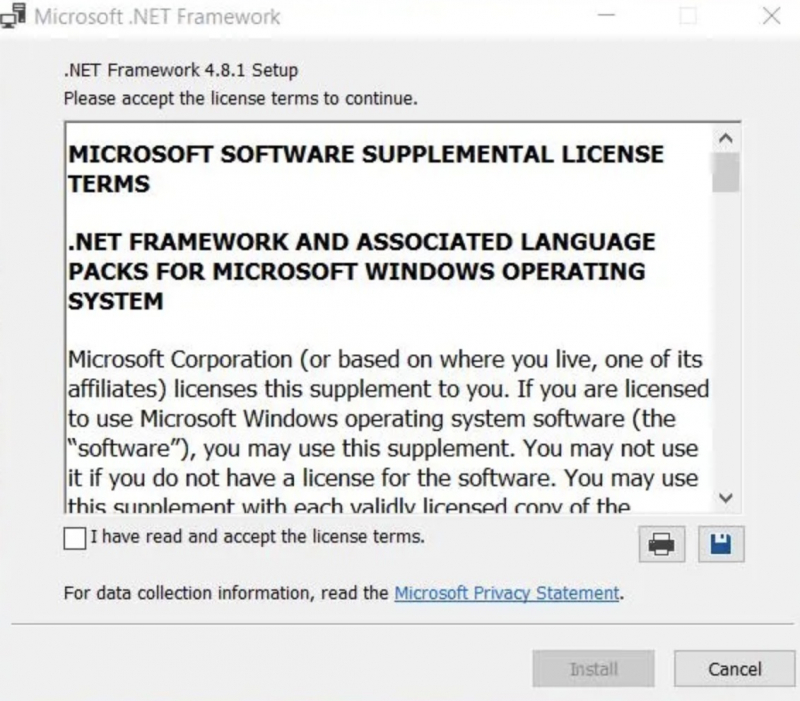
Install .NET Framework 4.8.1 -
Firewalls can sometimes prevent Synapse from starting up properly if they are configured to block its internet connectivity. To check if Microsoft Defender Firewall is the culprit, you can disable it temporarily. Refer to the guide on how to disable Microsoft Defender Firewall to apply this solution. Once disabled, try running Razer Synapse to see if it works without any issues.
If the software starts working with the firewall disabled, you can configure Microsoft Defender Firewall to allow Razer Synapse through it. We have an article that explains how to allow apps through the Windows firewall, which will guide you in the process.
This potential solution also applies to third-party firewalls. You can temporarily disable your firewall, or its antivirus component, to see if that resolves the issue. If it does, you can add Synapse to the firewall's allowed apps list.
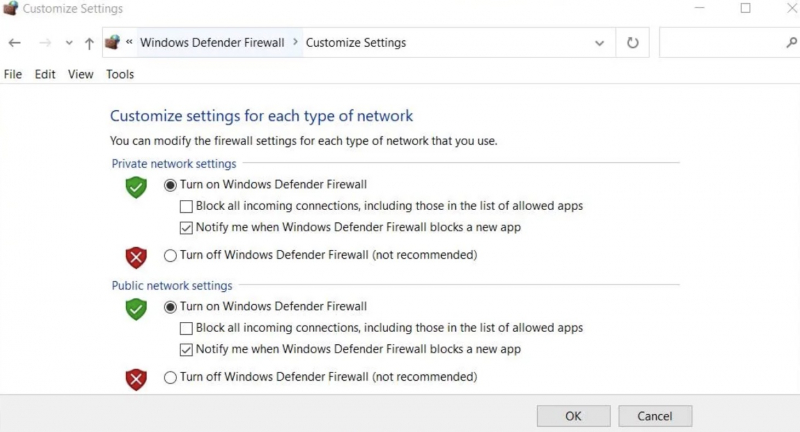
Temporarily Disable Firewalls 
Image by Matheus Bertelli via pexels.com -
If you have installed Razer Surround, an optional module of the Synapse software, it is recommended that you remove it to avoid any potential conflicts with the Synapse app. You can easily uninstall Razer Surround by using the Programs and Features Control Panel applet, as described in this guide for removing Windows software.

Image by Lisa Fotios via pexels.com 
Image by Philbert Pembani via pexels.com -
If Razer Synapse is still not working despite trying other potential solutions, it is possible that corrupted or missing software files are causing the issue. In such a case, you will need to reinstall Synapse.
- First, remove the software by clicking the Change button for Synapse in Programs and Features, as outlined in the first three steps of the third method in this guide. Then select Uninstall.
- Before reinstalling Synapse, make sure to delete any leftover folders and files from the software. Next, visit the Synapse page and click Download Now. Once the download is complete, install the software by double-clicking the RazerSynapseInstaller file. When reinstalling Synapse, ensure that you only install Razer Synapse and not any superfluous optional modules such as Razer Surround.
Download here: https://www.razer.com/gb-en/synapse-3

Reinstall Razer Synapse 
Reinstall Razer Synapse


