Top 12 Simple Tips to Speed Up Windows 10/11
Discover the ultimate compilation of Simple Tips to Speed Up Windows, curated by Toplist. Boost your computer's performance and optimize its efficiency with ... read more...these tried and tested methods.
-
In modern computing, there has been a noticeable improvement in the prevailing issue of new computers being laden with excessive and often superfluous software, commonly referred to as bloatware, crapware, or PUPs (potentially unwanted programs). In a recent examination conducted by PCMag on a Lenovo PC, nearly 20 seemingly innocuous helper programs were discovered, intermittently disrupting user activities.
To swiftly rid your system of these unwanted applications,
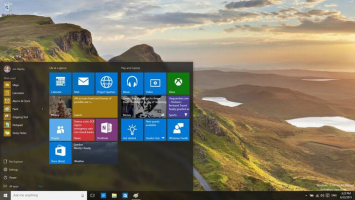
- Right-click on the icon of the undesirable app in the Start menu
- Select the Uninstall option.
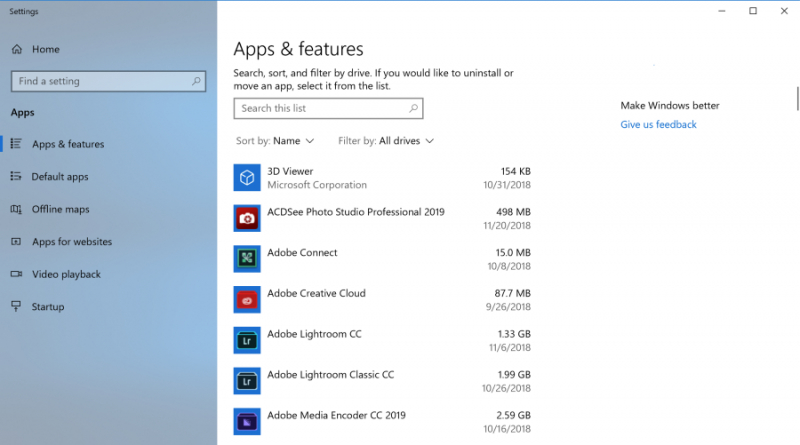
- Alternatively, you can right-click the Windows logo Start button and opt for the foremost choice, Programs and Features.
- Another efficient method is typing "Programs" in the search box adjacent to the Start button.
Identifying the culprits of crapware can be facilitated by sorting the list of installed apps based on your PC maker's name. Alternatively, sorting by Recent can unveil any programs that might have been unwittingly installed, while sorting by Size allows you to eliminate unnecessarily large items.
Once you pinpoint the undesired apps, select them and click on Uninstall. It's worth noting that the uninstallation process is one at a time, so allocate around 15 minutes for this endeavor if you are dealing with many bloatware.
Credit: Microsoft -
As highlighted previously, numerous programs install supplementary processes that initiate each time your PC boots up, and not all of them are essential for constant system operation.
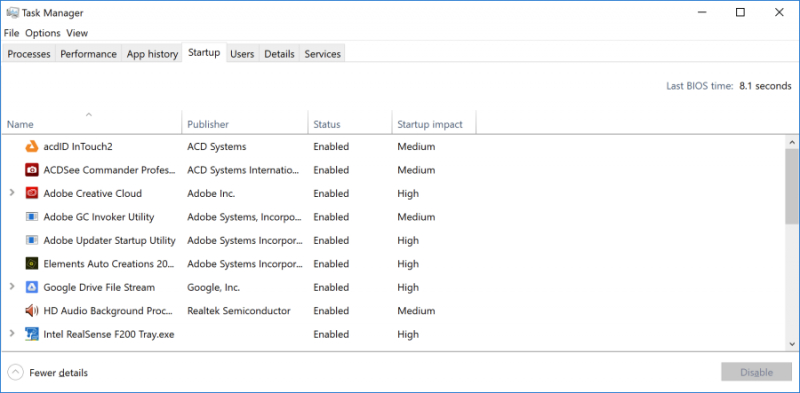
In earlier iterations of Windows, users had to resort to the MSCONFIG utility through the command prompt to manage these processes. While this method remains viable, and you might consider using it to curtail auto-running services and programs, more recent versions of Windows present a more user-friendly approach through the enhanced Task Manager.
Initiate the Task Manager effortlessly by pressing Ctrl-Shift-Esc. Navigate to the Startup tab, where a comprehensive list of programs loading during Windows startup is displayed. The accompanying dialog box conveniently includes a column indicating the Startup impact for each program. The Status column provides insight into whether a program is configured to launch at startup. Modify this status by right-clicking on the respective entry.
Identifying programs you wish to restrict is generally straightforward. For instance, if you seldom utilize iTunes, it's likely unnecessary for iTunesHelper to run continuously in the background. This streamlined approach in the Task Manager of newer Windows versions enhances the management of startup programs, offering users a more intuitive control over their system's performance.
Credit: Microsoft -
Navigate to the Start menu and input "Disk Cleanup" to unveil the reliable utility ingrained in Windows across numerous OS generations. This utility, a mainstay in the Windows toolkit, adeptly identifies and targets unwanted clutter like temporary files, offline web pages, and installer files lingering on your PC.
It allows you to eradicate these accumulated items in one fell swoop. Keep an eye out for a potentially overflowing Recycle Bin; however, its impact on system speed is usually discernible only when your drive is nearing full capacity.
For those seeking to optimize their disk performance, consider establishing a regular disk defragmentation schedule using the Optimize Drives tool. You can locate this tool by typing its name in the search box adjacent to the Start button. It's essential to note that if your primary disk operates on SSD technology, defragmentation is unnecessary, as no moving parts are involved in reading the disk.
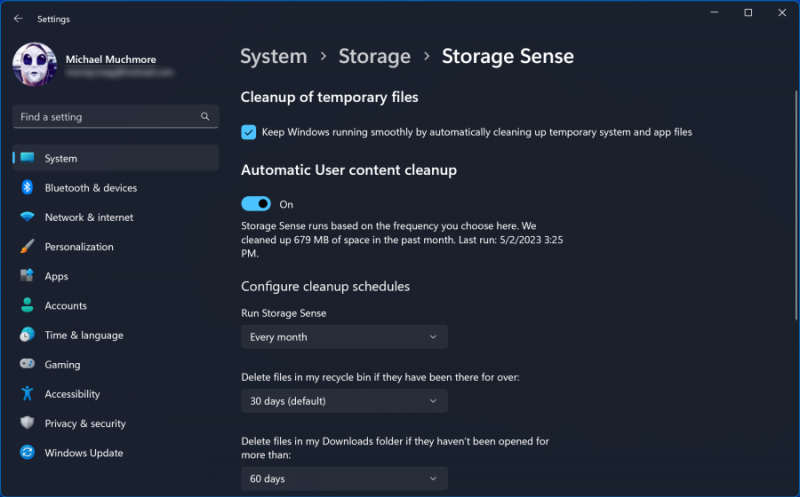
A more contemporary approach to managing storage consumption involves activating the Storage Sense option (refer to the accompanying image). This feature, an innovation in storage management, autonomously liberates space by purging temporary files and items in the Recycle Bin.
For a comprehensive guide on leveraging this functionality, consult our article on "How to Free Up Hard Disk Space on Windows." This streamlined process ensures efficient storage utilization while contributing to the overall performance of your Windows system.
Credit: Microsoft -
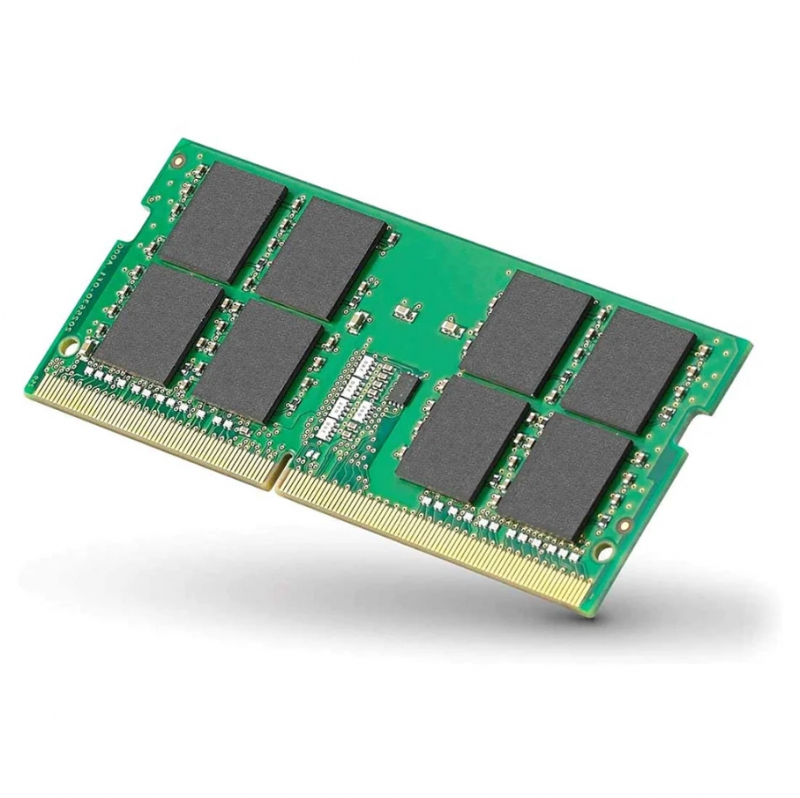
Windows 10 and 11 exhibit enhanced memory management compared to their predecessors, optimizing overall system performance. Nevertheless, augmenting your system's memory capacity can potentially accelerate PC operations. If you're utilizing a traditional desktop tower, this guide can assist you in selecting the appropriate RAM type for your system.
Prominent RAM manufacturers like Crucial, Kingston, and Corsair provide user-friendly product finders on their websites, facilitating the identification of the compatible RAM type for your PC. Remarkably, 16GB of DDR4 RAM can be acquired for under $50, offering an affordable performance boost.
For users on a tighter budget or operating older computers with hard drives instead of SSDs and limited RAM, ReadyBoost with a USB stick can be a viable solution. This feature caches data on the portable storage device, expediting memory access, which is particularly beneficial for systems with slower-spinning hard drives.
To implement ReadyBoost, access the USB key's File Explorer entry, right-click to open Properties, and navigate to the ReadyBoost tab. However, this feature may not be available for contemporary systems and may not yield a significant performance enhancement.
While adding more RAM is an effective strategy for many, it's not universally applicable. Certain Windows devices, like Surface Pro tablets, may not support RAM upgrades. Although gaming and business laptops often permit RAM upgrades, this trend is diminishing.
Modern ultrabooks and convertibles typically feature non-expandable, fixed memory configurations, reflecting a shift in design priorities towards slimmer form factors. Stay informed about the specific capabilities of your device to determine the feasibility of RAM upgrades for optimal performance.
Credit: Kingston 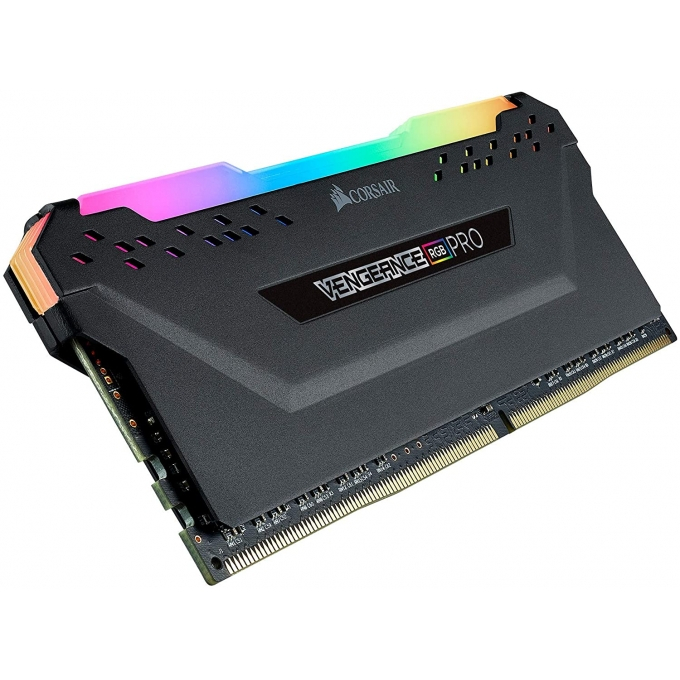
Credit: Corsair -
Accelerating the installation and execution of resource-intensive applications like Adobe Photoshop becomes significantly swifter when employing a Solid State Drive (SSD).
The advantages extend to enhancing the startup performance of Windows as well. Facilitating this process is the ability to effortlessly transfer Microsoft Store apps from a traditional spinning hard drive to an SSD via the Apps and Features page within the Settings menu.
To optimize overall system speed, a logical approach involves upgrading your internal startup drive, especially feasible for laptop users. However, considering the versatility of technology, an external SSD equipped with a USB 3.0 connection can also deliver a notable speed boost, particularly in applications with substantial storage requirements.
If you need guidance in selecting the most suitable SSD for your needs, refer to PCMag's curated list of the best SSDs. Investing in an SSD presents a multifaceted solution for users seeking to enhance the performance of their systems, whether through internal upgrades or external peripheral options.
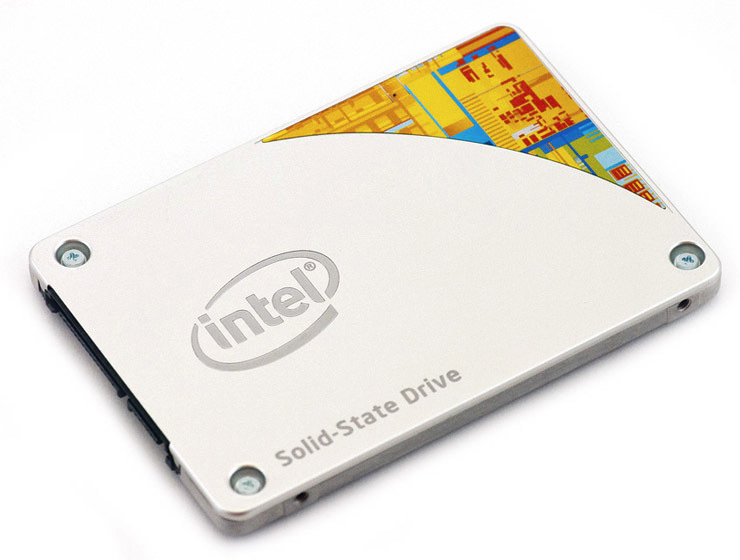
Credit: Intel -
For inspecting your system for viruses and spyware, you have the option of utilizing the integrated Windows Defender or a third-party application. However, the most prudent choice is to employ one of the top-rated malware removal programs meticulously assessed by PCMag's principal security analyst, Neil Rubenking.
It's imperative to complement this with continuous antivirus protection, bearing in mind that certain products exhibit a more minimal impact on system performance. For an exhaustive exploration of the optimal antivirus software, refer to our comprehensive compilation.
If you prefer not to invest in anti-malware software, consider the no-cost option of MalwareBytes Free, as depicted above, or simply rely on the free Microsoft Defender malware scanner bundled with Windows. Stay proactive in safeguarding your system against malicious threats with these informed choices.
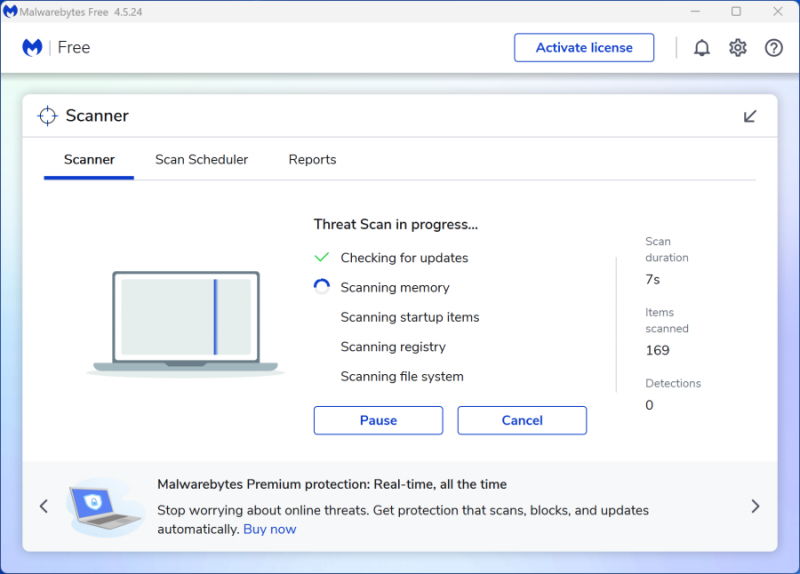
Screenshot via 
Screenshot via https://www.malwarebytes.com/ -
Adjusting the power settings, albeit with increased energy consumption, can enhance your computer's processing speed. Navigate to the Settings app and access System > Power & Sleep; then, click on the Additional Power Settings link. Expand the dropdown menu on the right to reveal Additional Plans in the ensuing window and opt for High Performance.
- For Windows 11 users, the process involves selecting Better Performance or Best Performance under Settings > System > Power & Battery, as illustrated in the accompanying screenshot.
- Unlike Windows 10, navigating through Show Additional Plans in Windows 11 is unnecessary. Notably, Windows 11 has recently incorporated features in this panel aligning with environmental sustainability efforts, introducing energy-saving recommendations.
A straightforward power optimization technique involves connecting your laptop to a power source rather than relying on battery mode, provided you are in proximity to an outlet.
This action typically intensifies CPU activity and activates other power-intensive yet performance-boosting features. Implementing these power adjustments caters to improved performance and energy efficiency, offering users a balanced approach to optimizing their computing experience.
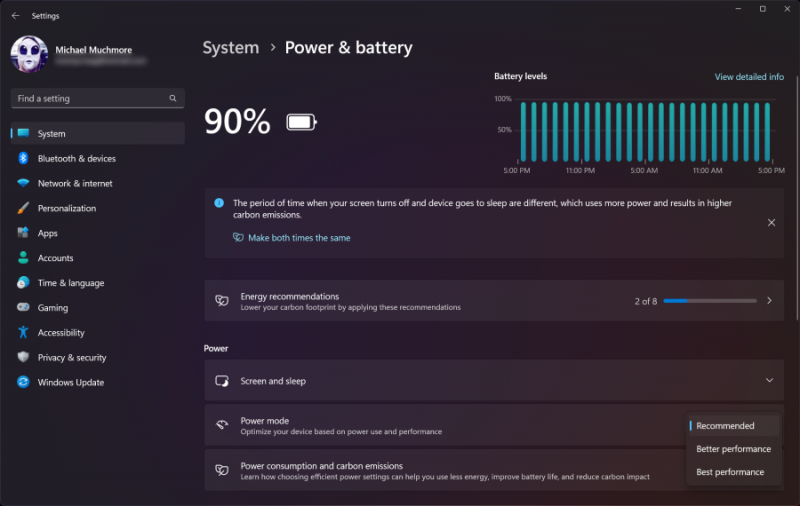
Credit: Microsoft -
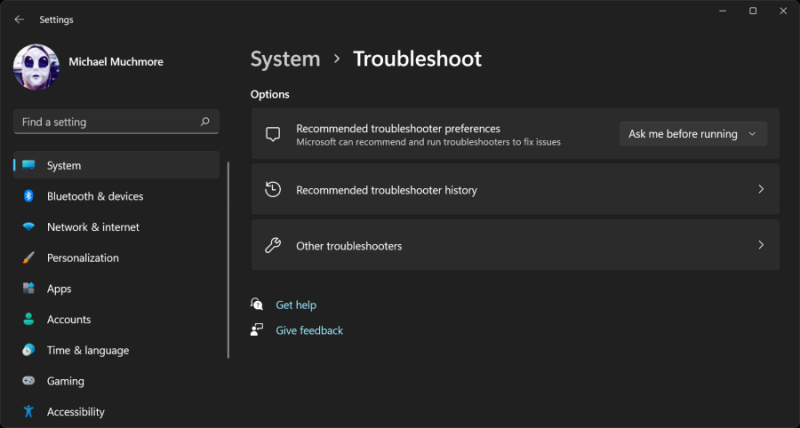
Initiate the troubleshooting process by clicking the Start button and searching for "troubleshoot." Windows conveniently suggests troubleshooting utilities, providing the flexibility to execute them automatically or manually.
Consider running additional troubleshooters such as Hardware and Devices, Windows Store Apps, and Search and Indexing as an extra precaution. If your PC is considerably aged and sluggish, it might be advisable to deactivate Search Indexing entirely for optimal performance, as suggested in tip 11.
- Access the traditional Control Panel by clicking the Start button and typing "Control Panel."
- On either OS version, navigate to the System > Security > Security and Maintenance page (or simply type "maintenance" in the Start menu search box).
- Click on Maintenance and initiate the process by selecting "Start Maintenance."
- This operation typically runs automatically on a daily schedule, and you can adjust the timing to suit your preferences better.
If your PC remains persistently sluggish, consider utilizing the Fresh Start option within the Windows Security app. Remember that opting for this approach may result in removing some installed programs, although your personal files will remain unaffected.
This multifaceted troubleshooting approach ensures a comprehensive examination and potential resolution of performance issues on your Windows system.
Credit: Microsoft -
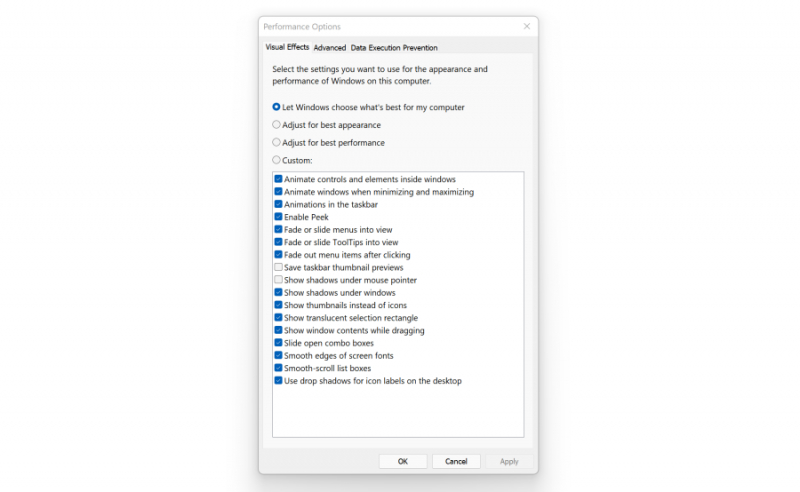
Optimizing the appearance settings in the performance options can potentially enhance the speed of an aging PC. Accessing this setting is straightforward in Windows 10 and 11; simply type "adjust appearance" in the Start menu's search box.
Within the ensuing dialog, utilize the radio button at the top labeled "Adjust for best performance," or individually select which visual features you can forego from the extensive list of checkboxes below these options. Opting for the overall best-performance button results in the elimination of all visual effects, such as the ability to see window contents while dragging to move.
However, a more balanced approach is retaining the effects contributing to your visual preferences. This tool can also be accessed through the Settings app by searching for "maintenance" or "performance." Enhancing your PC's performance through tailored appearance adjustments ensures a smoother user experience without compromising on visual aesthetics.
Credit: Microsoft -
Especially for less powerful PCs, the search indexing process can temporarily consume significant system resources, potentially impacting performance. This may be inconvenient for users who frequently conduct searches, as it can lead to slower search results.
To disable indexing, access the Indexing Options Control Panel window (or type "index" in the Start button search box). Click on Modify and uncheck the locations you prefer not to be indexed. You may need to expand the folders under your user folder to make informed choices. Opting for the Advanced option allows you to specify which file types should or shouldn't be included in the indexing process.
Alternatively, if you wish to enable search indexing but encounter occasional slowdowns, you can temporarily halt the process to boost system speed.
- Right-click on This PC on the desktop (or type "Computer" in the Search box) and choose Manage.
- Navigate to Services and Applications, then select Services.
- Locate Windows Search, and double-click on it.
- In the Properties dialog, you can set the Startup type to Manual or Disabled, ensuring a silent default process.
- The Automatic (Delayed Start) option is recommended by Microsoft Help for minimizing the impact on overall boot performance.
As a final option, in the right-hand panel,
- Click More options, and then choose Stop.
- Alternatively, you can use the stop button above the center section.
Remember to re-enable the process at some point if you intend to resume system searches. Customizing search indexing options allows users to manage system resources and optimize performance based on individual preferences.
Credit: Microsoft -
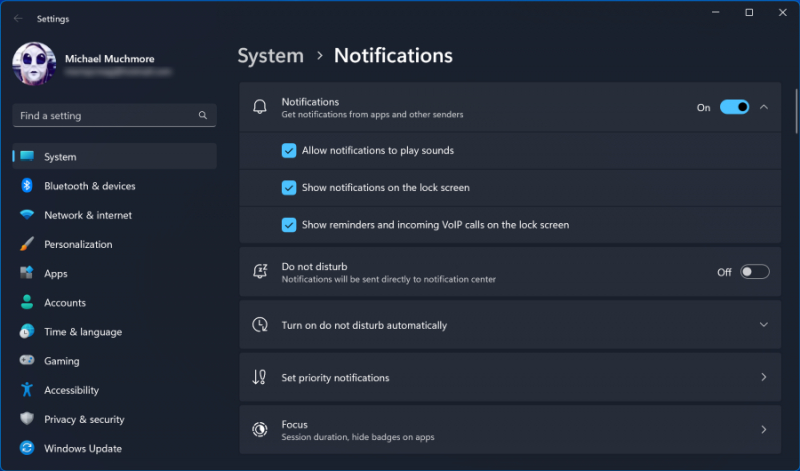
While it may seem counterintuitive for a tips article to recommend turning off Windows' Tips feature, doing so can actually reduce the processing load involved in displaying relevant tips for your system. This principle applies similarly to Notifications; streamlining unnecessary notifications can provide a smoother computing experience. I have over 40 apps capable of sending notifications.
To adjust notification settings, navigate to the Notifications page within the Settings app. You can globally disable all notifications with a simple switch at the top. Additionally, you'll find a list of individual apps that can send notifications; deselect those you'd prefer not to receive alerts from. If you have an abundance of these apps, reviewing the list will likely reveal sources from which notifications are unnecessary.
Beyond the tangible performance boost, minimizing distractions can enhance your perception of computing speed. Use the Do Not Disturb button at the top of the Notification right-hand sidebar for a quick pause in notifications. This method also simplifies re-enabling notifications when needed later on.

Screenshot via -
Windows 10 and Windows 11 are equipped with Game Mode, designed to enhance performance during PC gaming sessions. This feature actively restricts background tasks, temporarily halts notifications, inhibits OS updates while gaming, and, as per Microsoft documentation, contributes to achieving a more stable frame rate tailored to the specific game and system.
Game Mode is automatically enabled for recognized games. However, it's worth noting that performance outcomes, as demonstrated by various tests across the web, can differ based on the game and hardware configuration. For optimal results, consider experimenting with toggling Game Mode on or off to determine which setting delivers superior performance for your specific gaming experience.

Screenshot via


